Perimeter Trail

Name of Hike: Perimeter Trail

Trail(s): Perimeter Trail

Location: Ouray, CO

Wilderness Area: San Juan National Forest

Type of Hike: Loop

Difficulty: Moderate (strenuous if you’re not used to altitude!)

Distance/elevation: 5.8 miles, 1345 ft elevation gain

Estimated Time Commitment: Hiking times can vary for a number of reasons, but we estimate most people would be able to complete this hike in 3-4 hours.

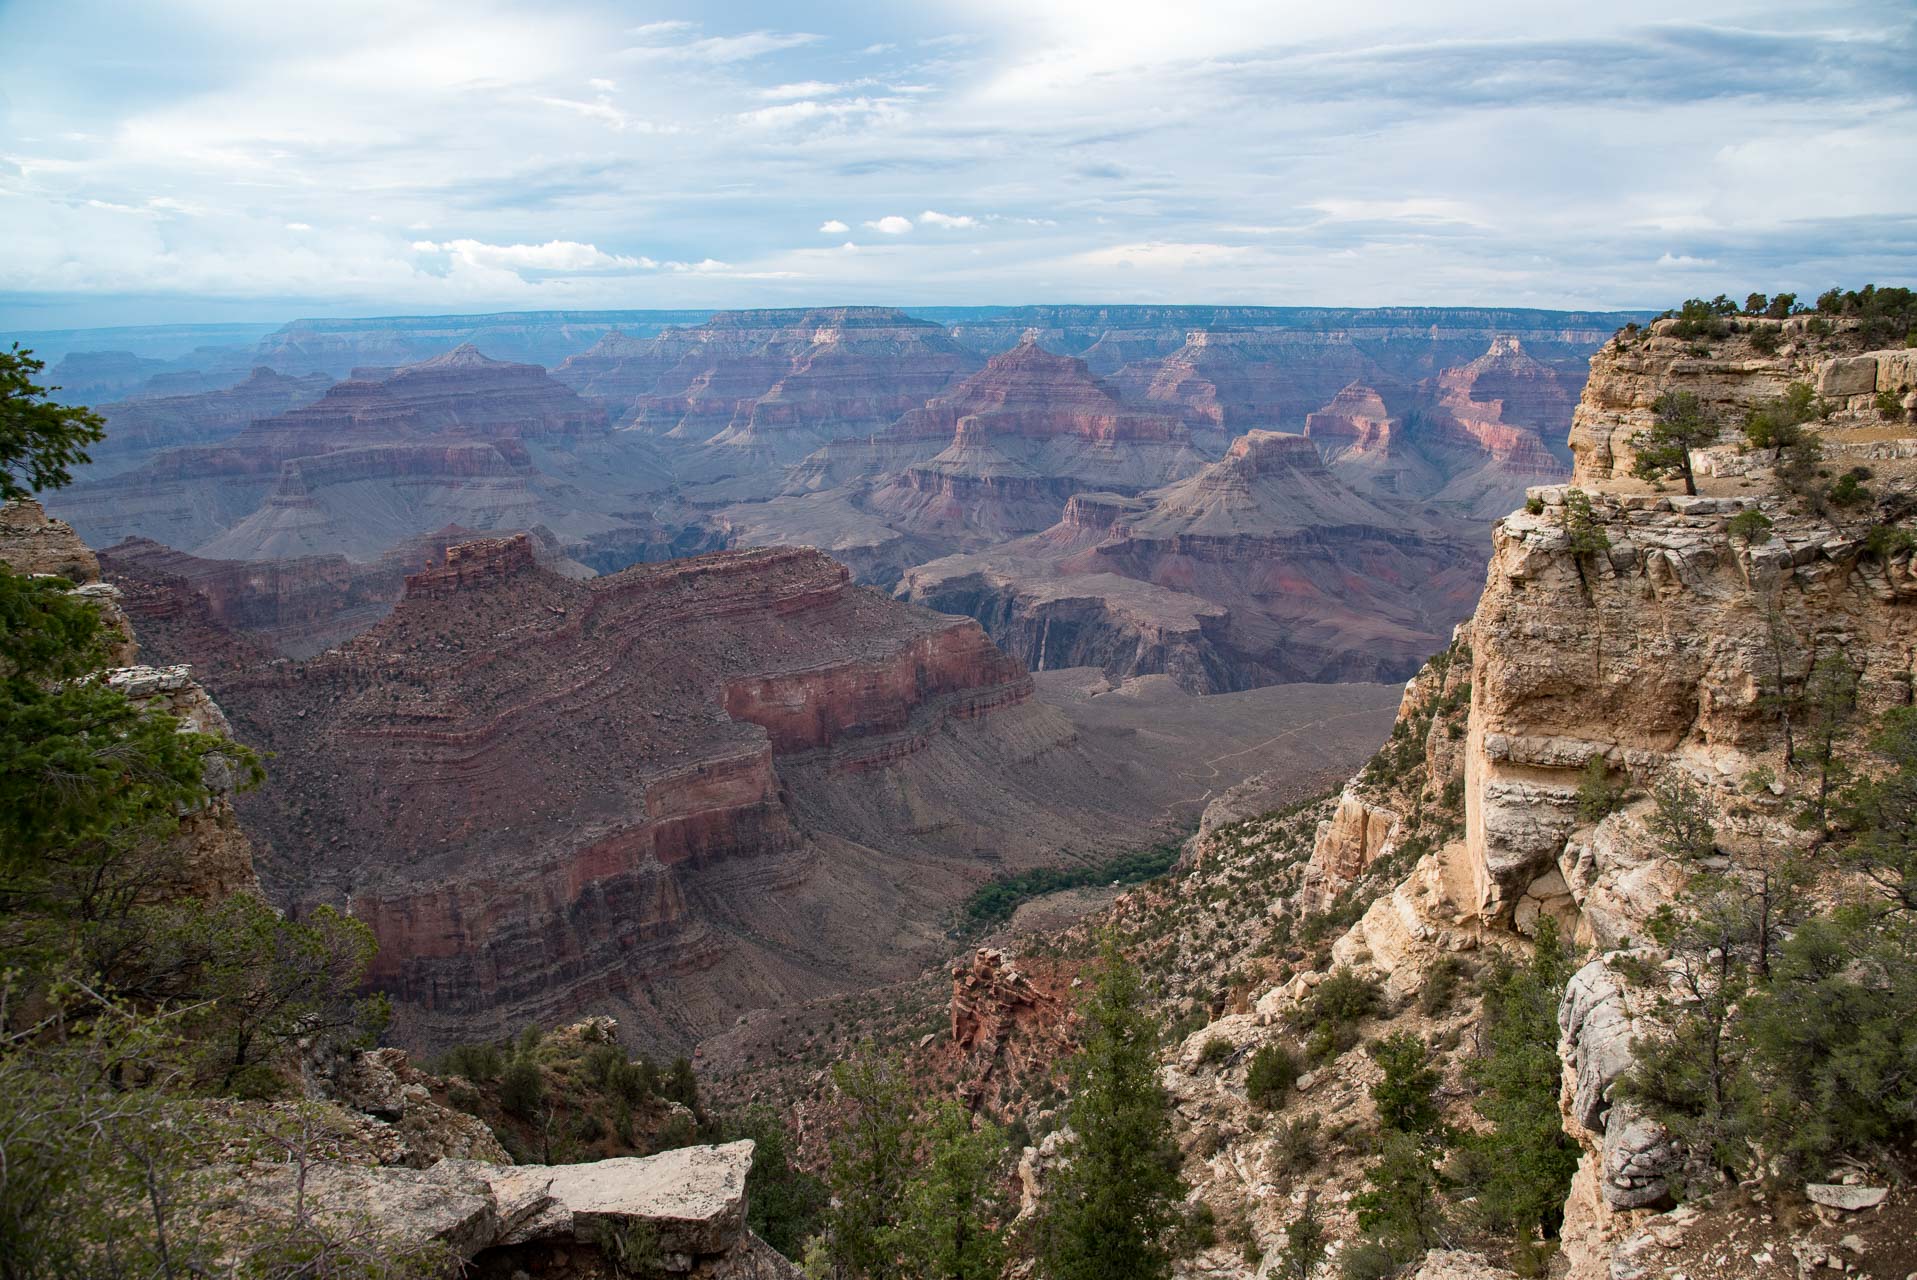
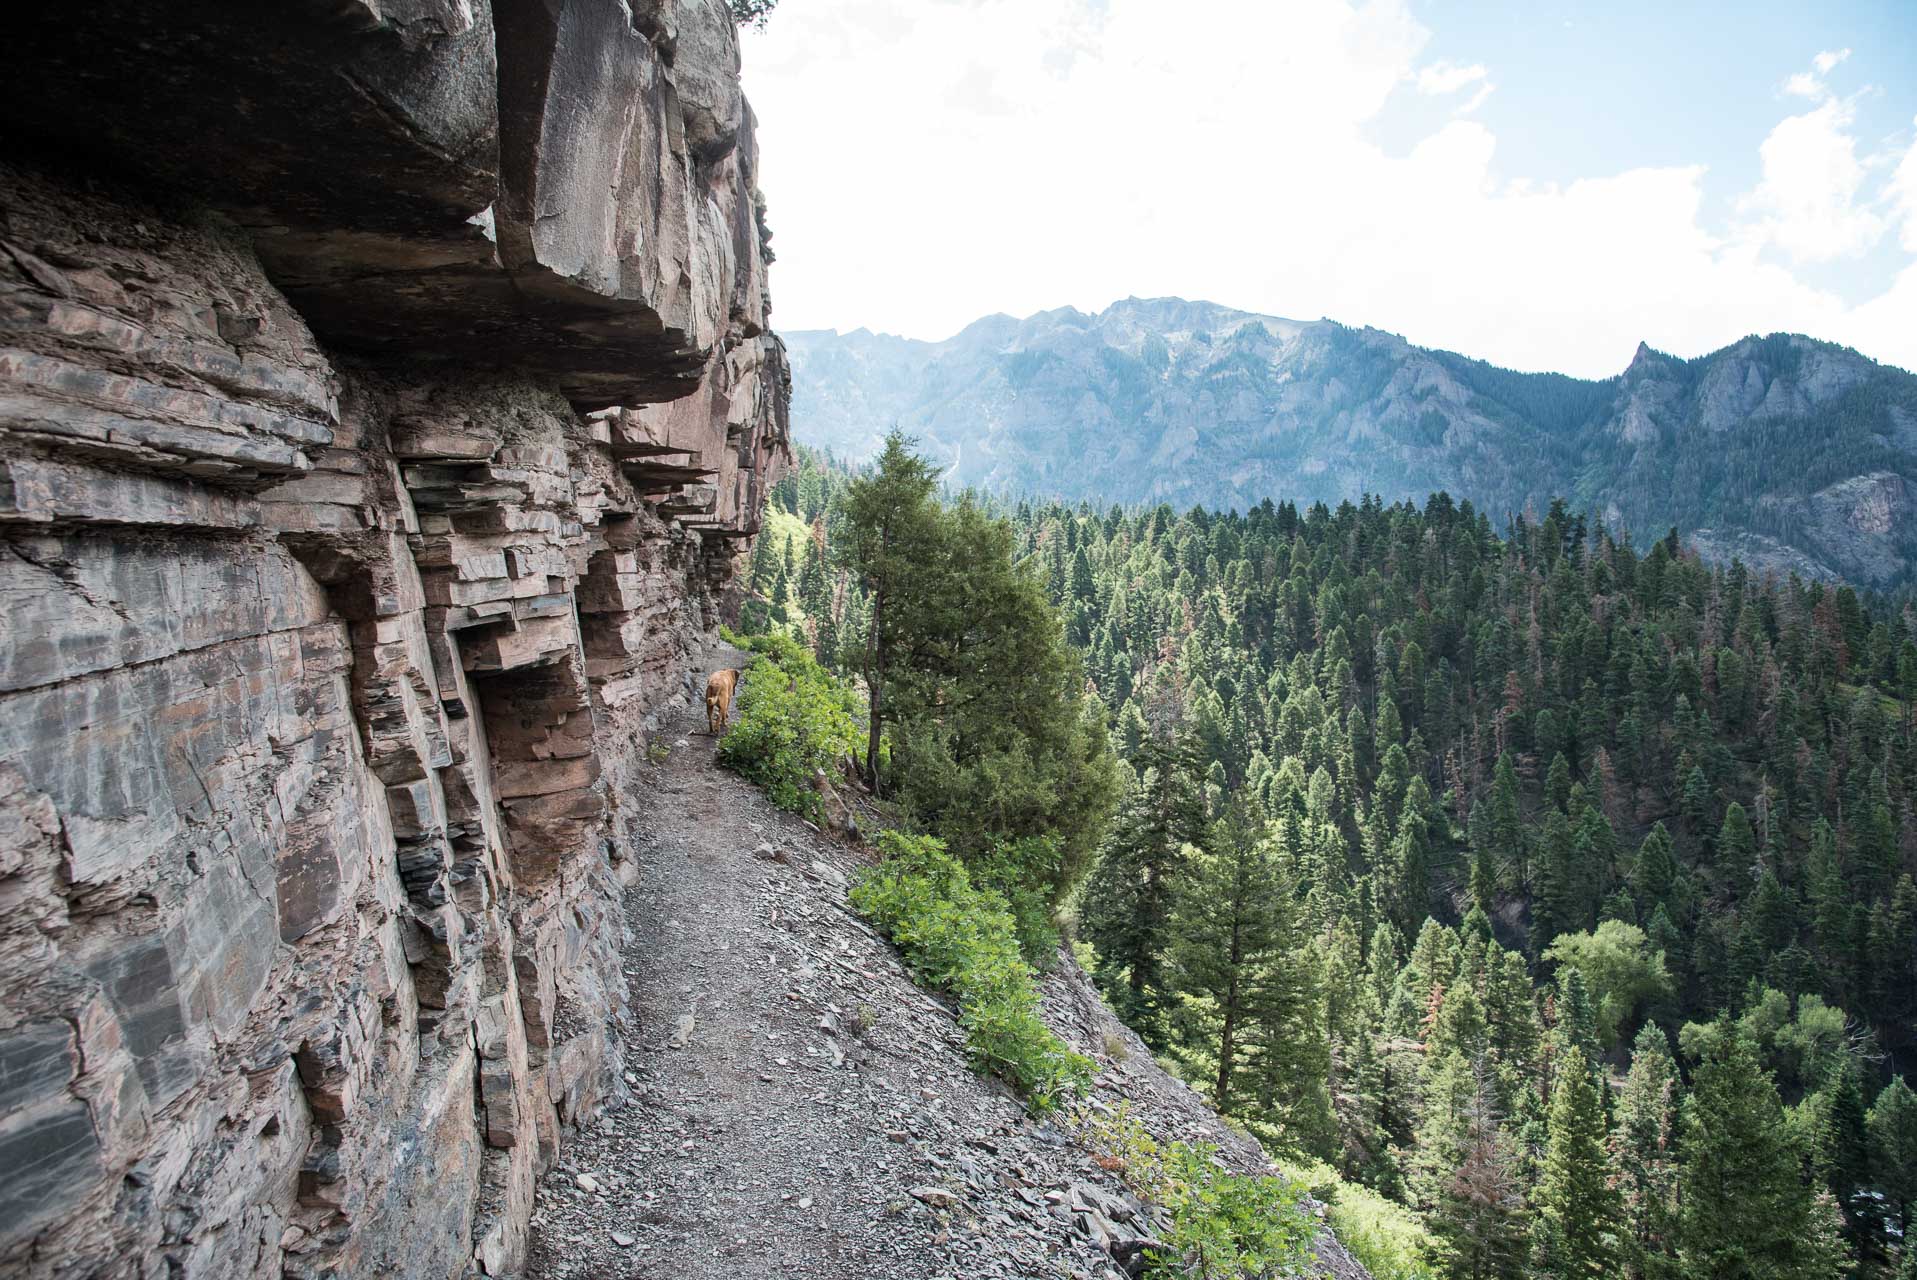
Views: Yes, there are some great views along the Perimeter Trail. There are some spots with panoramic views of the valley and overlooking the town. Additionally, you get right up to the Lower Cascade Falls and traverse Box Canyon.

Popularity: The Perimeter Trail is very popular (especially during the summer months), and you can expect to encounter many other hikers and potentially hikers with canine companions.

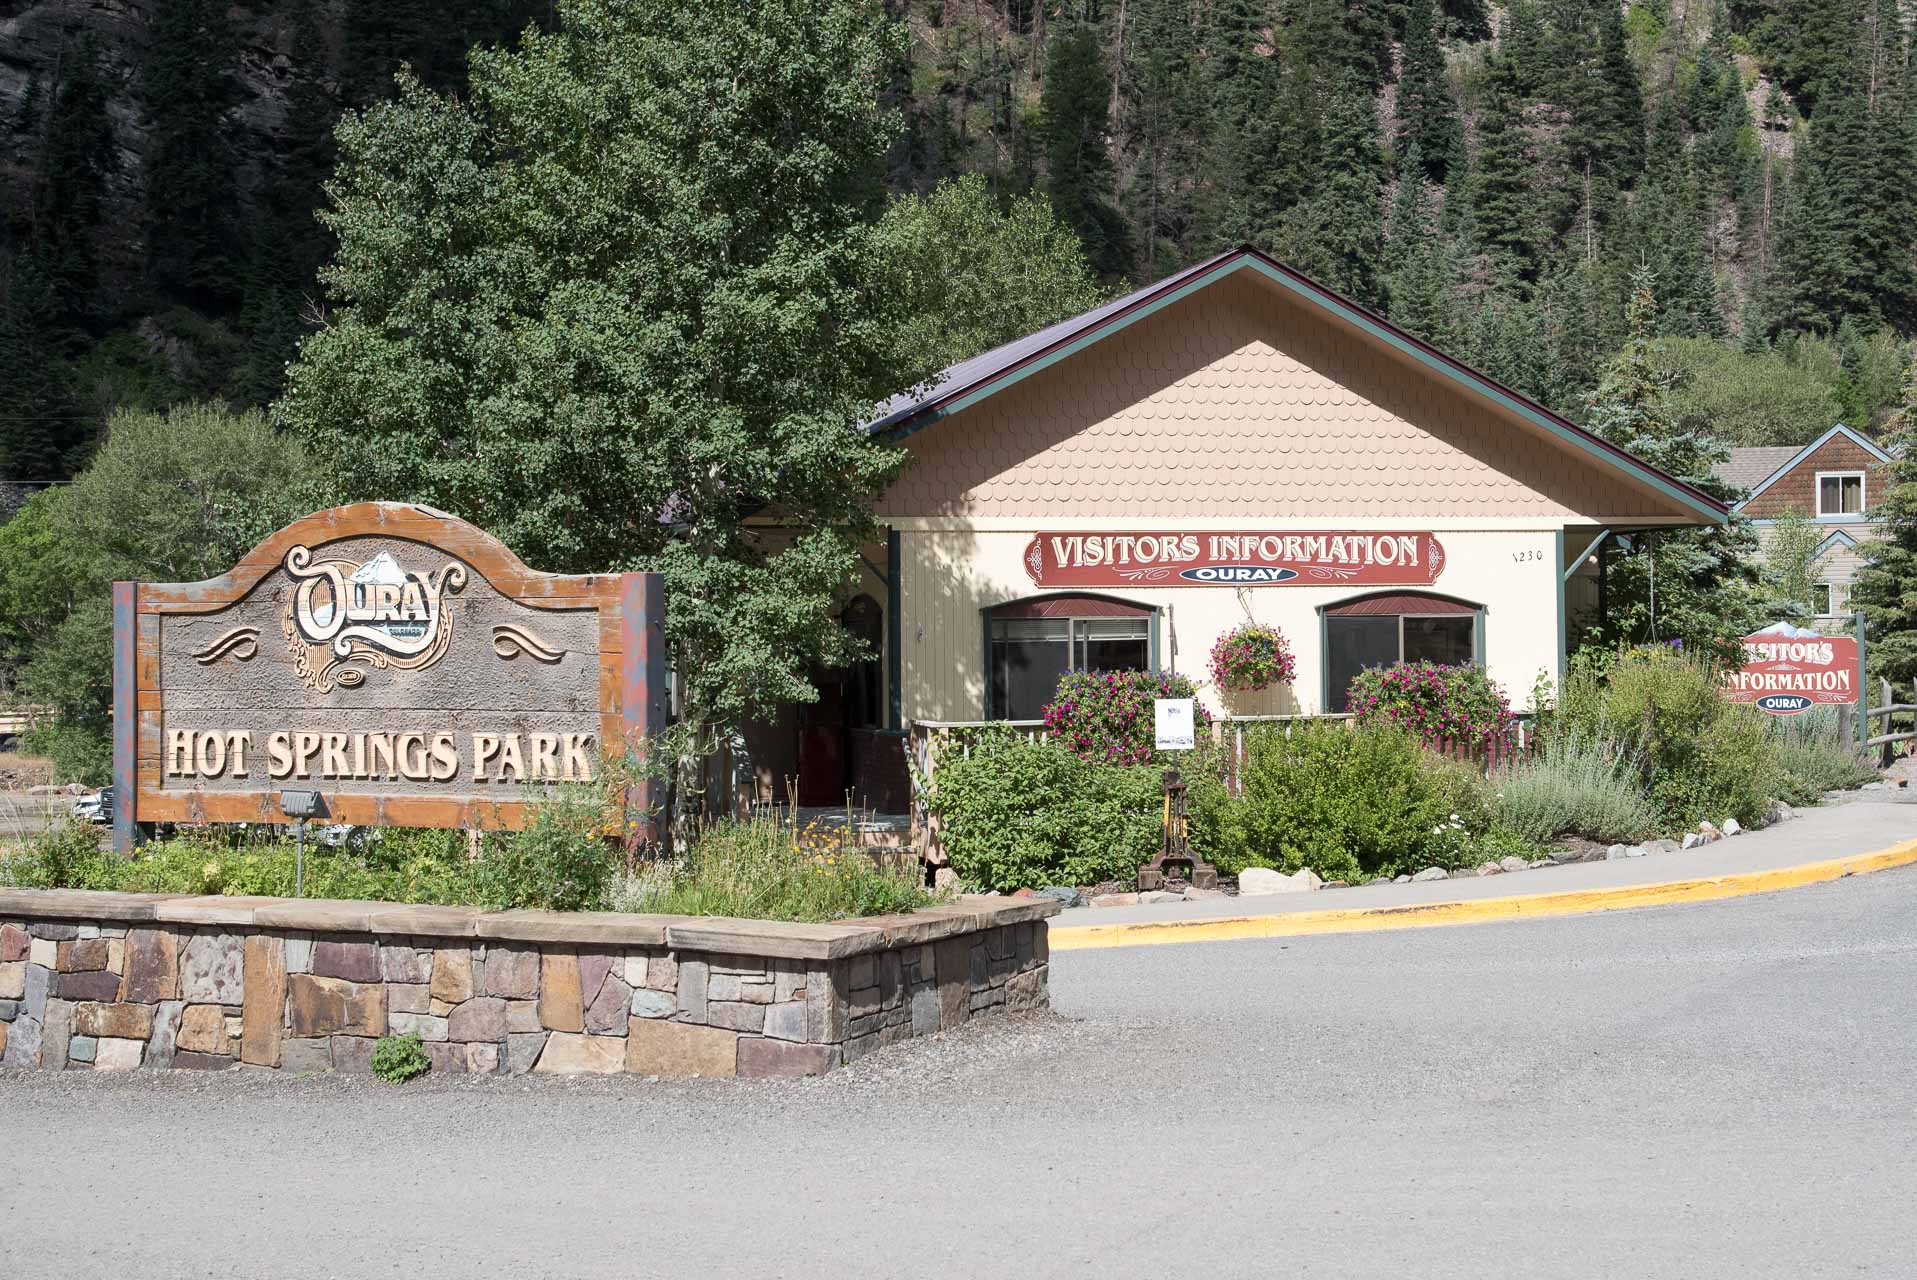
Facilities/restrooms: Yes, there are very nice public restrooms at the Ouray Visitor’s Center across the street from the most popularly used trailhead.

Directions: The Perimeter Trail is a loop trail that can be accessed from many different spots in Ouray. The most popular trailhead is across the street from the Ouray Visitor’s Center. The 550 is the main route in and out of town. If you’re coming from Ridgeway, follow the 550 South. Before you enter the downtown area you’ll see the Visitor’s Center and the Hot Springs Park on your right. If you’re coming from Silverton, take the 550 North and travel almost all the way through town. The Visitor’s Center and the Hot Springs Park will be on the left.

Parking: There is plenty of parking in the Visitor’s Center parking area. There is additional parking across the street in a smaller gravel parking area.

Vancisin_20180714_DSC_2373
Ouray Visitor’s Center.
Vancisin_20180714_DSC_2376
Ouray Hot Springs Park.

The Perimeter Trail in Ouray is located in the San Juan National Forest and is open to hikers and dogs. More detailed and up-to-date information on the San Juan National Forest available here.

The Perimeter Trail is a loop trail and can be accessed from many different points and hiked in both directions. We started the trail from the most popular trailhead across from the Visitor’s Center and hiked in a clockwise direction (also the more popular direction of travel). Be careful crossing the 550 to get from the Visitor’s Center to the trailhead. It is a busy road with fast traveling vehicles (especially during the summer months).

Vancisin_20180714_DSC_2378
Map with distances and entry points for the Perimeter Trail.

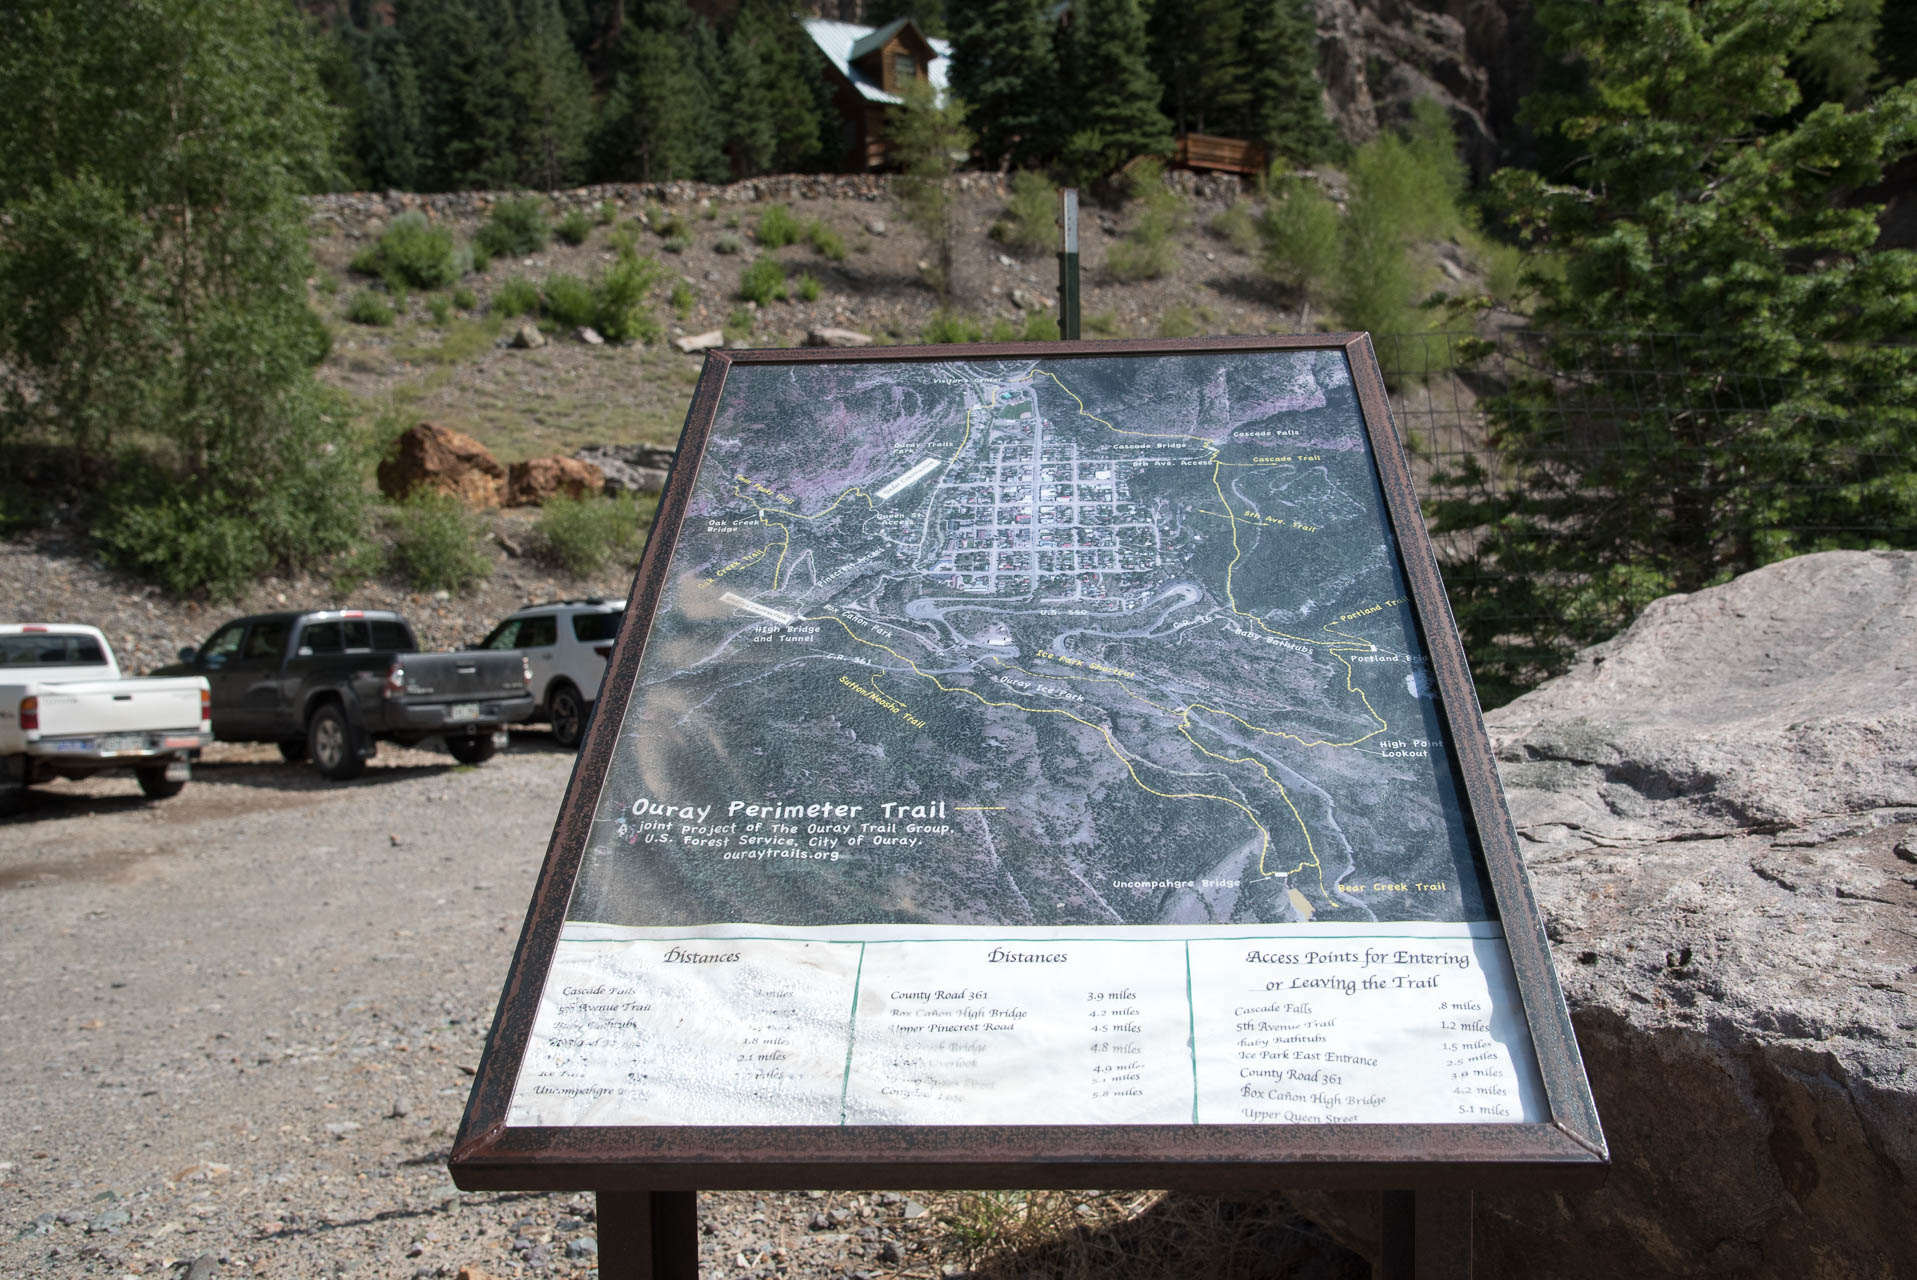
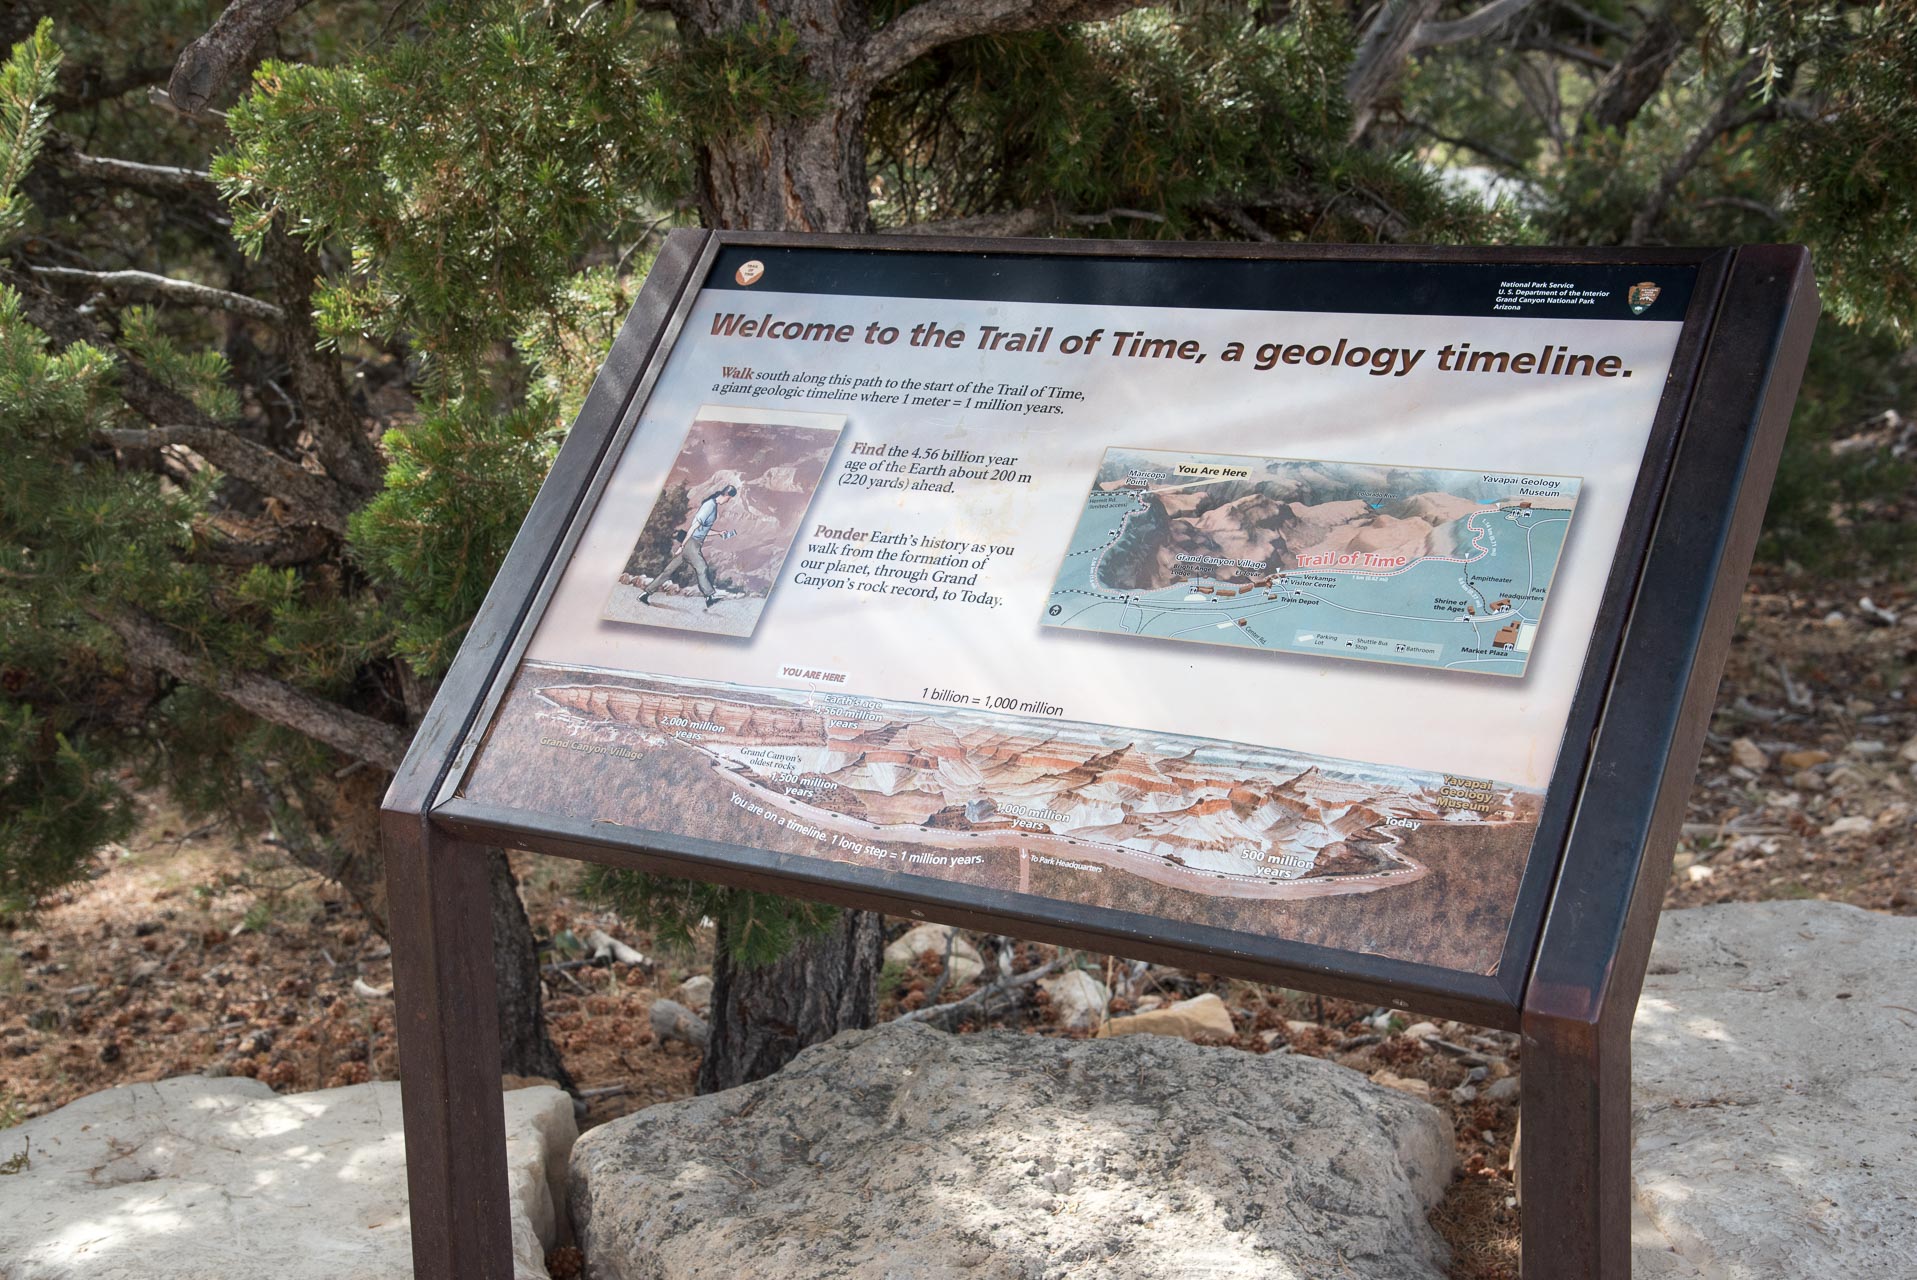
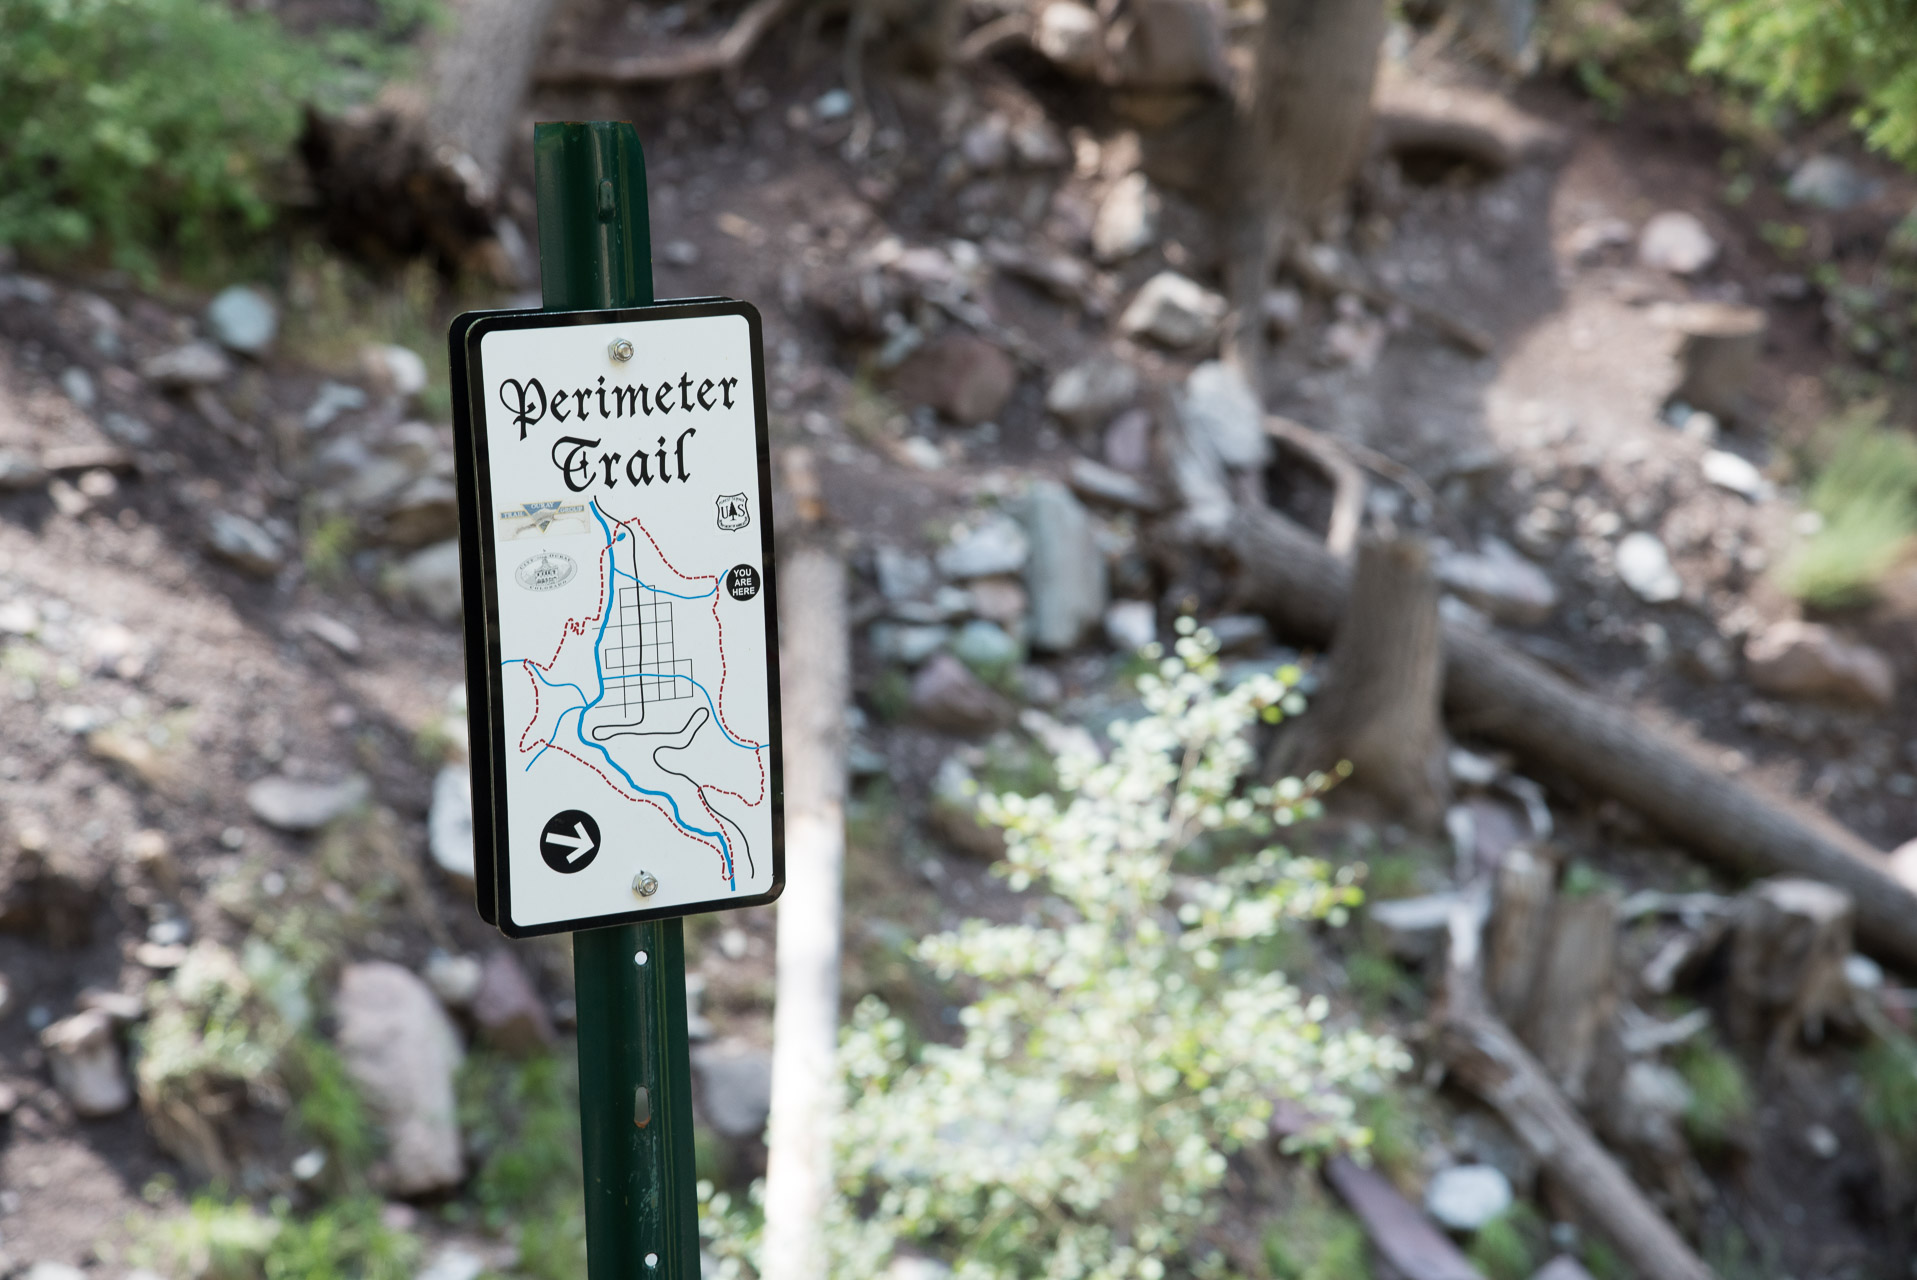
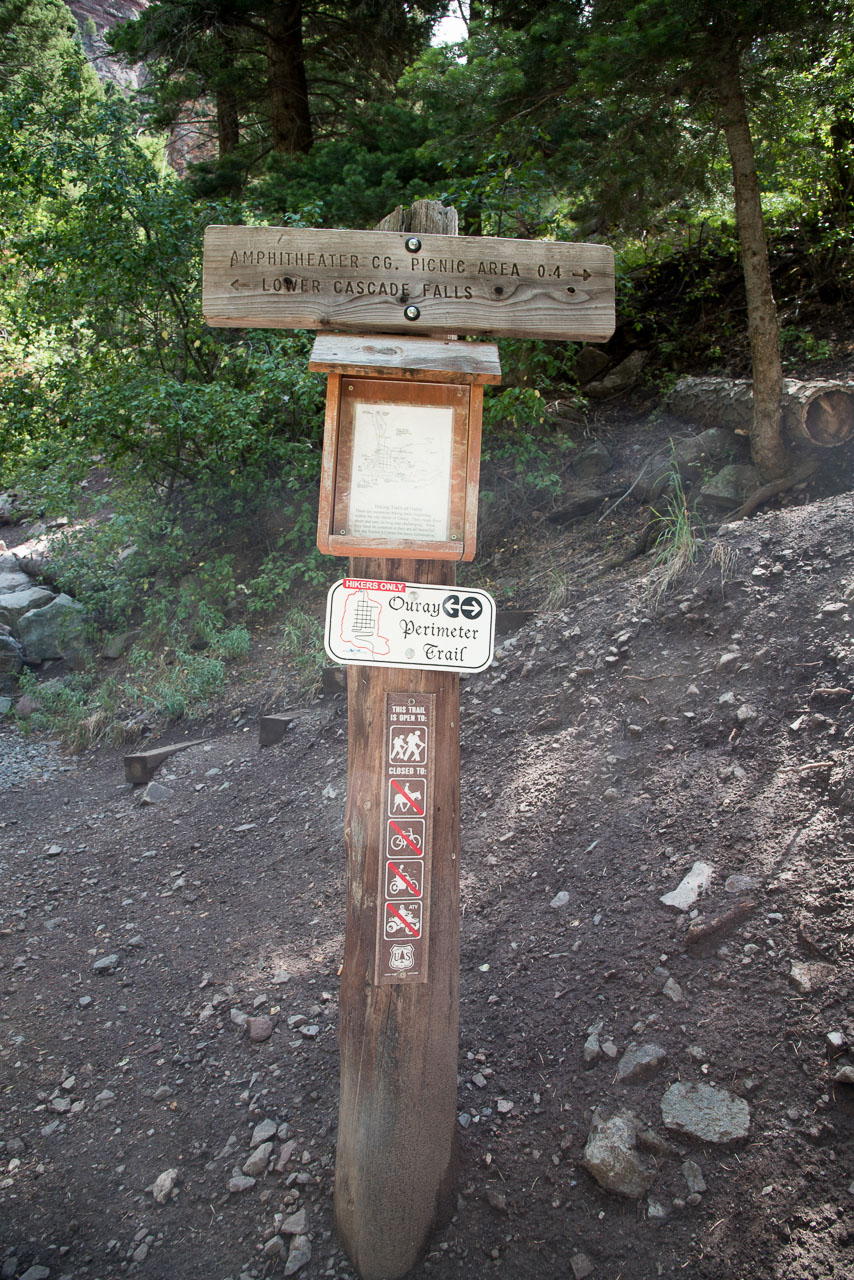
There is a sign at the Visitor’s Center trailhead with a map, distances to various places of interest along the trail and access points for entry and exit. This trail combines many of the different trails around Ouray, so we were afraid of getting confused and/or lost. However, the trail is very well marked throughout with signs indicating your exact location along the way.

Vancisin_20180714_DSC_2394
One of the very common trail markers along the Perimeter Trail.

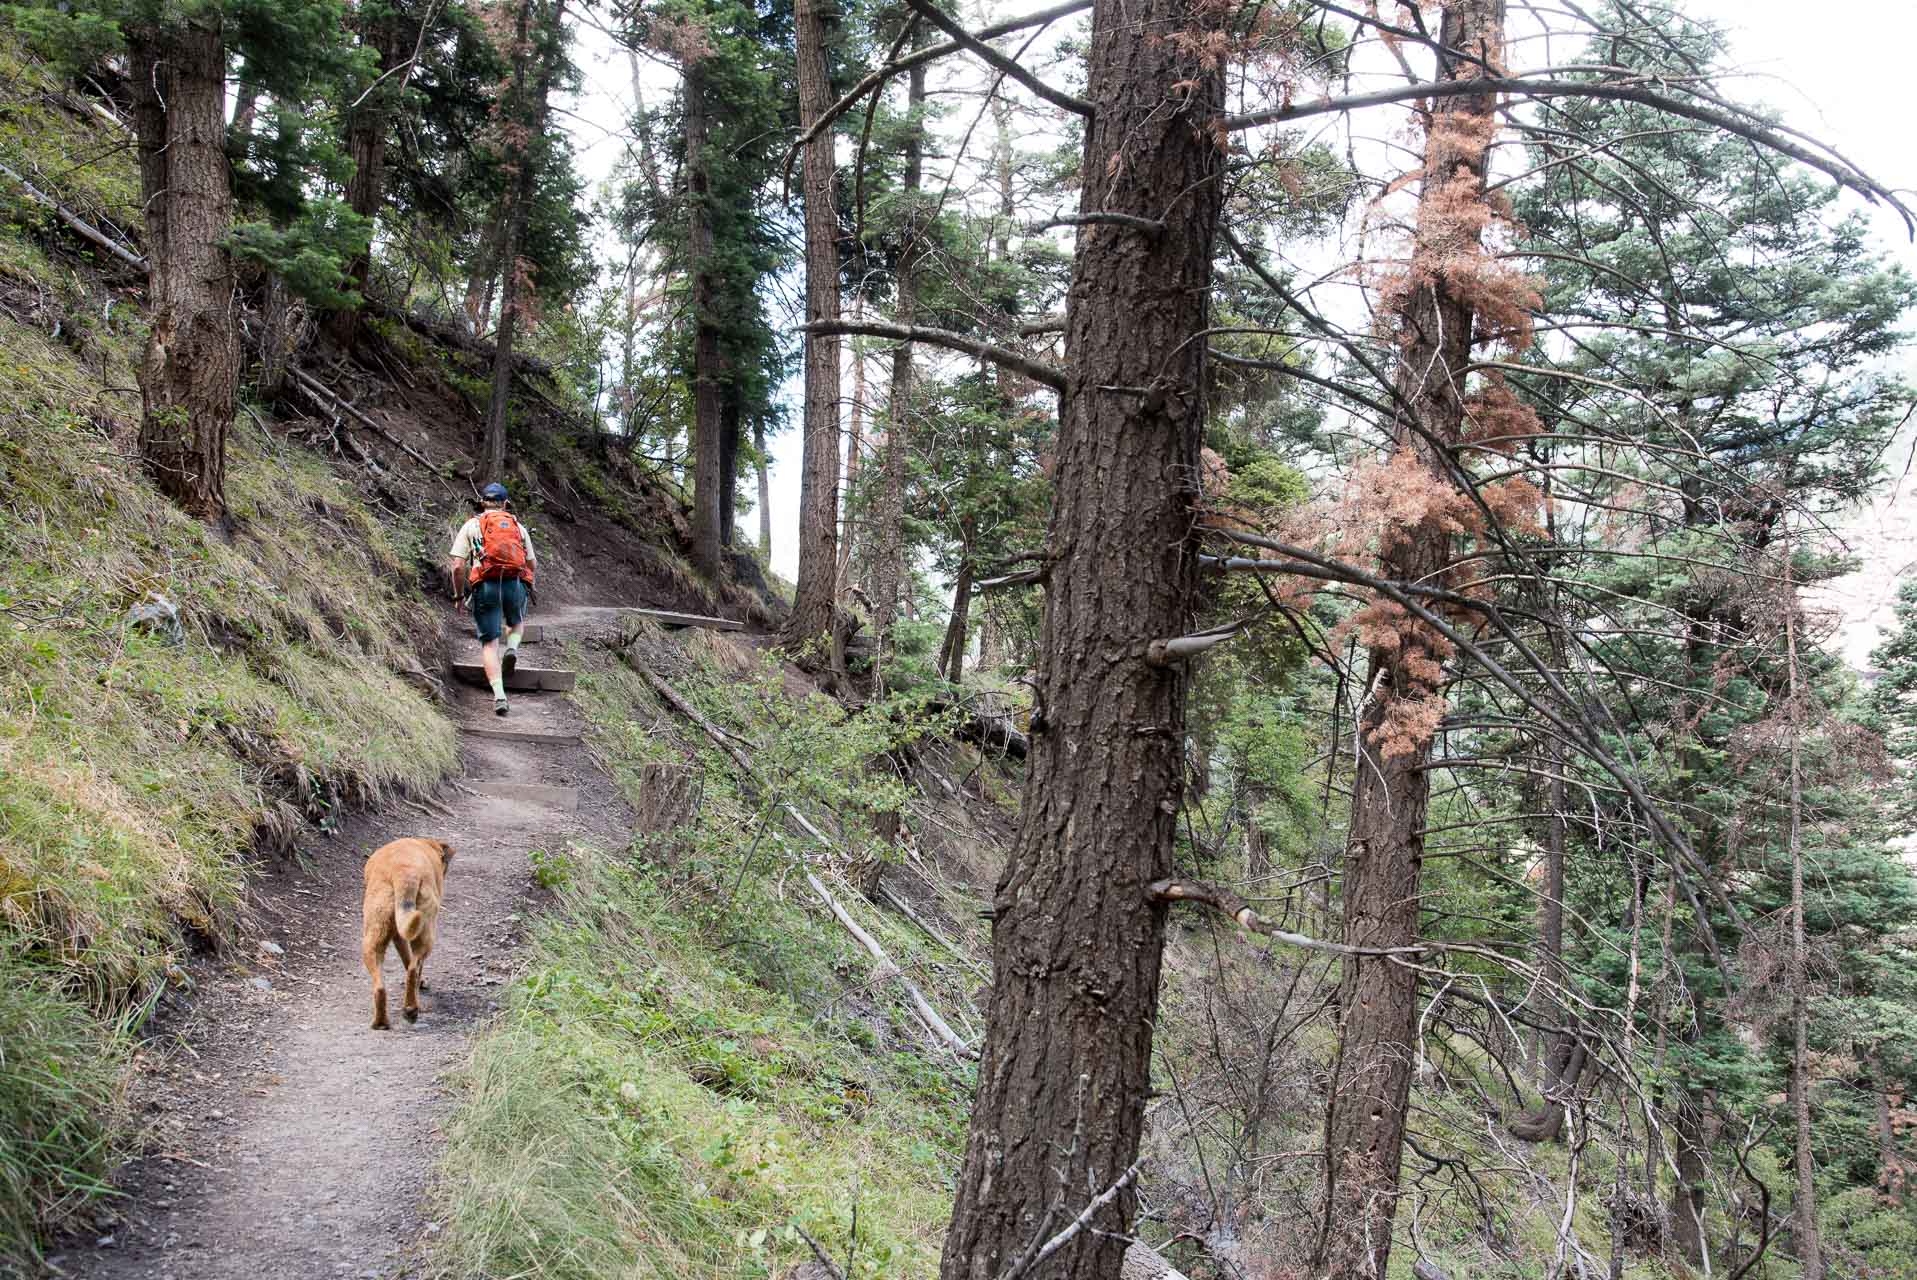
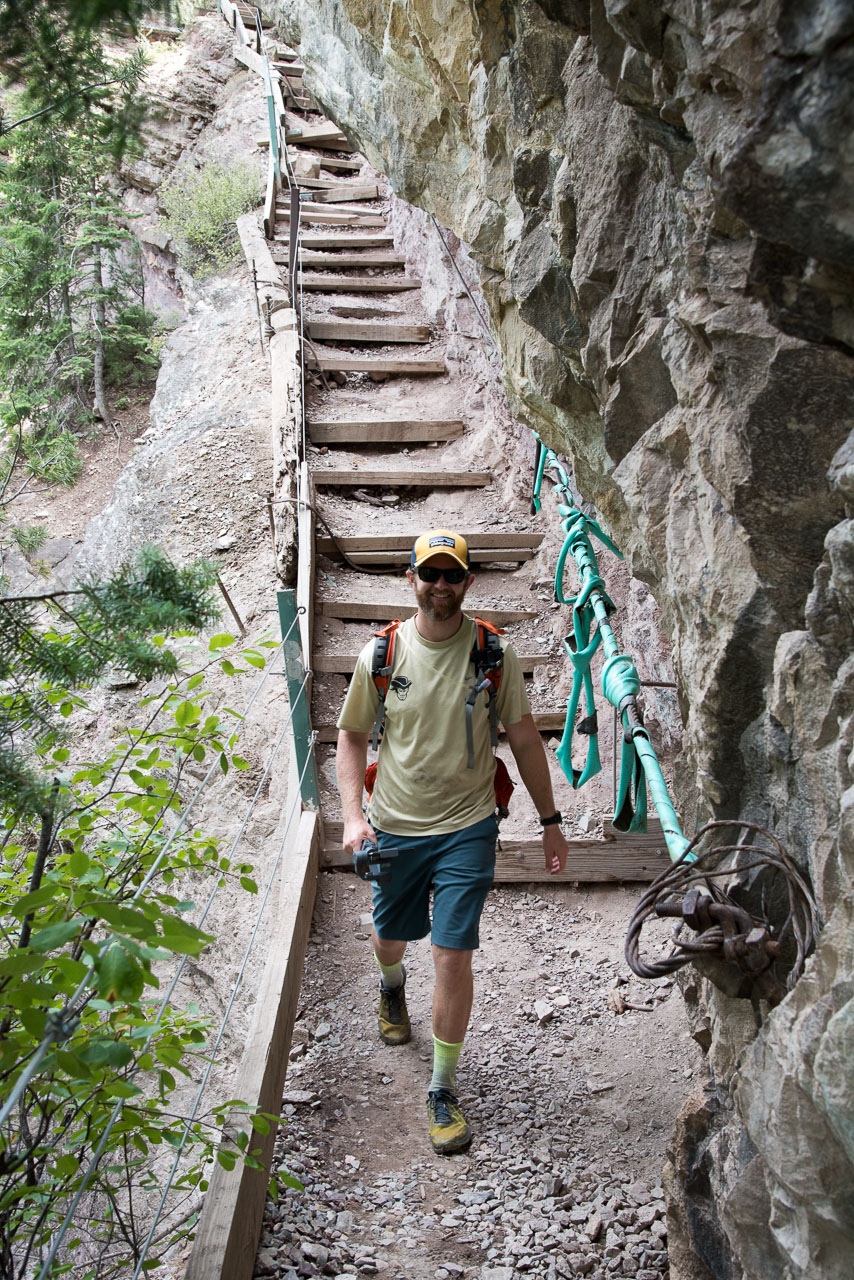
The trail starts out between a gravel parking lot and some townhome/condominium type buildings. It gains elevation pretty quickly, starting up a staircase (pictured below), with several more to follow, and proceeding to some switchbacks. It gets your heart pumping in a hurry! It also takes your breath away (for airsick lowlanders like us!).

Vancisin_20180714_DSC_2380
The staircase in the distance marks the beginning of the climb.

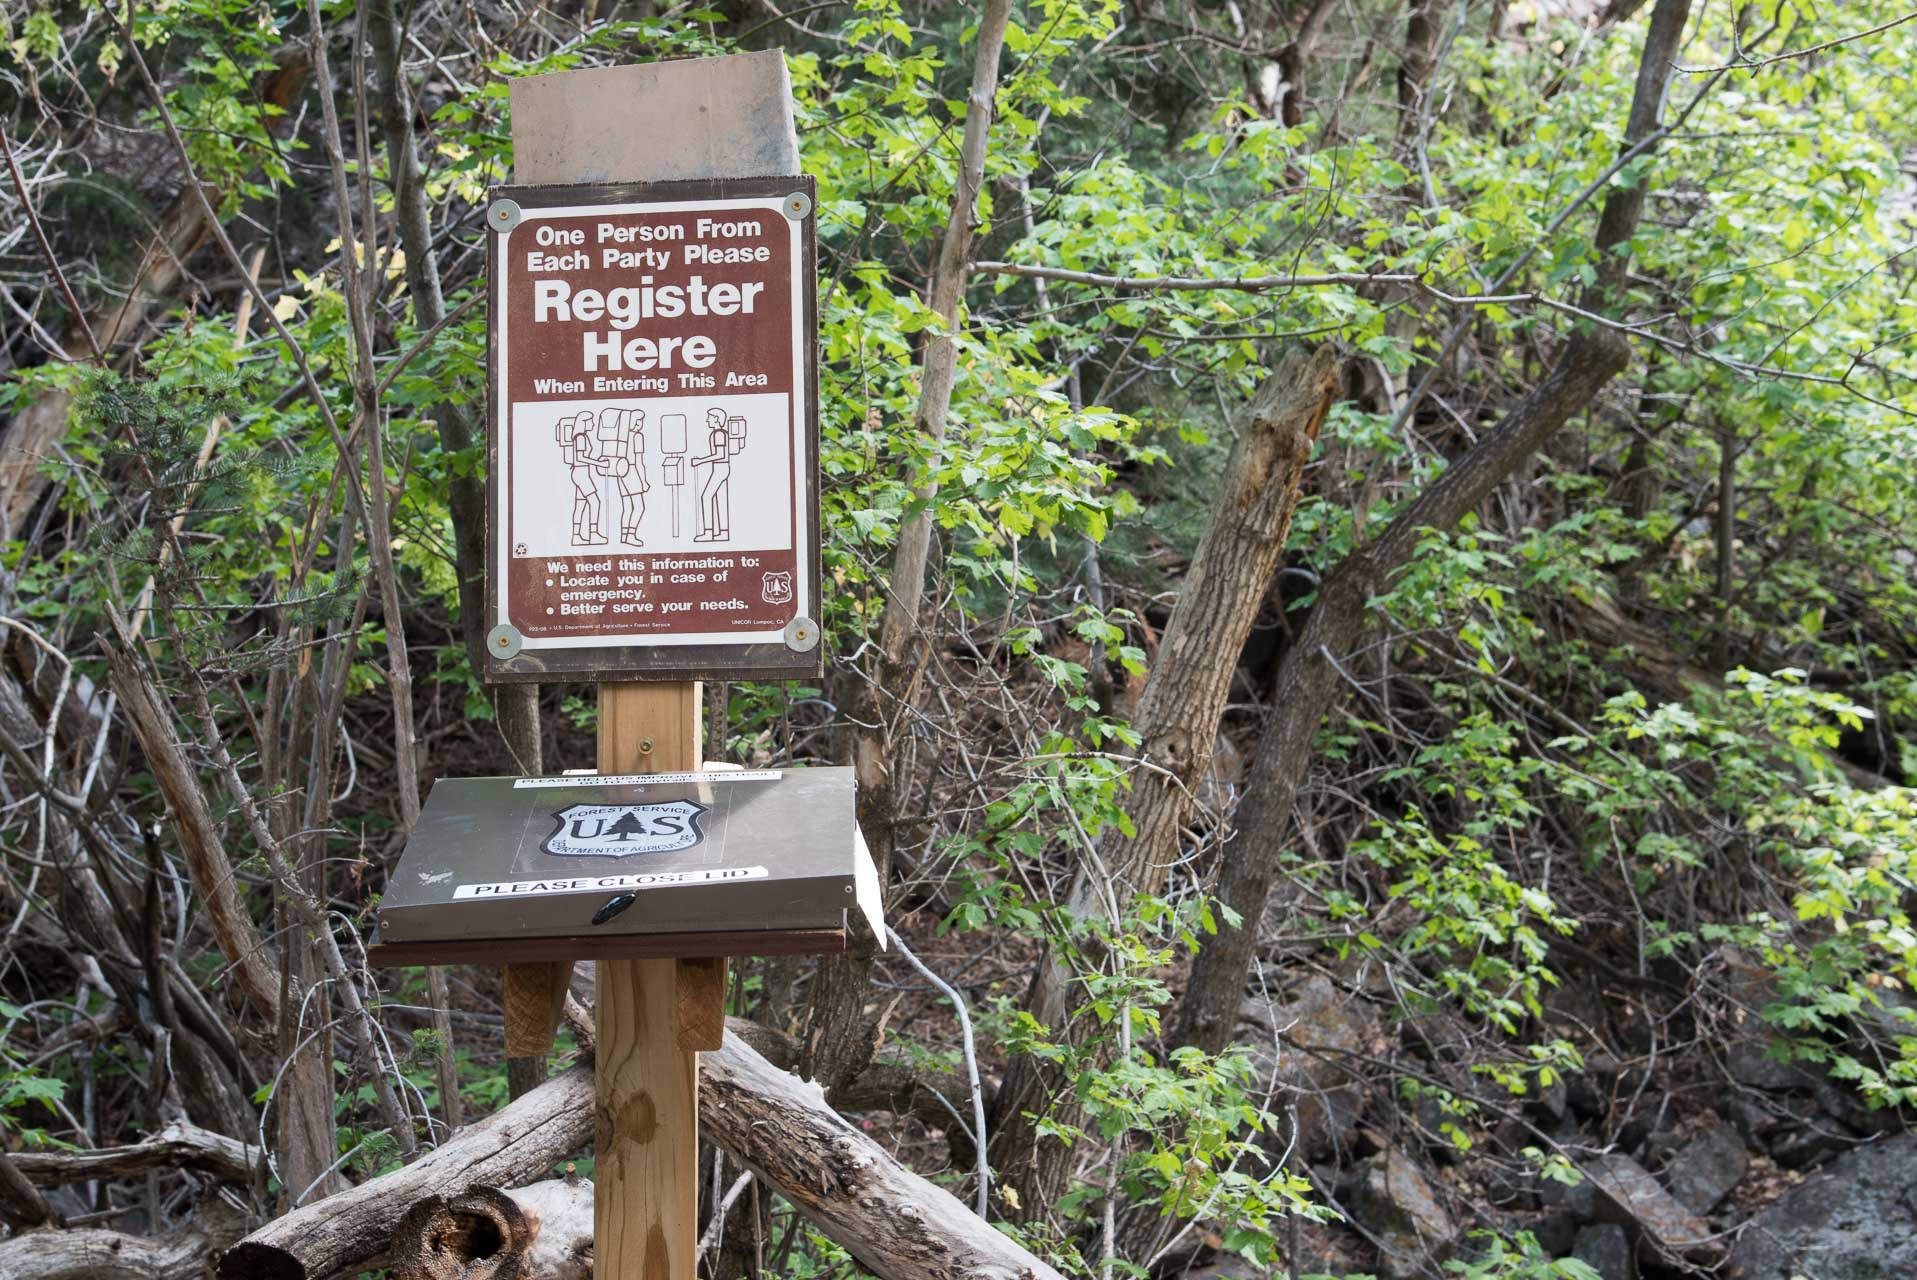
A little ways up the trail there is a spot to register your hiking group. Registering allows the Forest Service to gauge the amount of traffic on the trail. Additionally, this log provides helpful information in case a search and rescue is needed. Generally, it only asks for the names of the people in the party, zip code, date of entry/exit and hiking destination.

Vancisin_20180714_DSC_2381

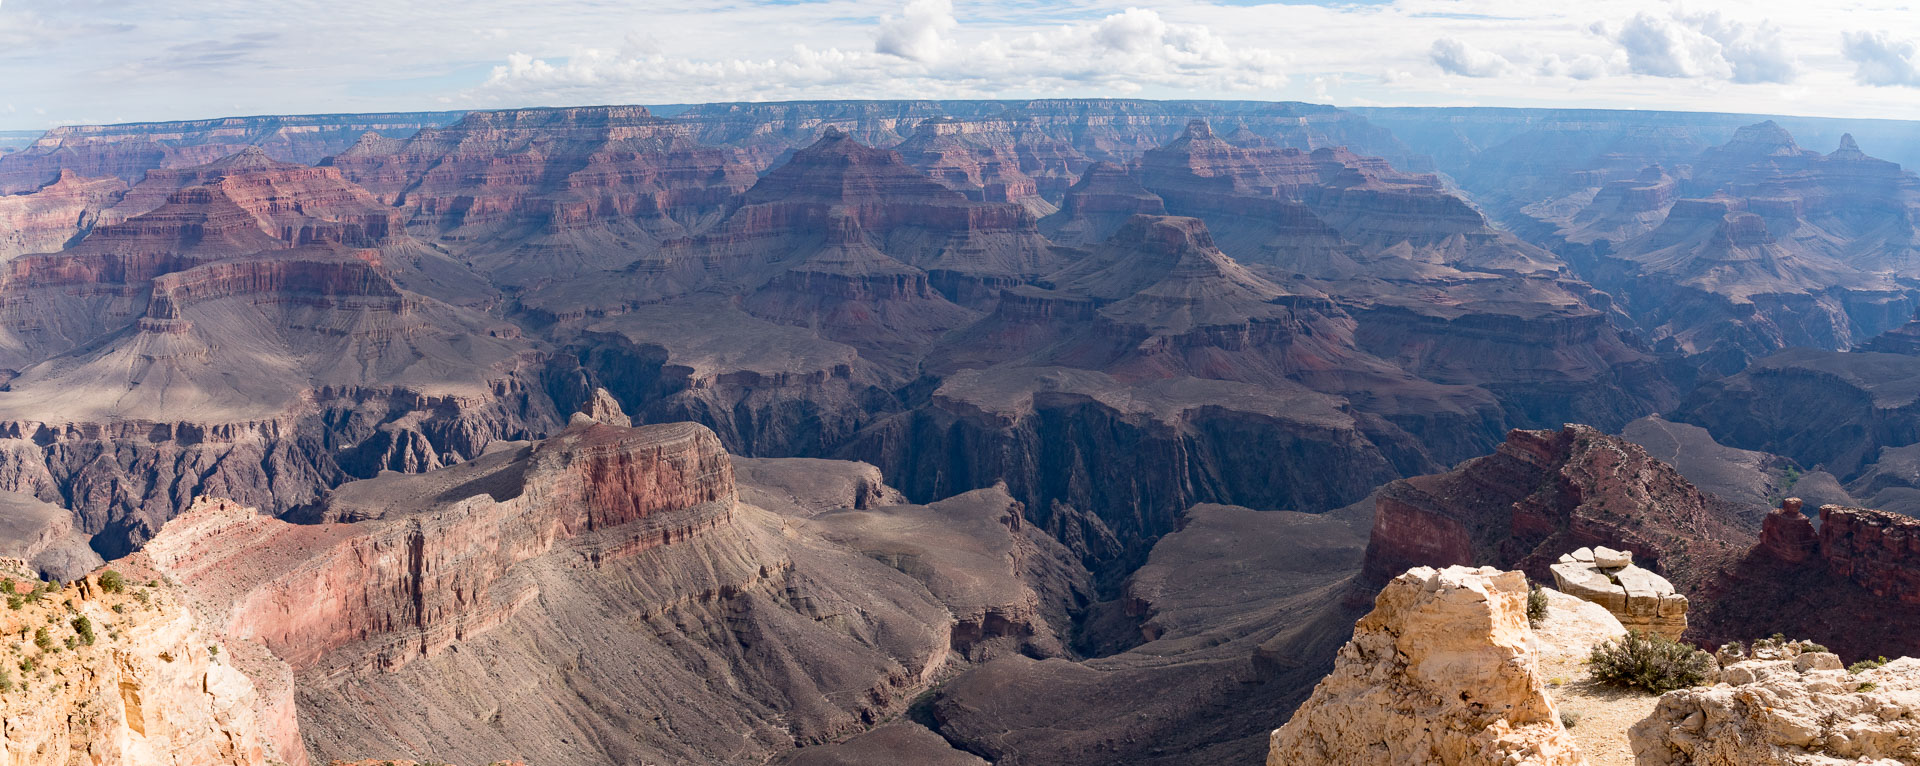
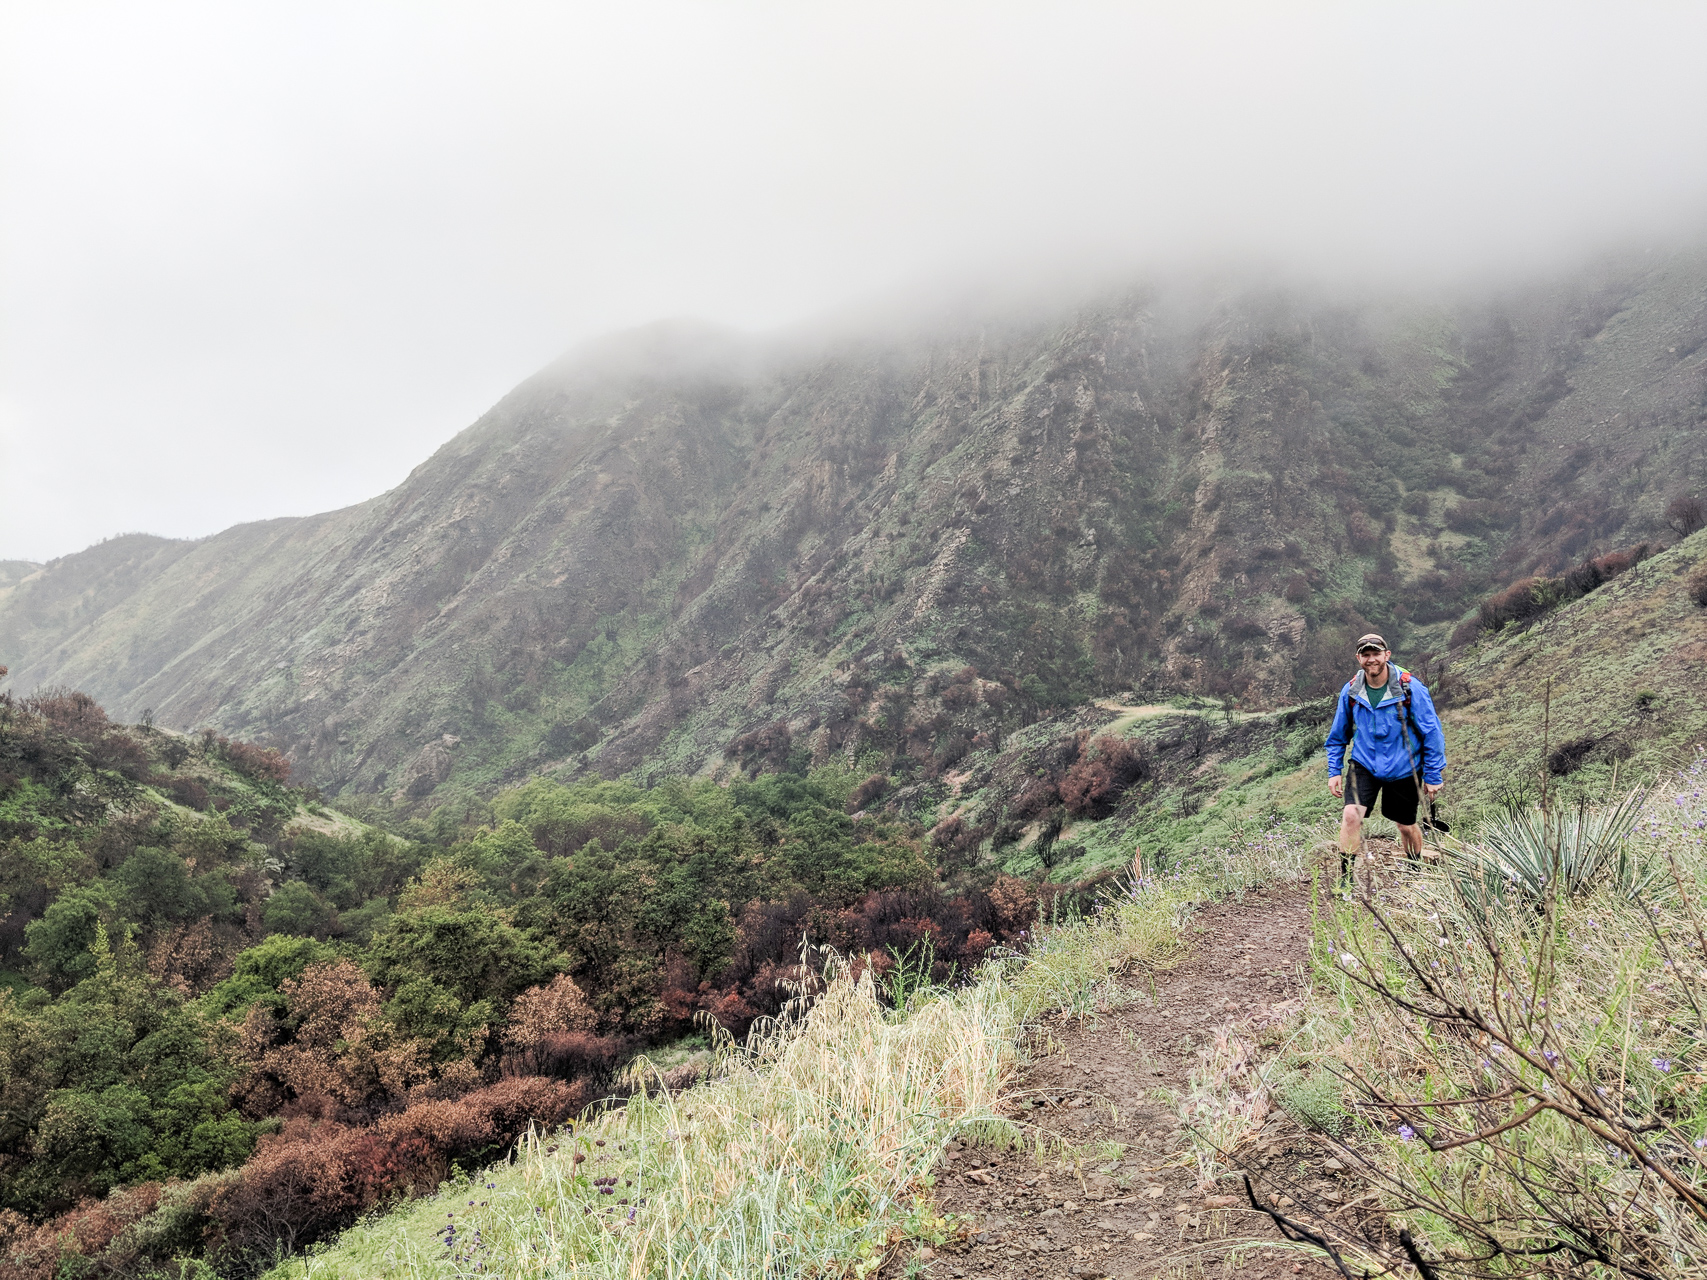
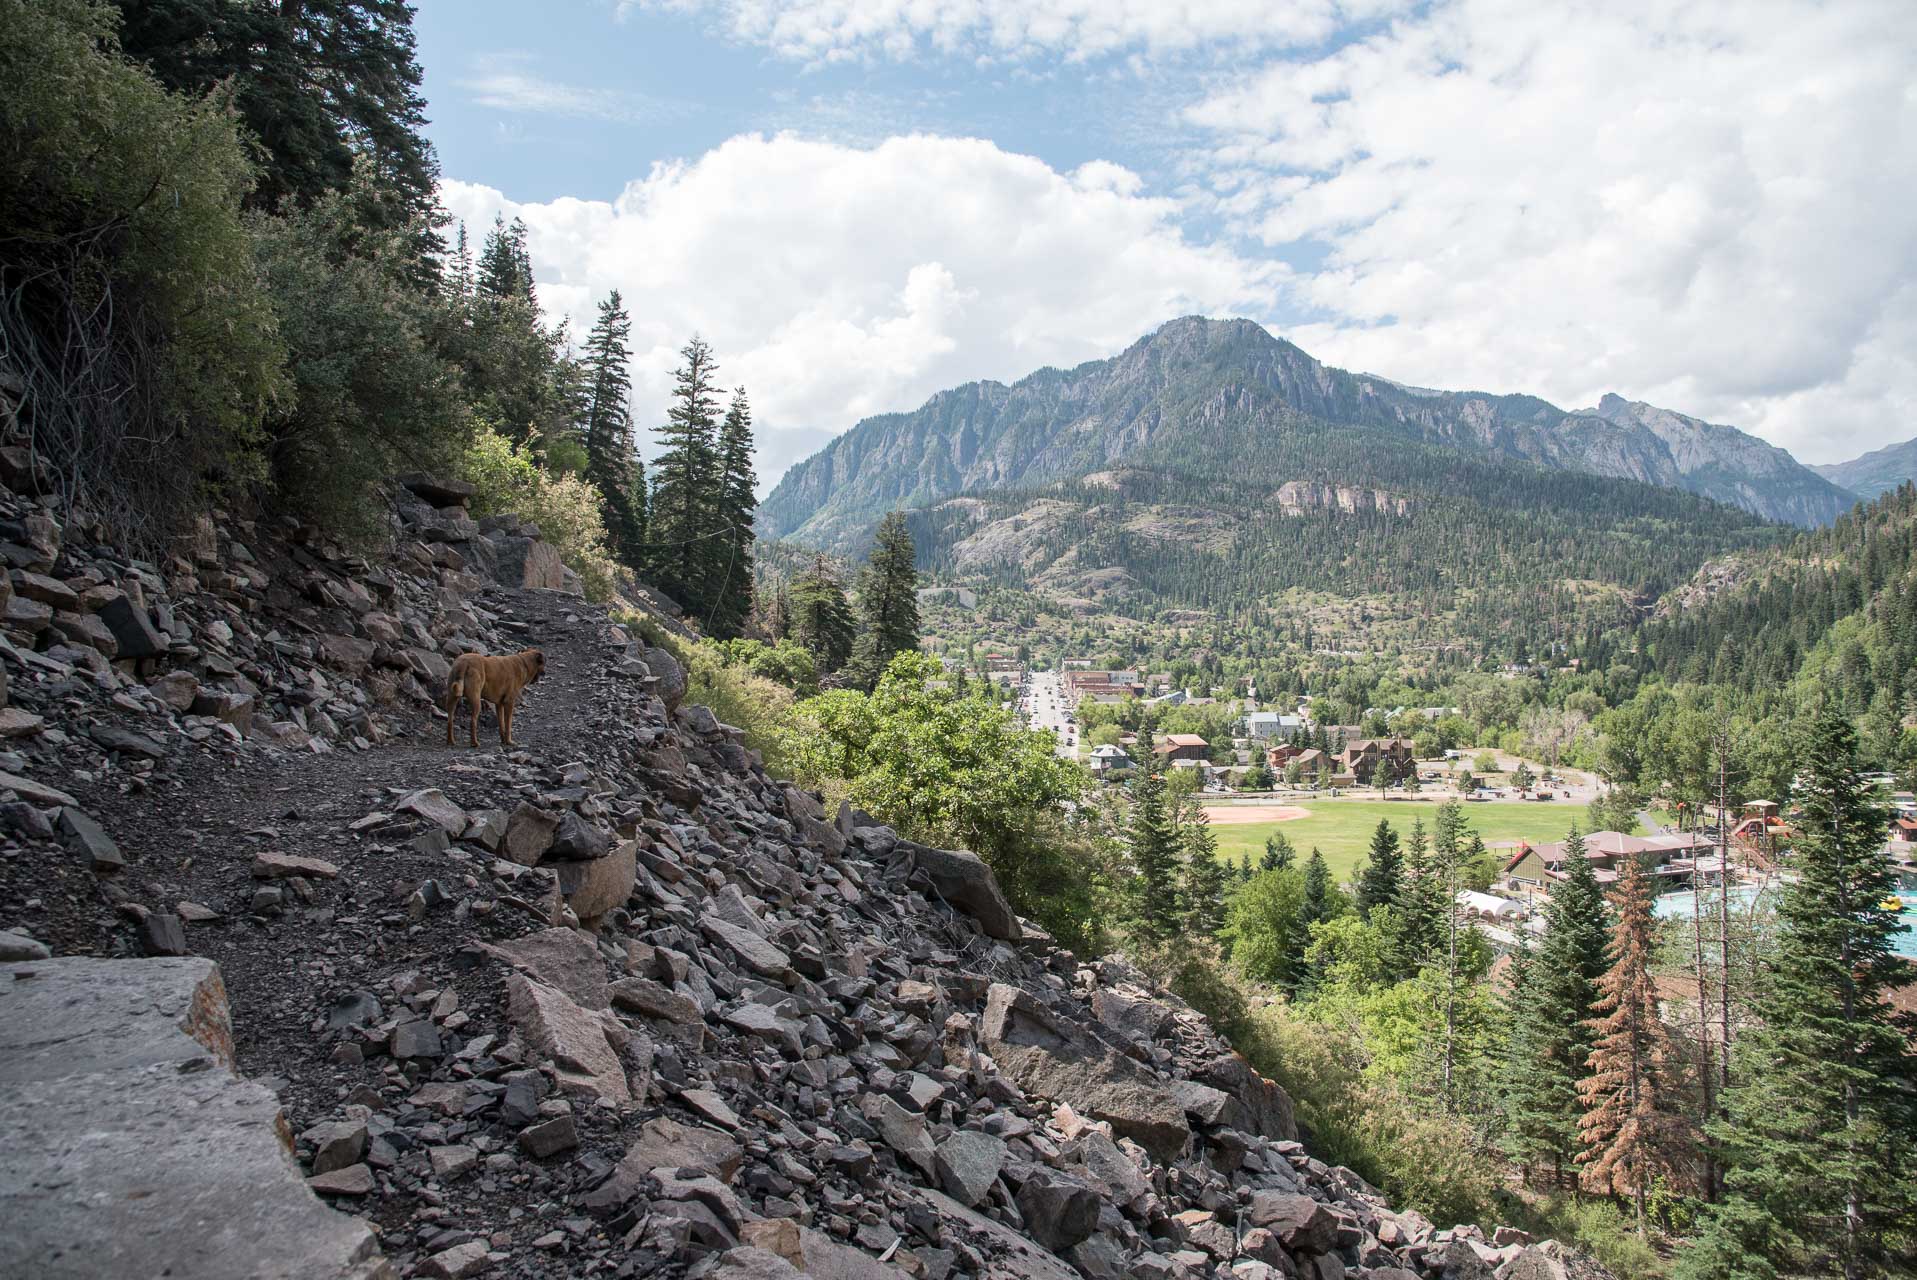
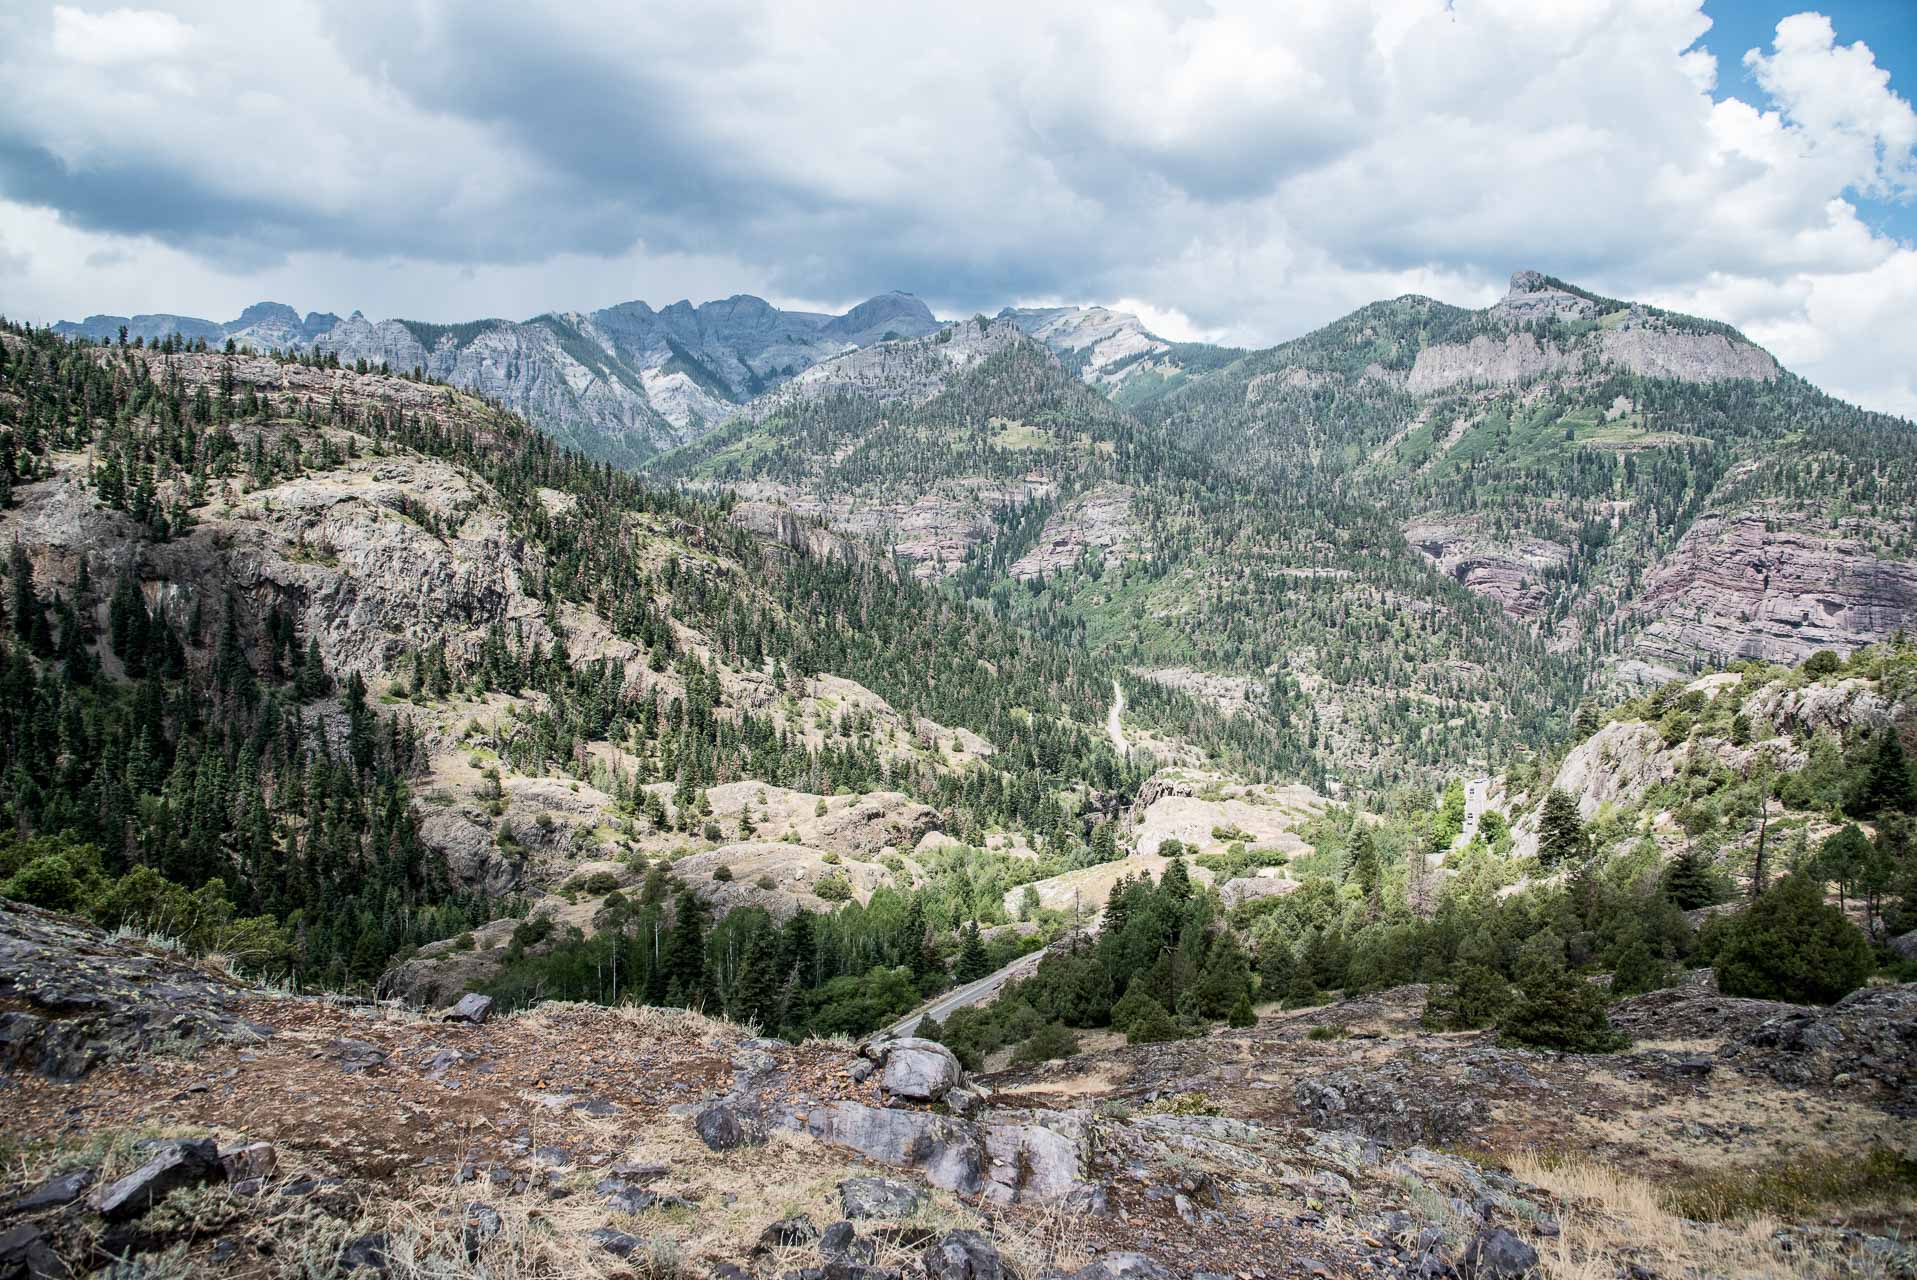
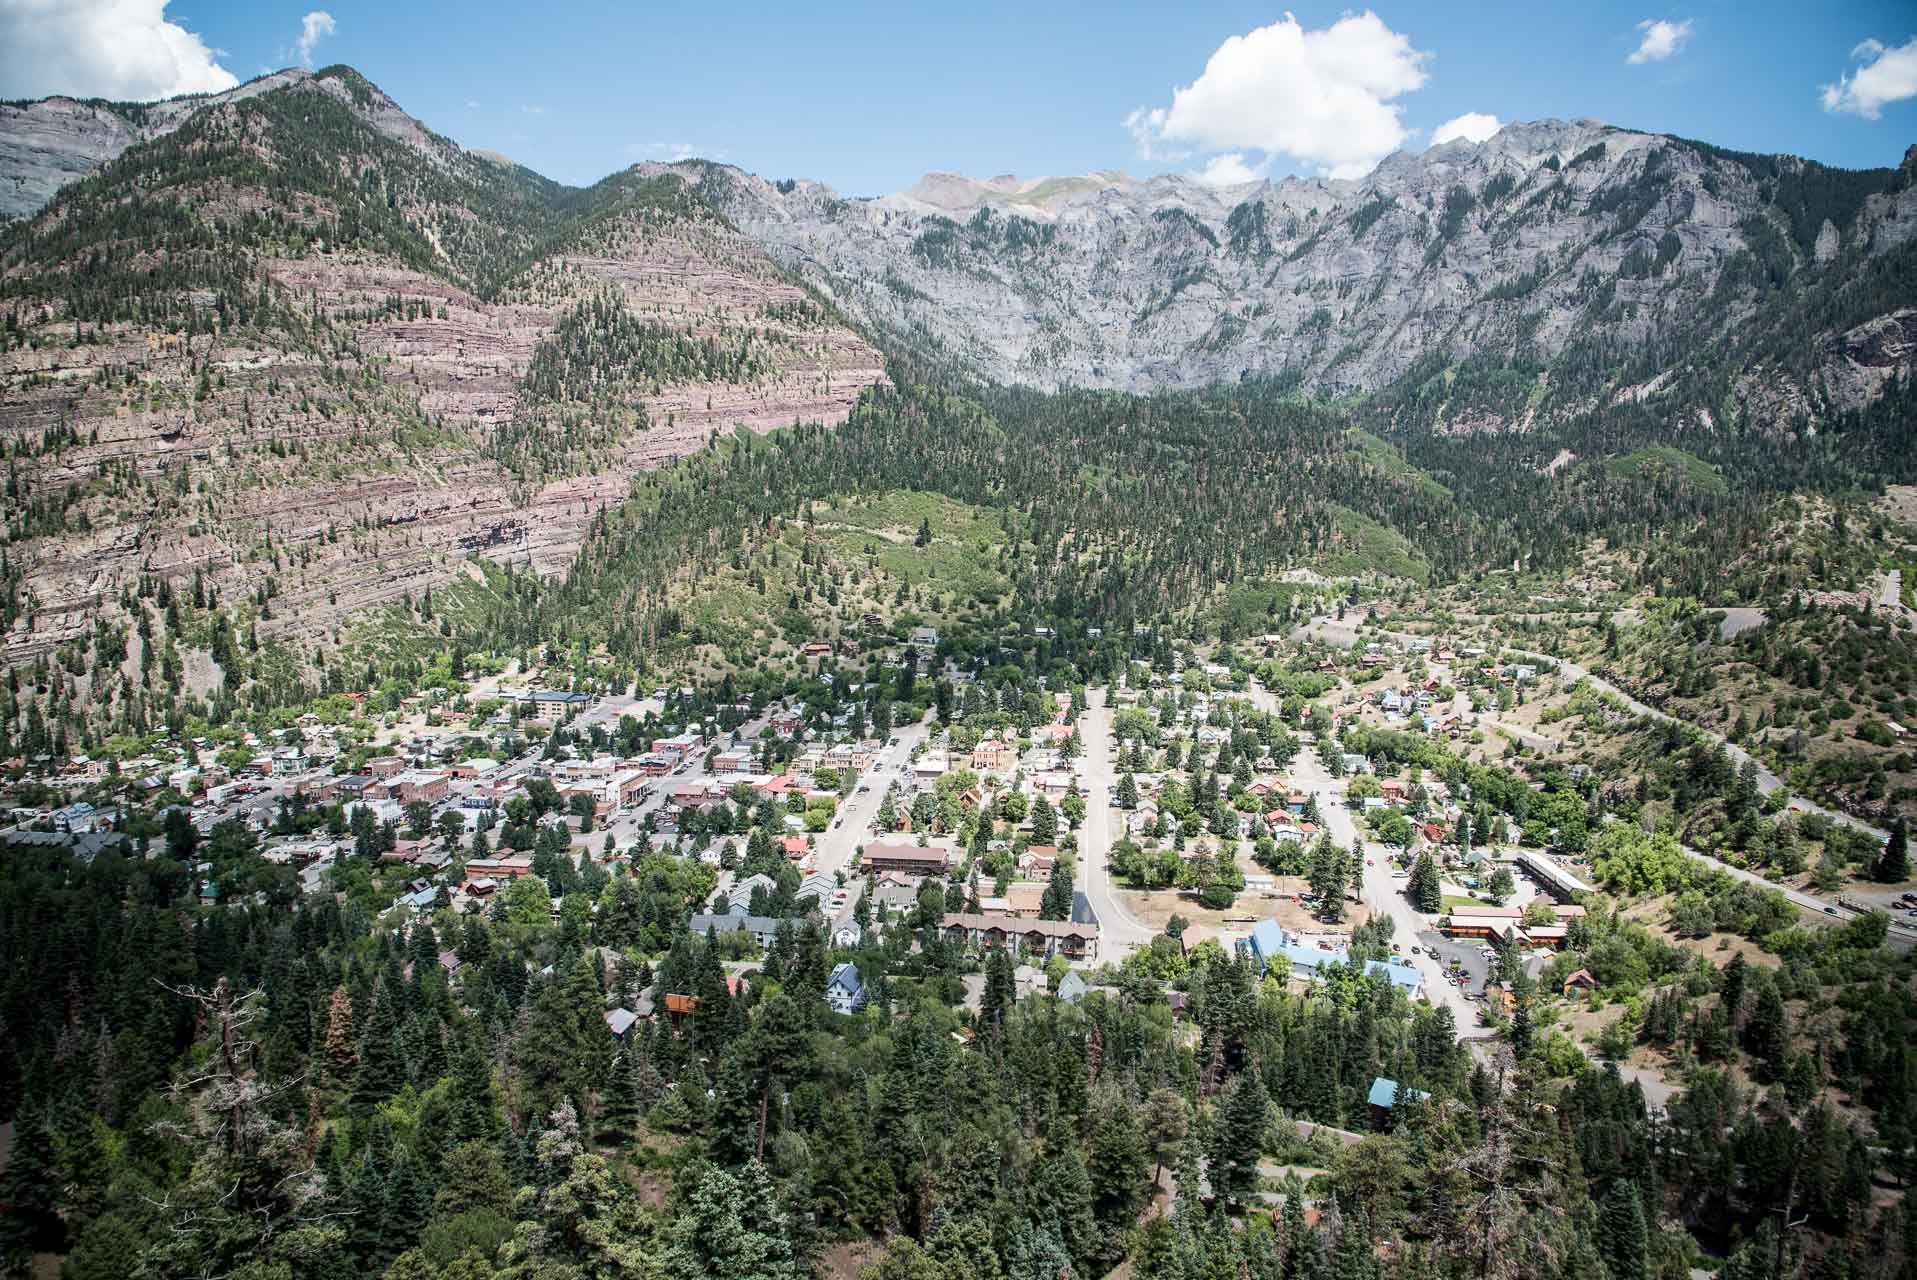
The initial climb from the trailhead is not particularly long in terms of distance traveled, but it affords some spectacular views of the town and surrounding mountains right away.

Vancisin_20180714_DSC_2384
The Perimeter Trail with Hayden Mountain in the background.
Vancisin_20180714_DSC_2386
Main Street with Hayden Mountain as the backdrop.

The elevation along the trail changes frequently with lots of ups and downs. For locals, it is probably only a moderately challenging trail, but for us sea-level-dwellers it was a challenging hike. There’s no one section that is overly tough, though the beginning is a bit of a slog, but the accumulation of ups and downs over roughly 6 miles wears a person out.

Vancisin_20180714_DSC_2389
Beautiful stretch of trail between the Visitor’s Center and the Lower Cascade Falls.

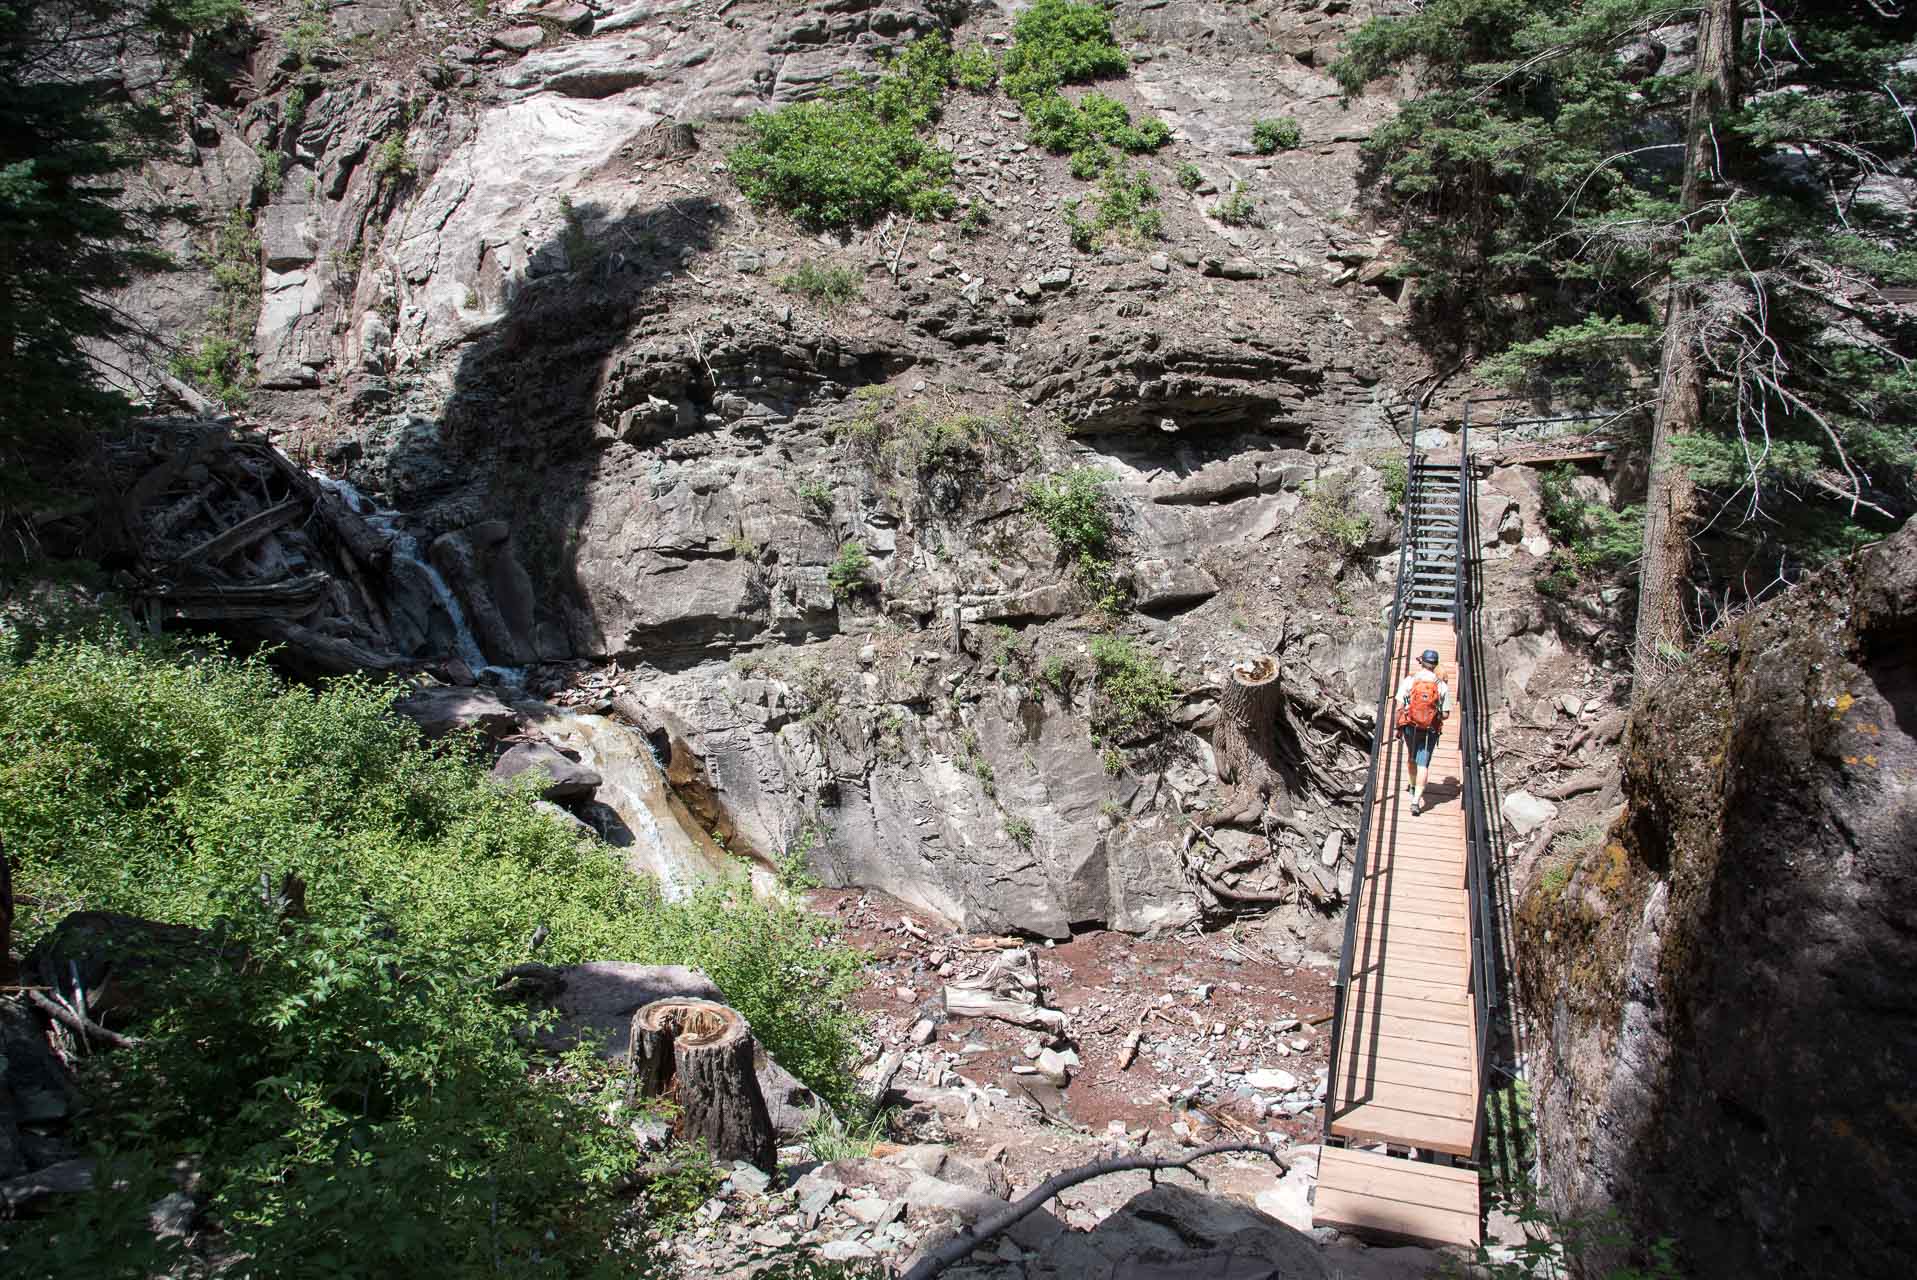
After ascending for about three-quarters of a mile, you get a side view of the Lower Cascade Falls. The trail then descends a short distance down to the base of the falls. This is a great place to stop and take a break and allow your dog to drink and cool off.

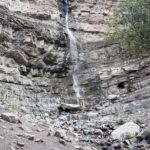
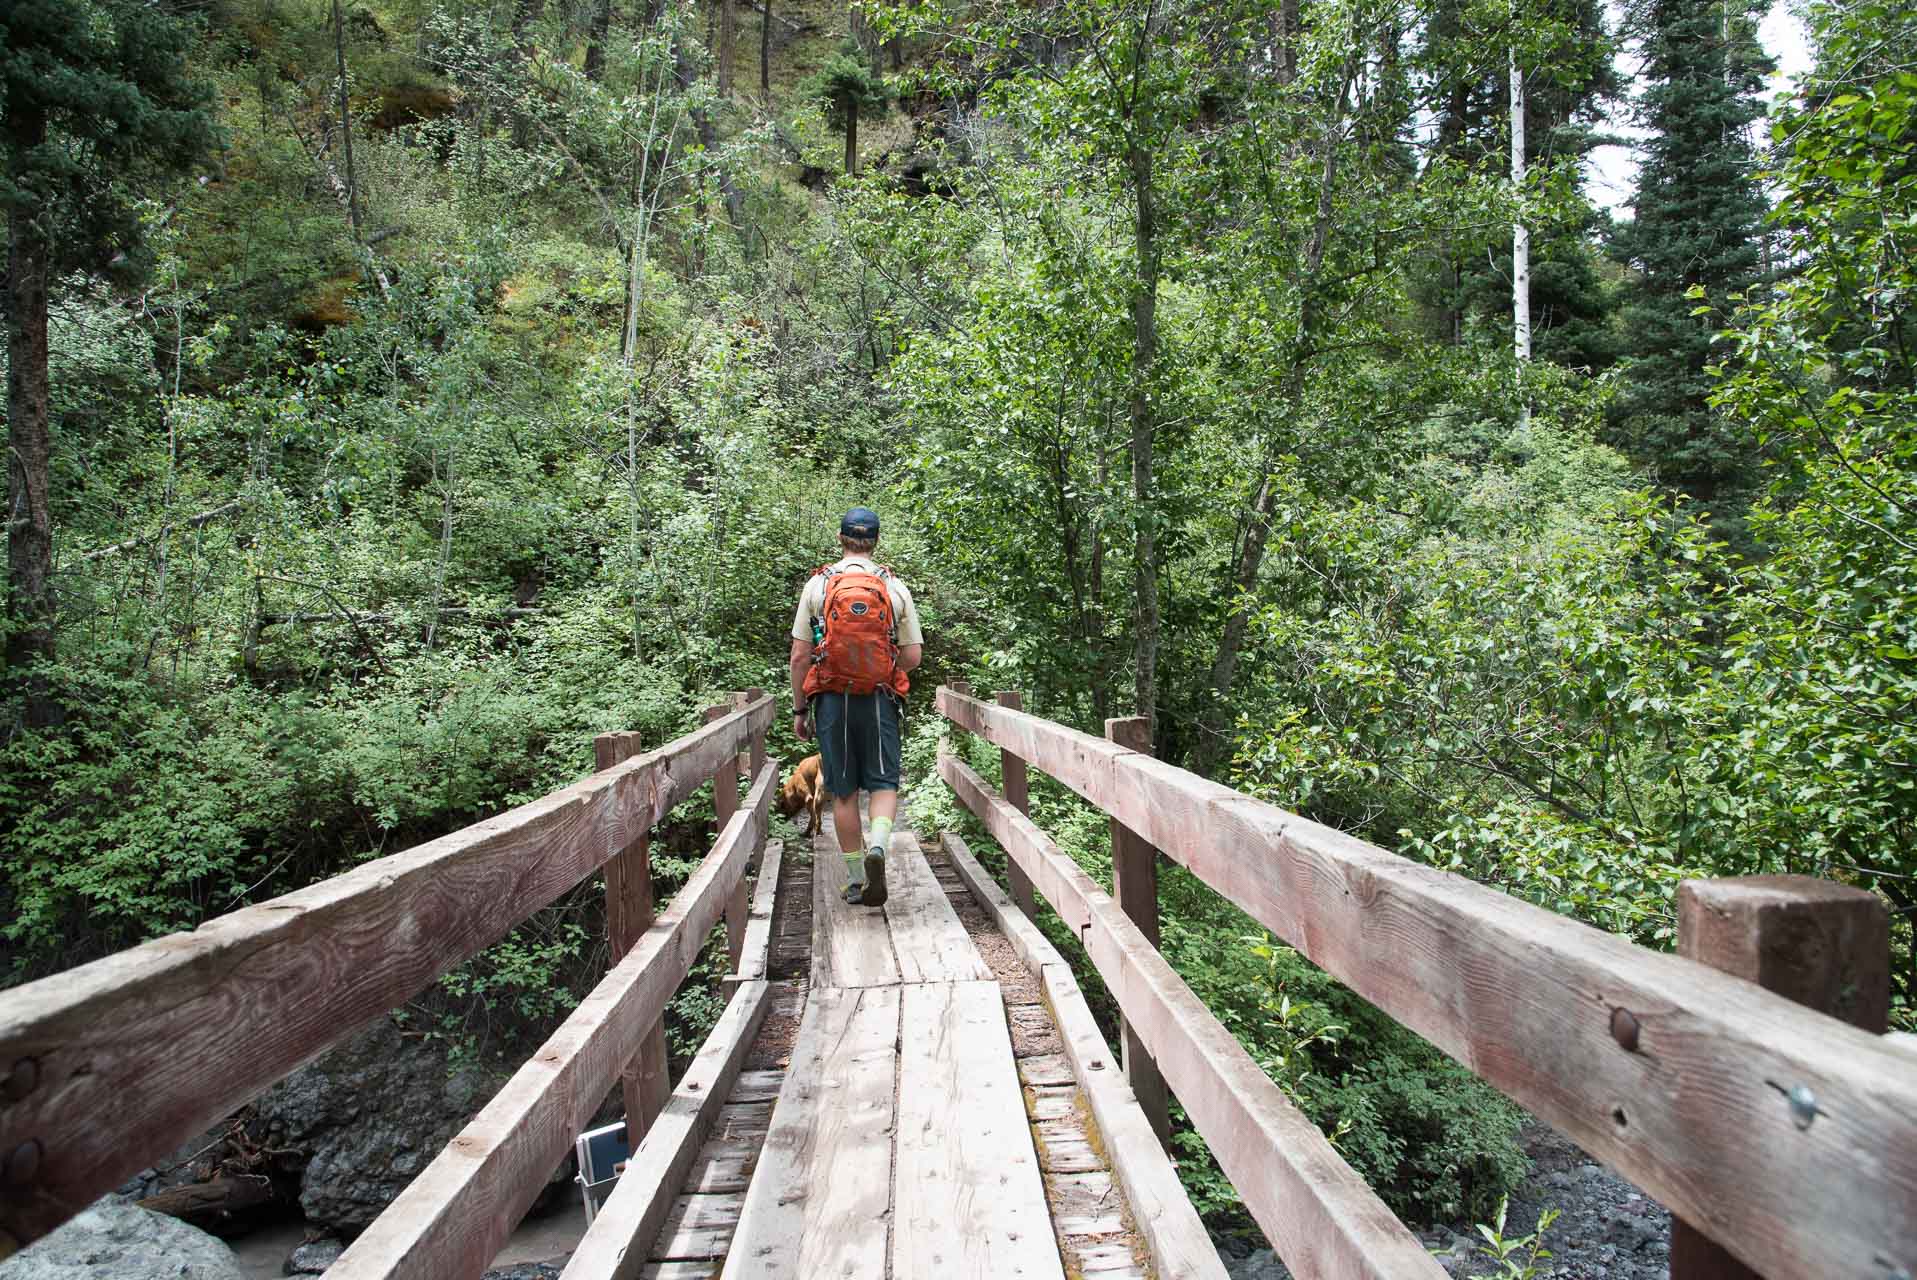
The Lower Cascade Falls has it’s own separate entry point for those interested in just a short, not very strenuous hike to the falls. You’ll cross a short, sturdy wooden bridge to continue on your way. Be mindful of the signs as you leave the falls to make sure you continue along the Perimeter Trail and don’t end up exiting towards town.

Vancisin_20180714_DSC_2413
Bridge crossing the Cascade Creek.
Vancisin_20180714_DSC_2414
Trail indicator with direction, distance and permissible use.
Vancisin_20180714_DSC_2420
The trail ascends again!

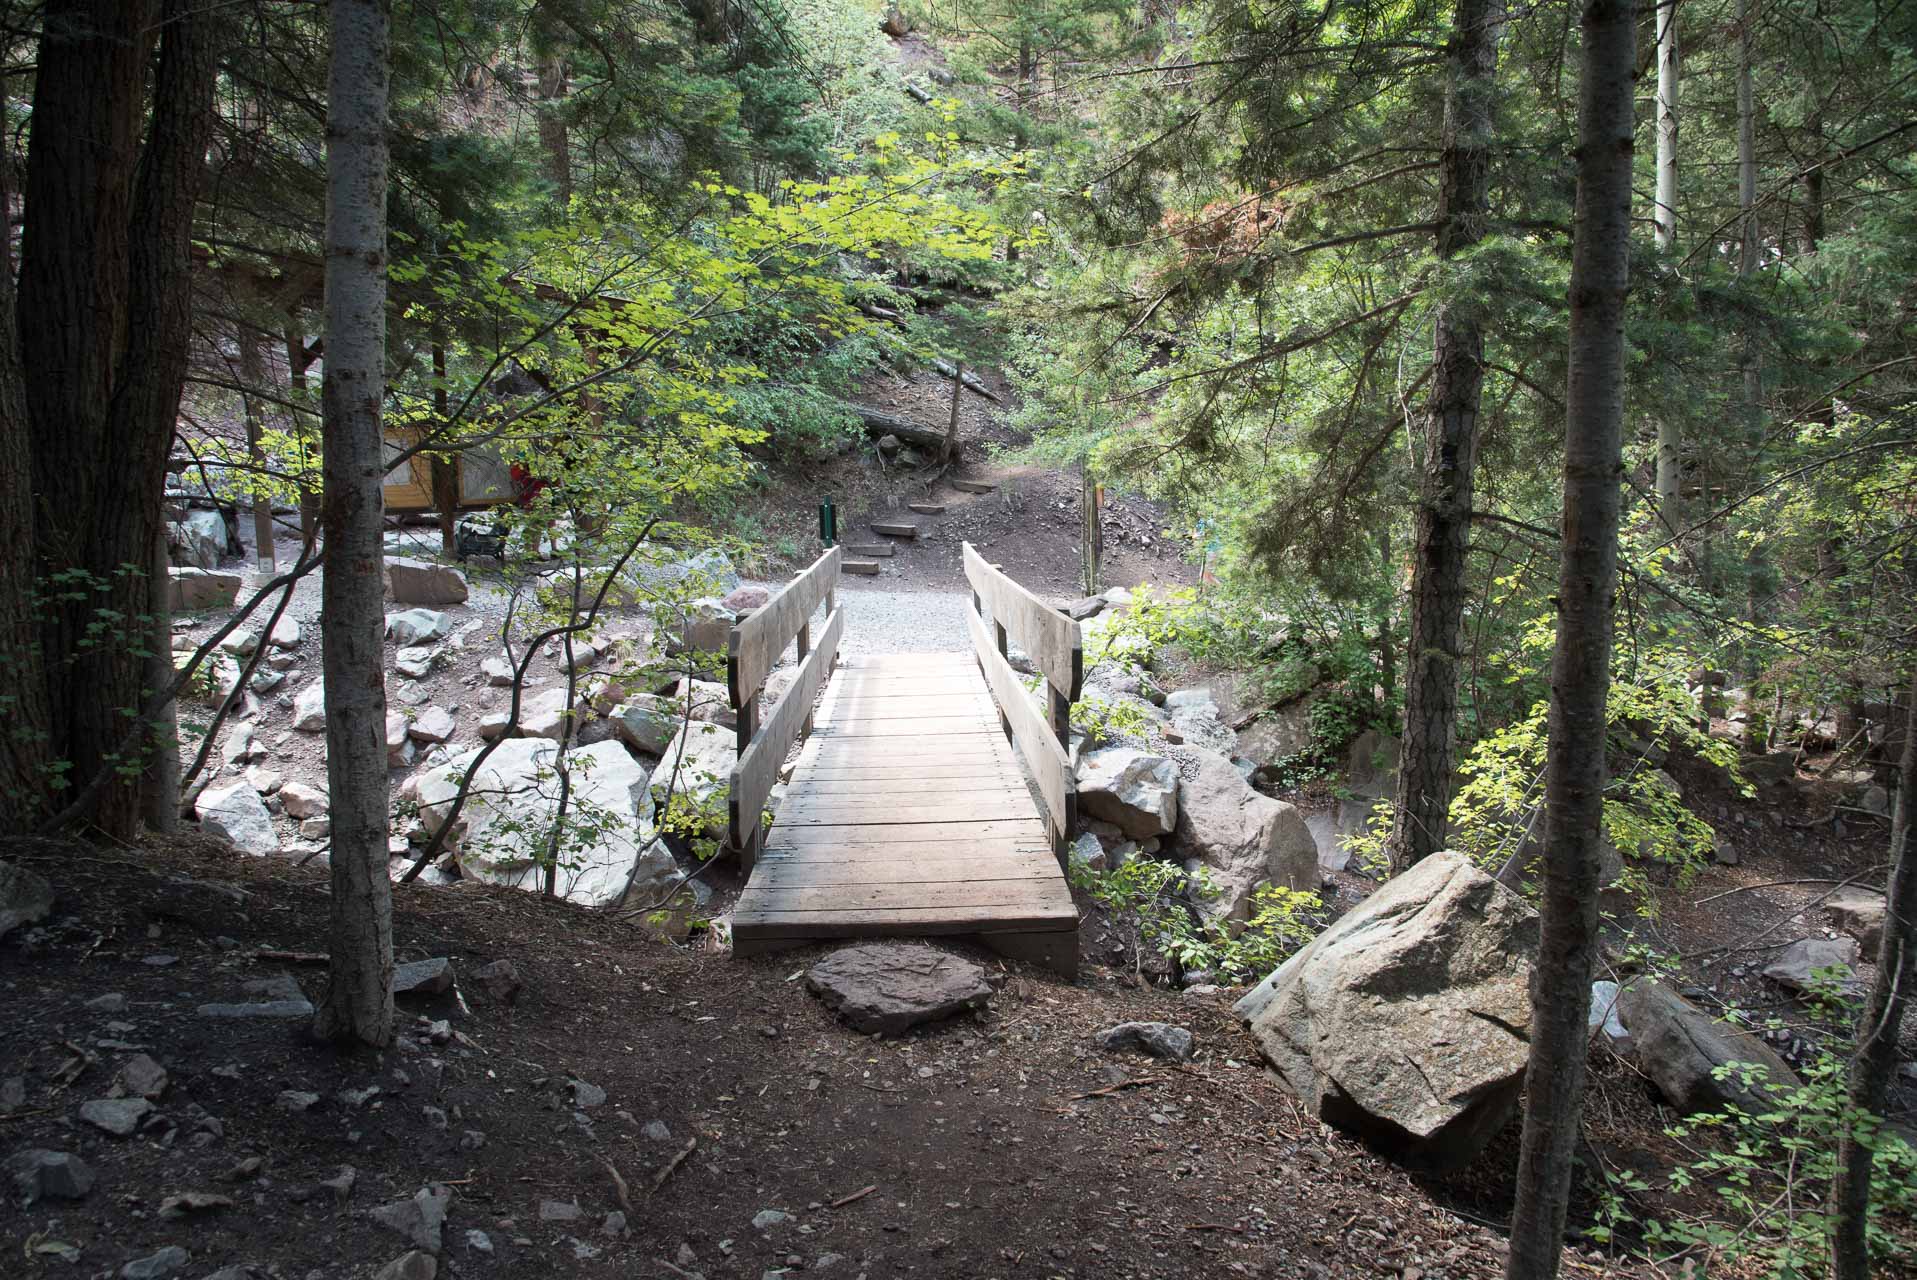
The trail ascends through a relatively lush (especially compared with what we’re used to!) forested section after leaving the falls. After this short ascent, the trail becomes much more gradual in its elevation change – though there are still many ups and downs to come.

Vancisin_20180714_DSC_2426
A more level stretch of trail between the Lower Cascade Falls and the Baby Bathtubs Trailhead.

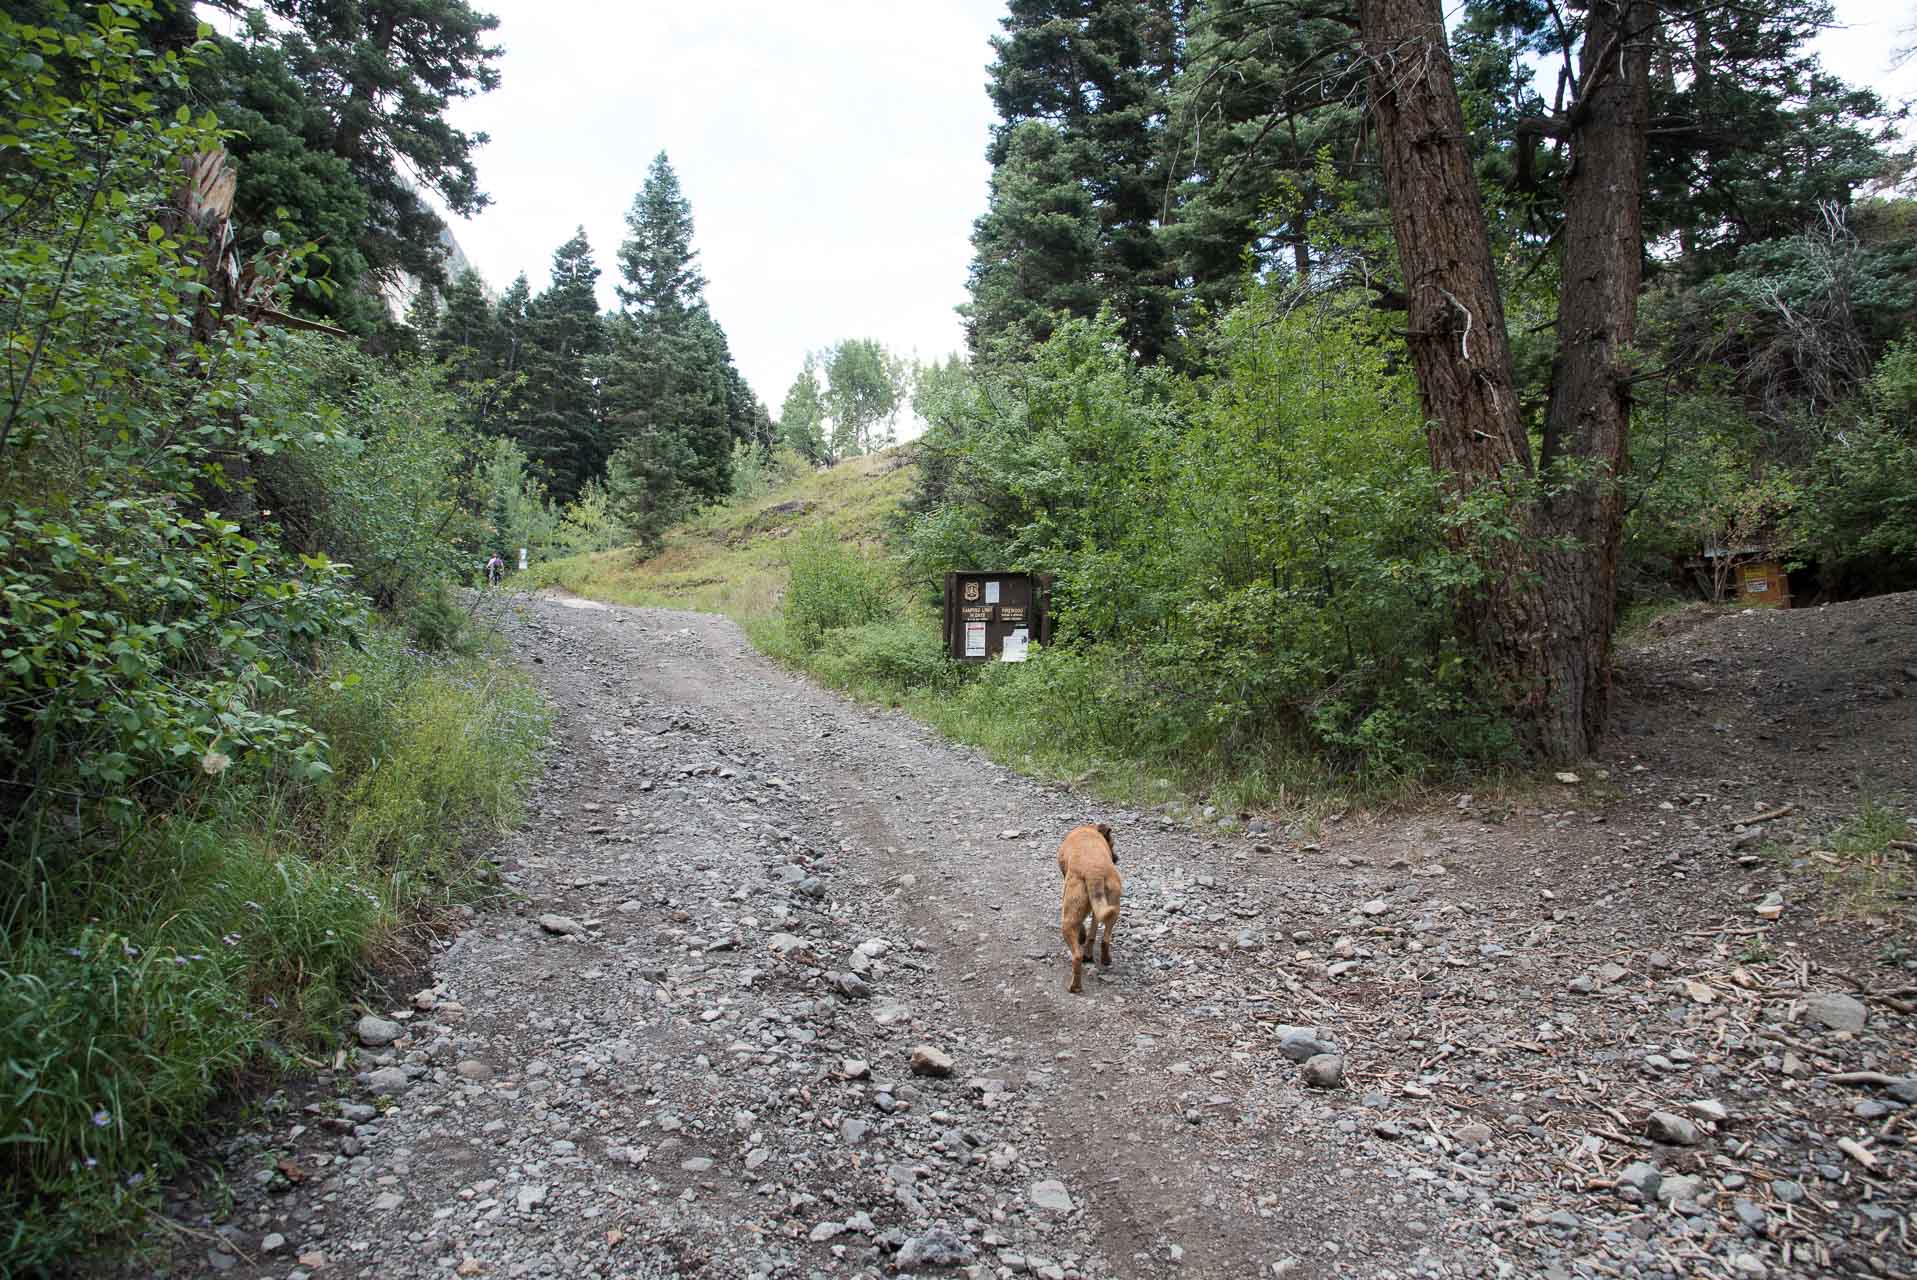
A little less than a mile and a half into the hike the trail meets with the Amphitheater Campground Road – the Amphitheater is a distinctive ridge line on the east side of Ouray pictured later in this post. Turn right on this road and follow it a short distance to the Baby Bathtubs Trailhead.

Vancisin_20180714_DSC_2427
The Baby Bathtubs Trailhead.

The Baby Bathtubs are bowled out sections of rock in the creek bed that are the result of erosion from swirling water. There are a few other trails that you’ll encounter along this stretch, but the signs for the Perimeter Trail are still prominent and easy to follow. You’ll cross the creek over a footbridge and eventually come to a gravel road.

Vancisin_20180714_DSC_2431
Footbridge crossing the creek after the Baby Bathtubs.
Vancisin_20180714_DSC_2432
Short stretch of gravel road to get to the next section of trail.

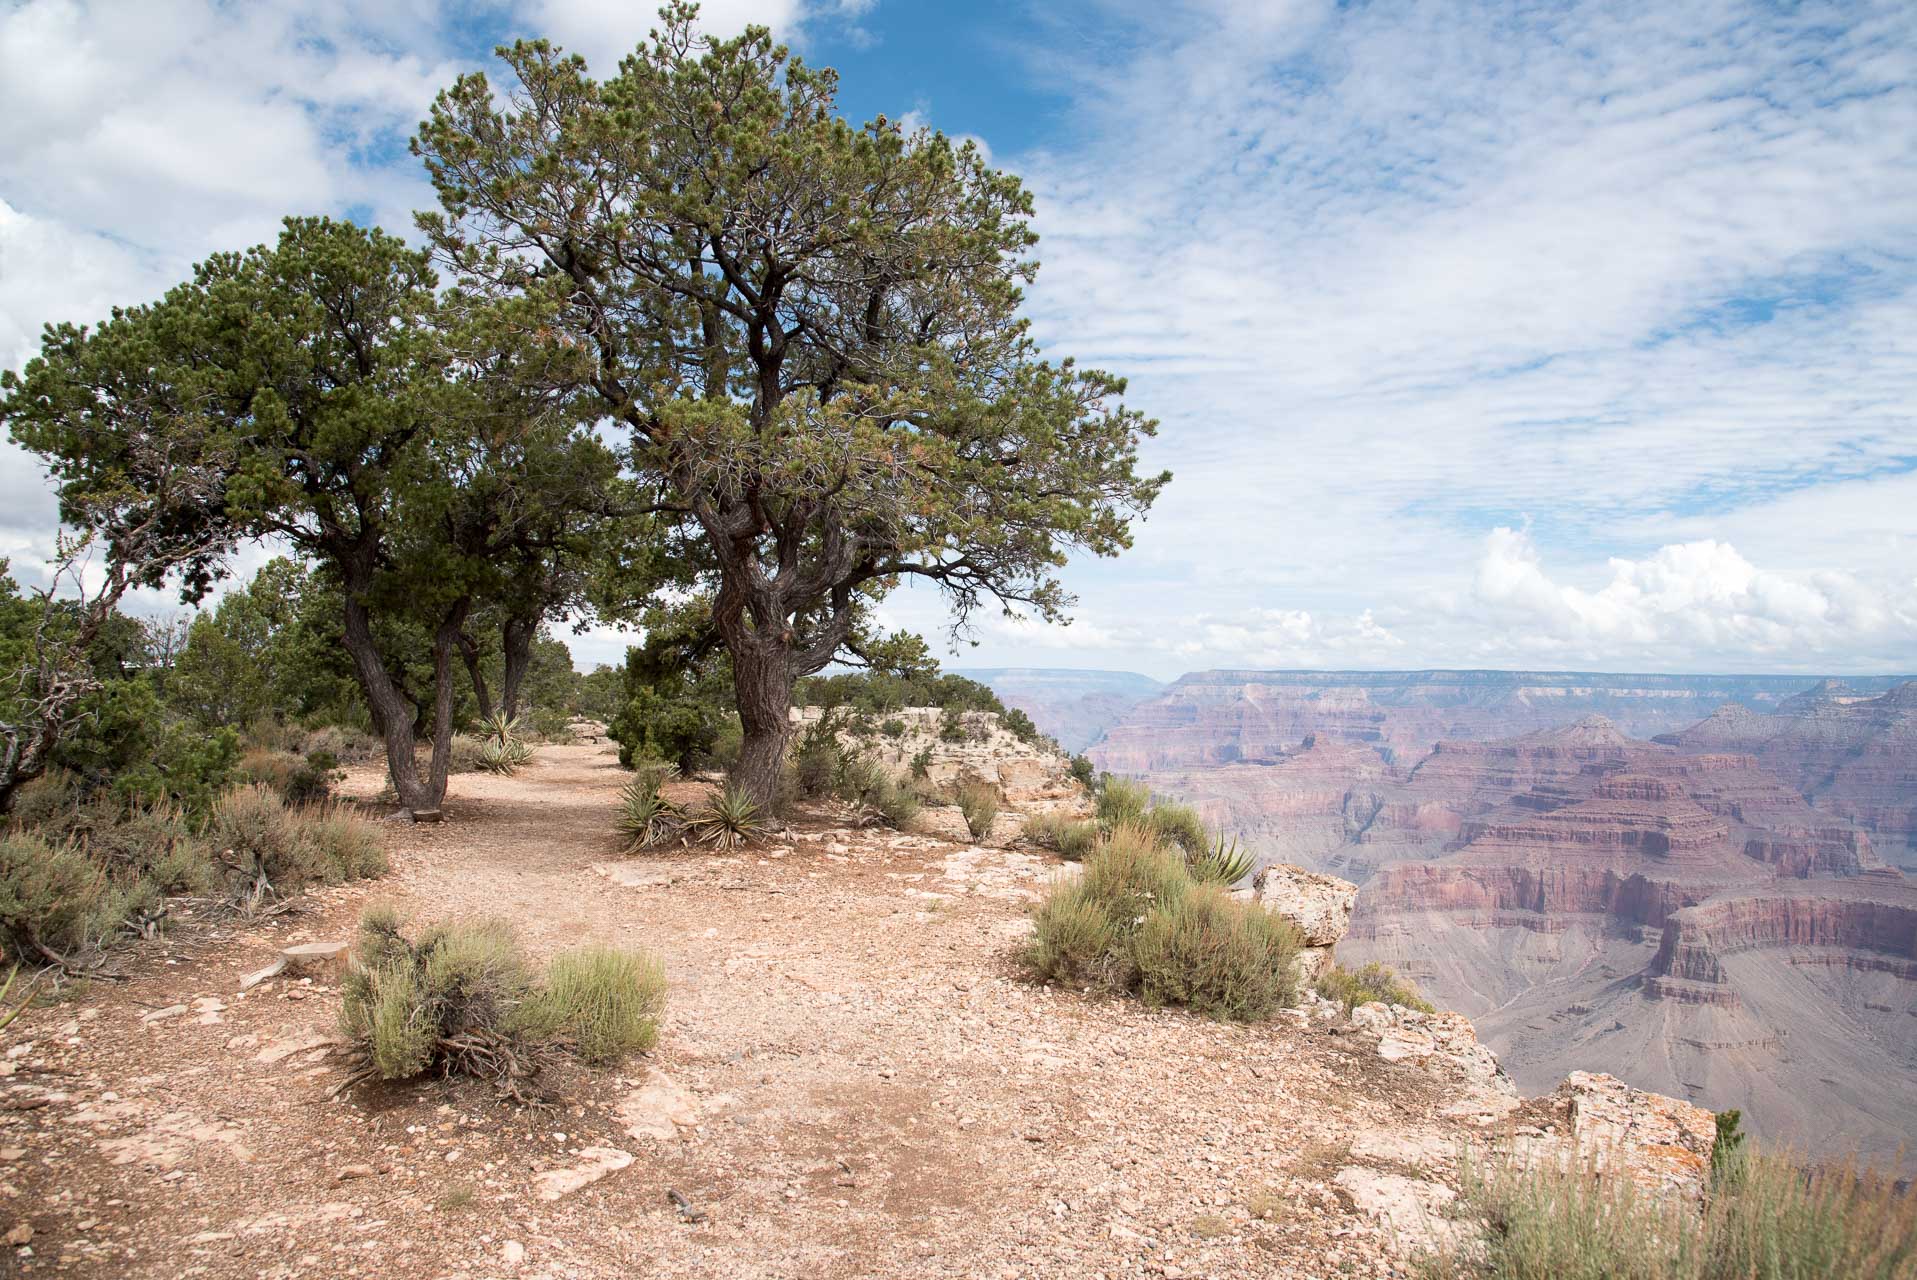
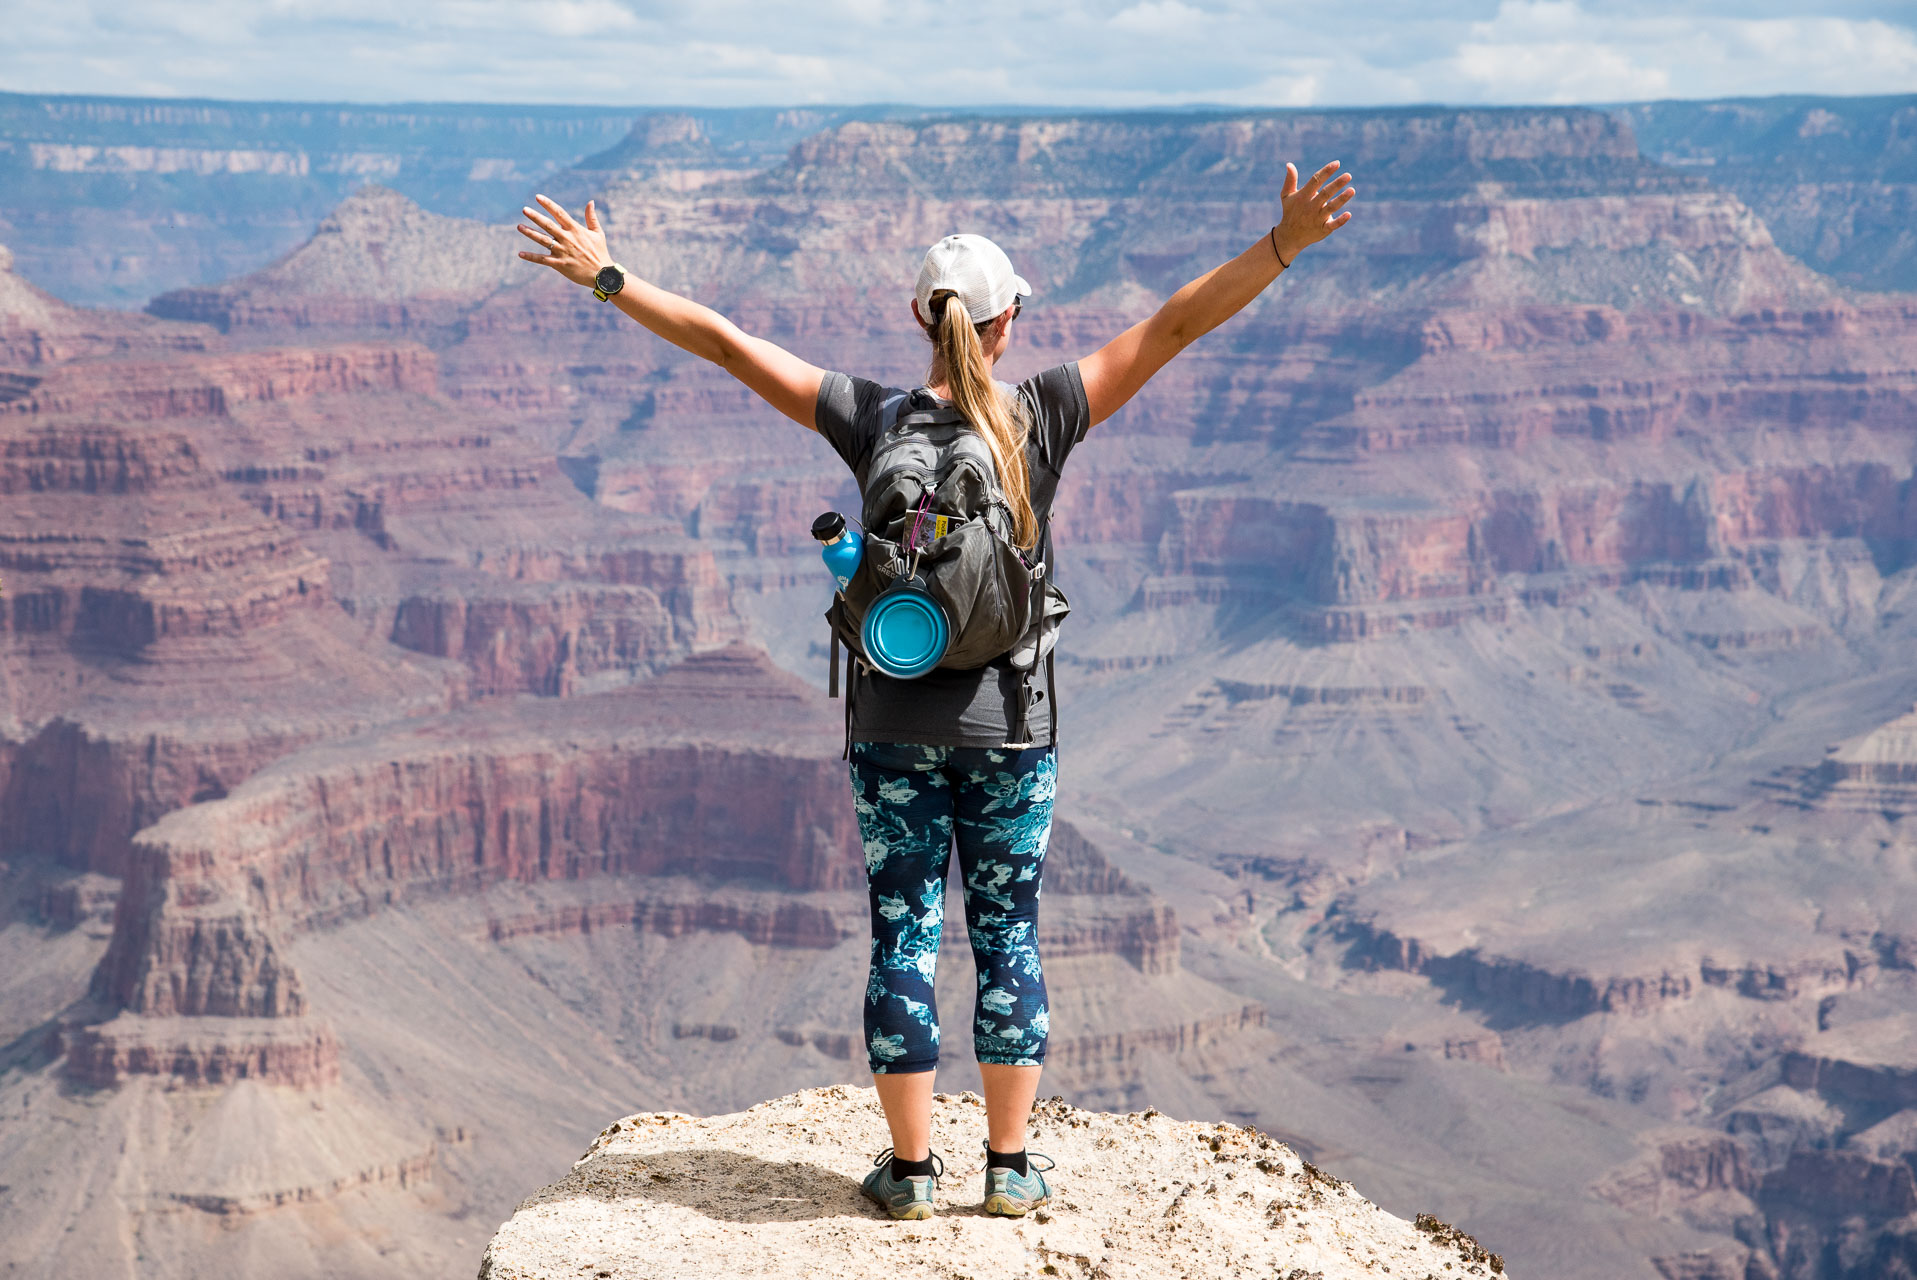
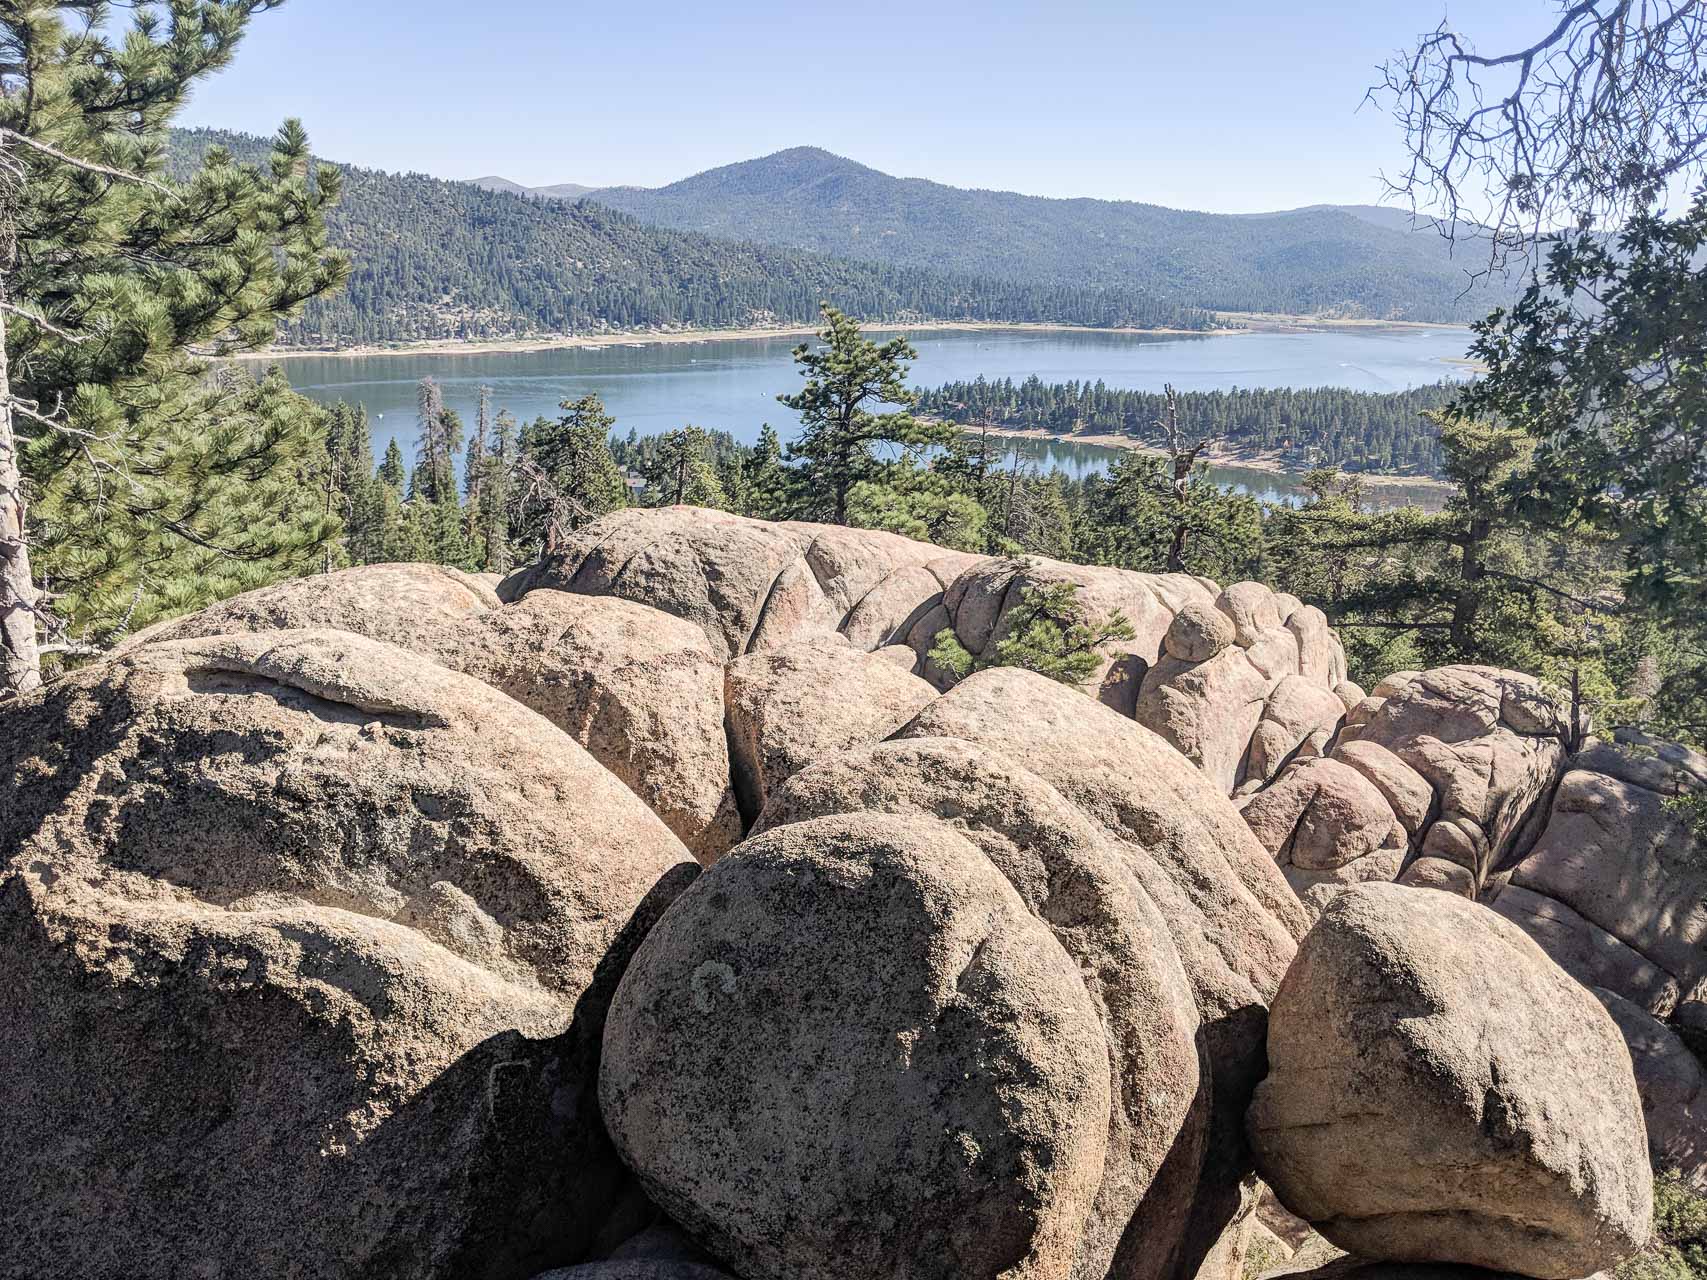
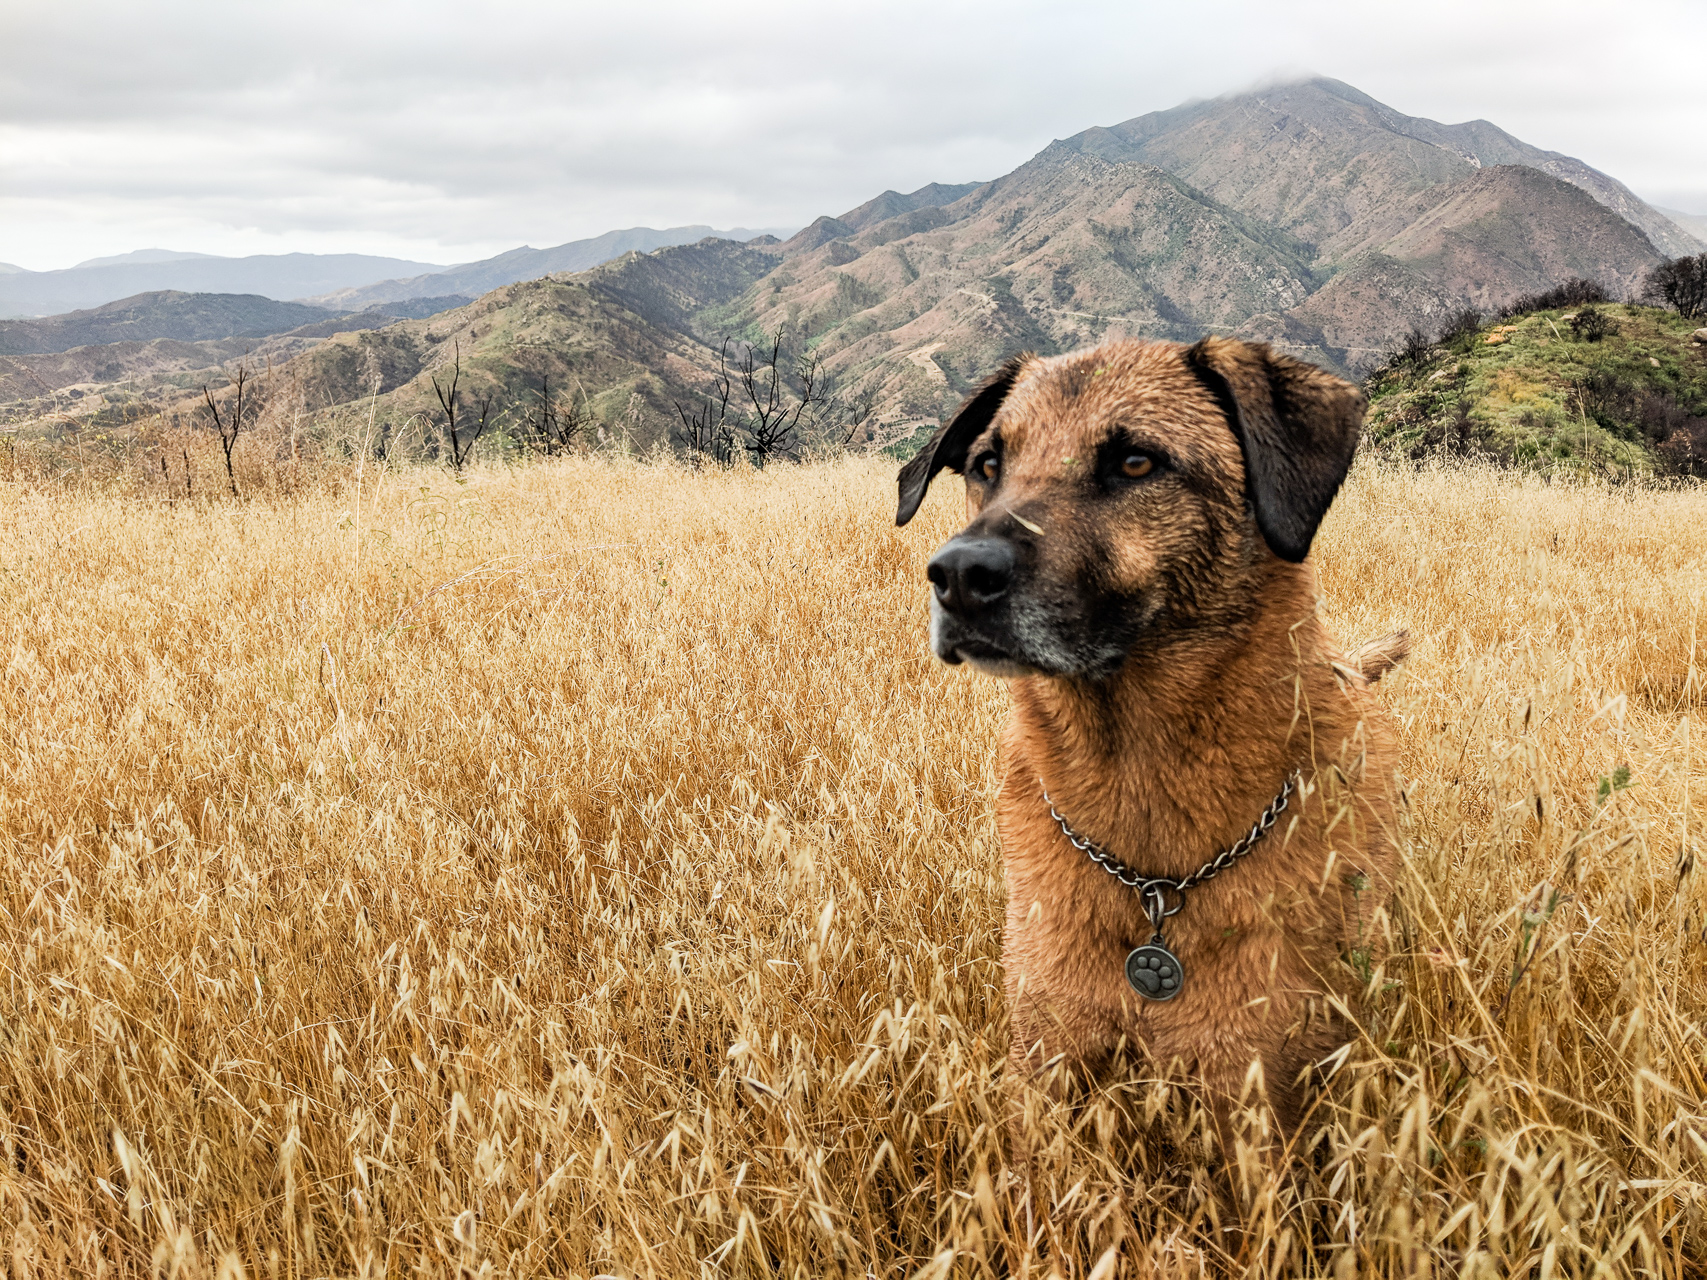
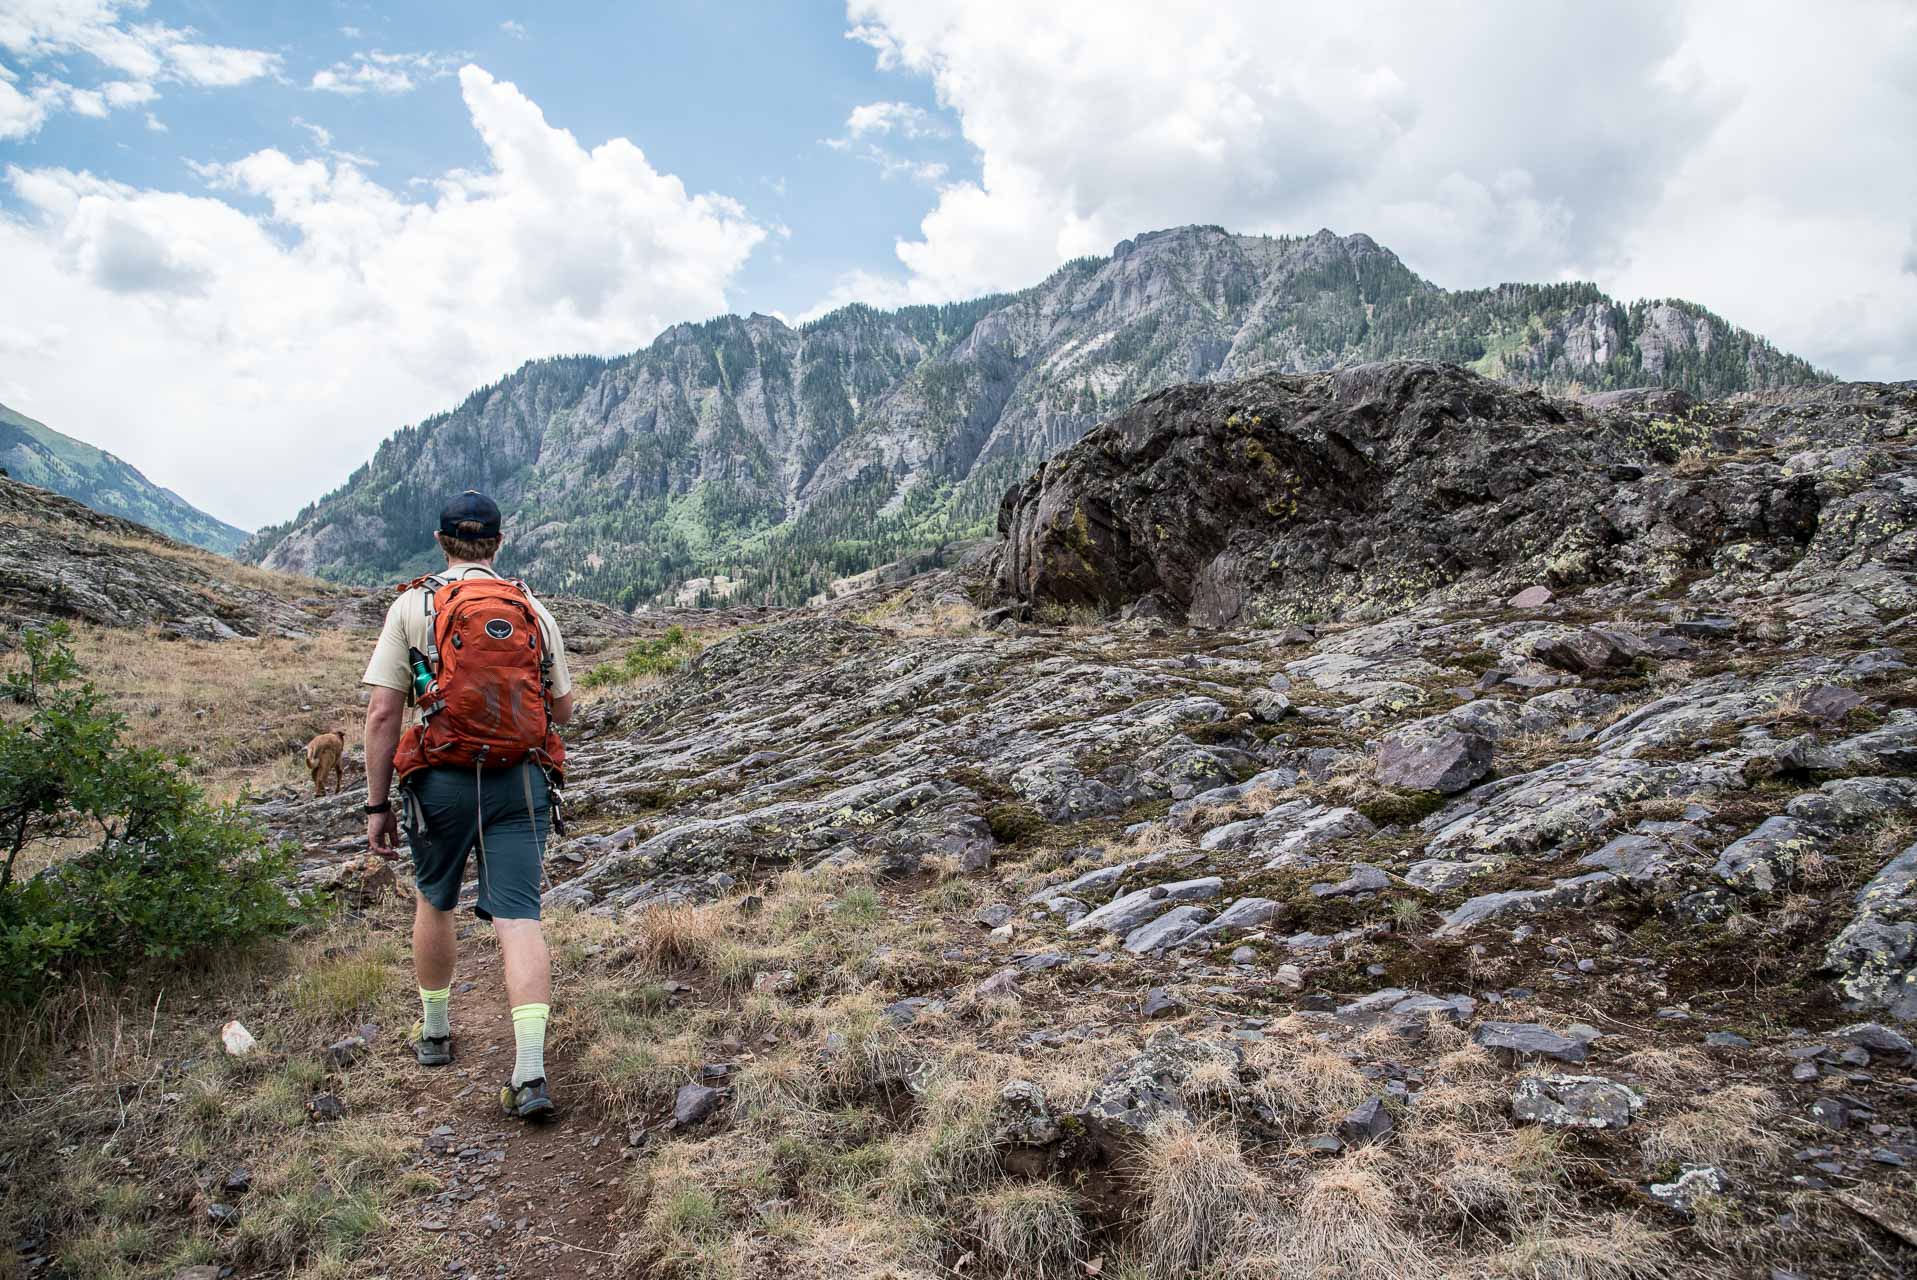
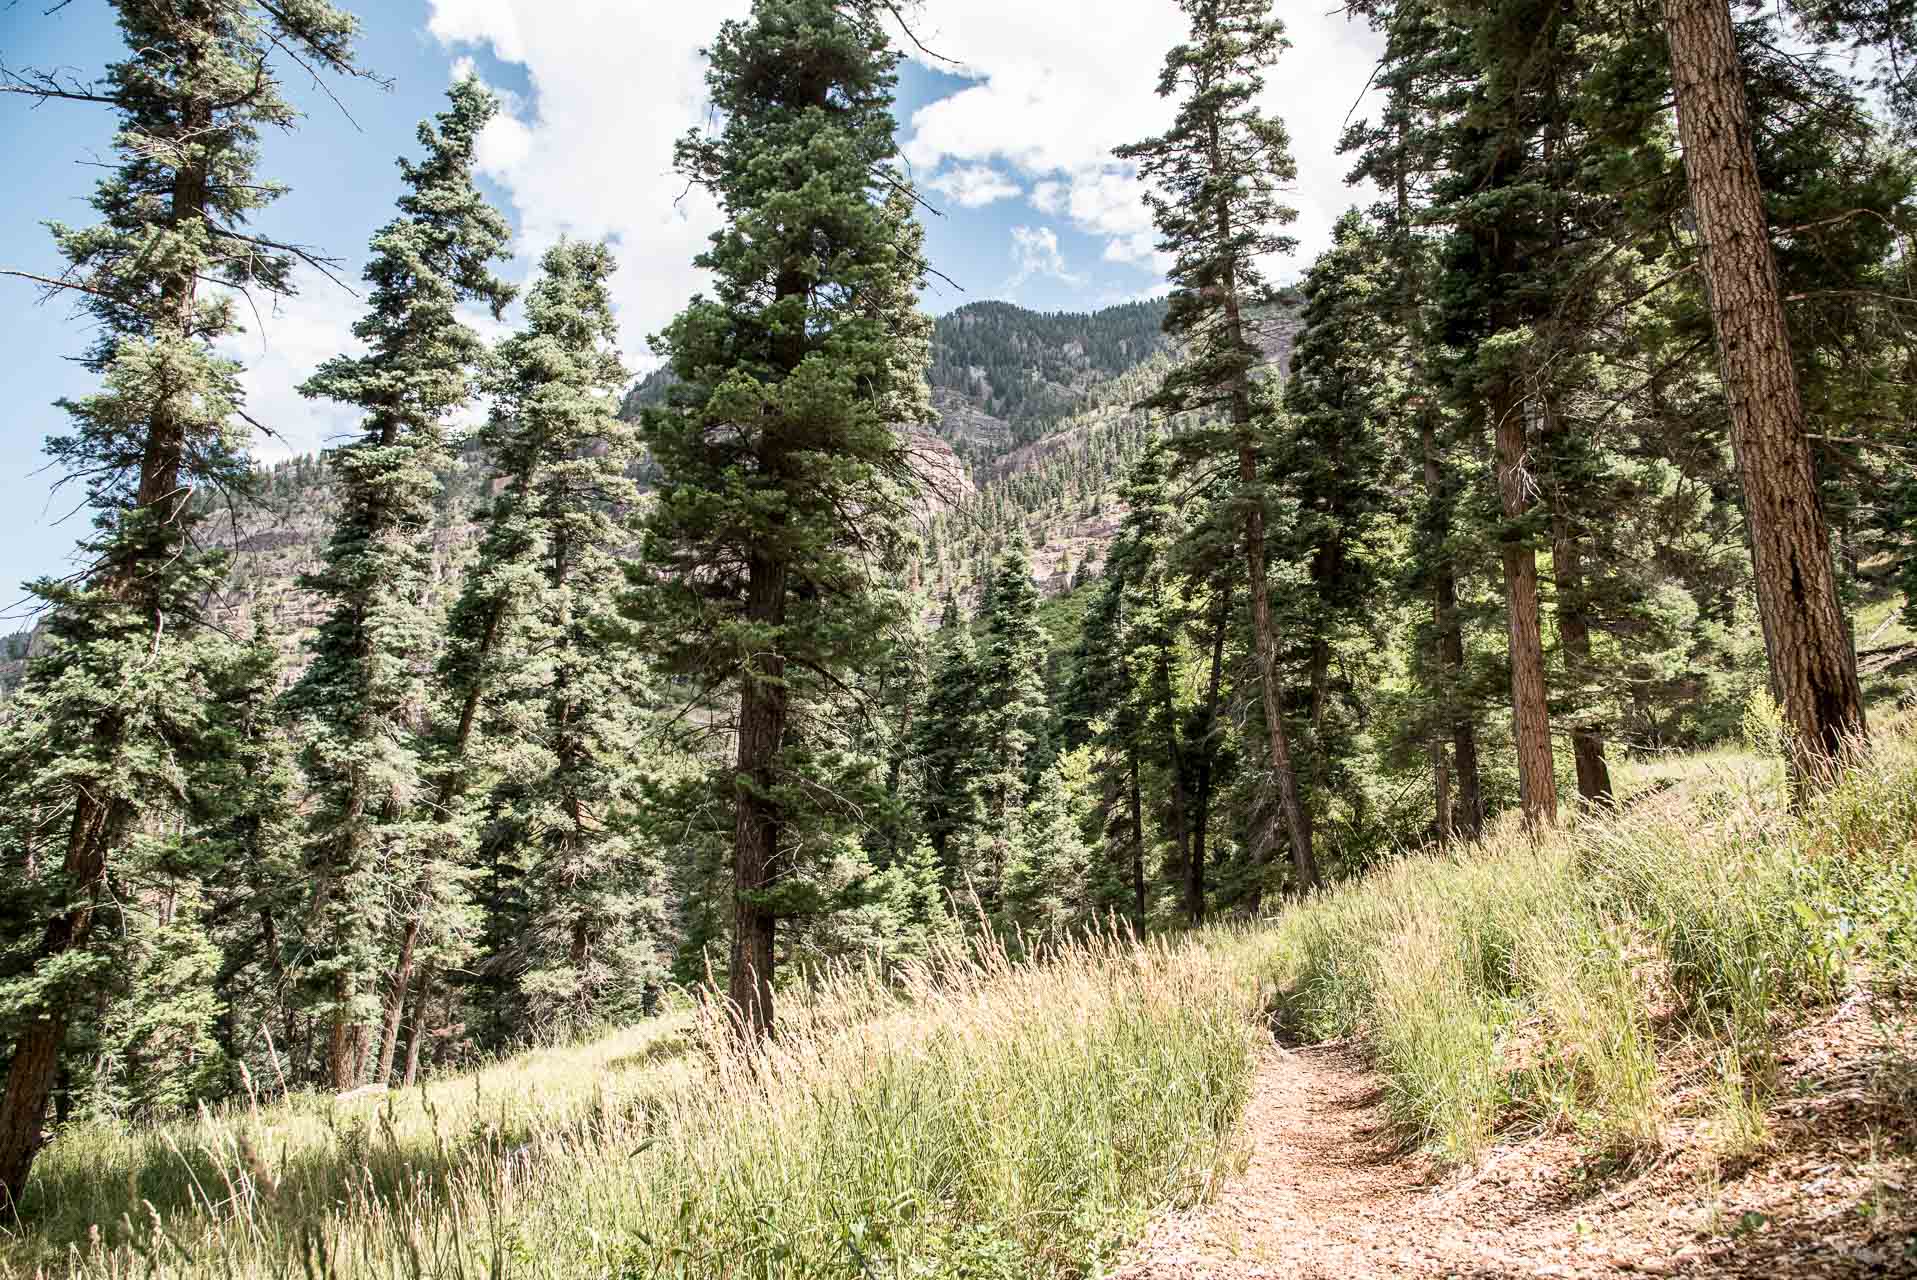
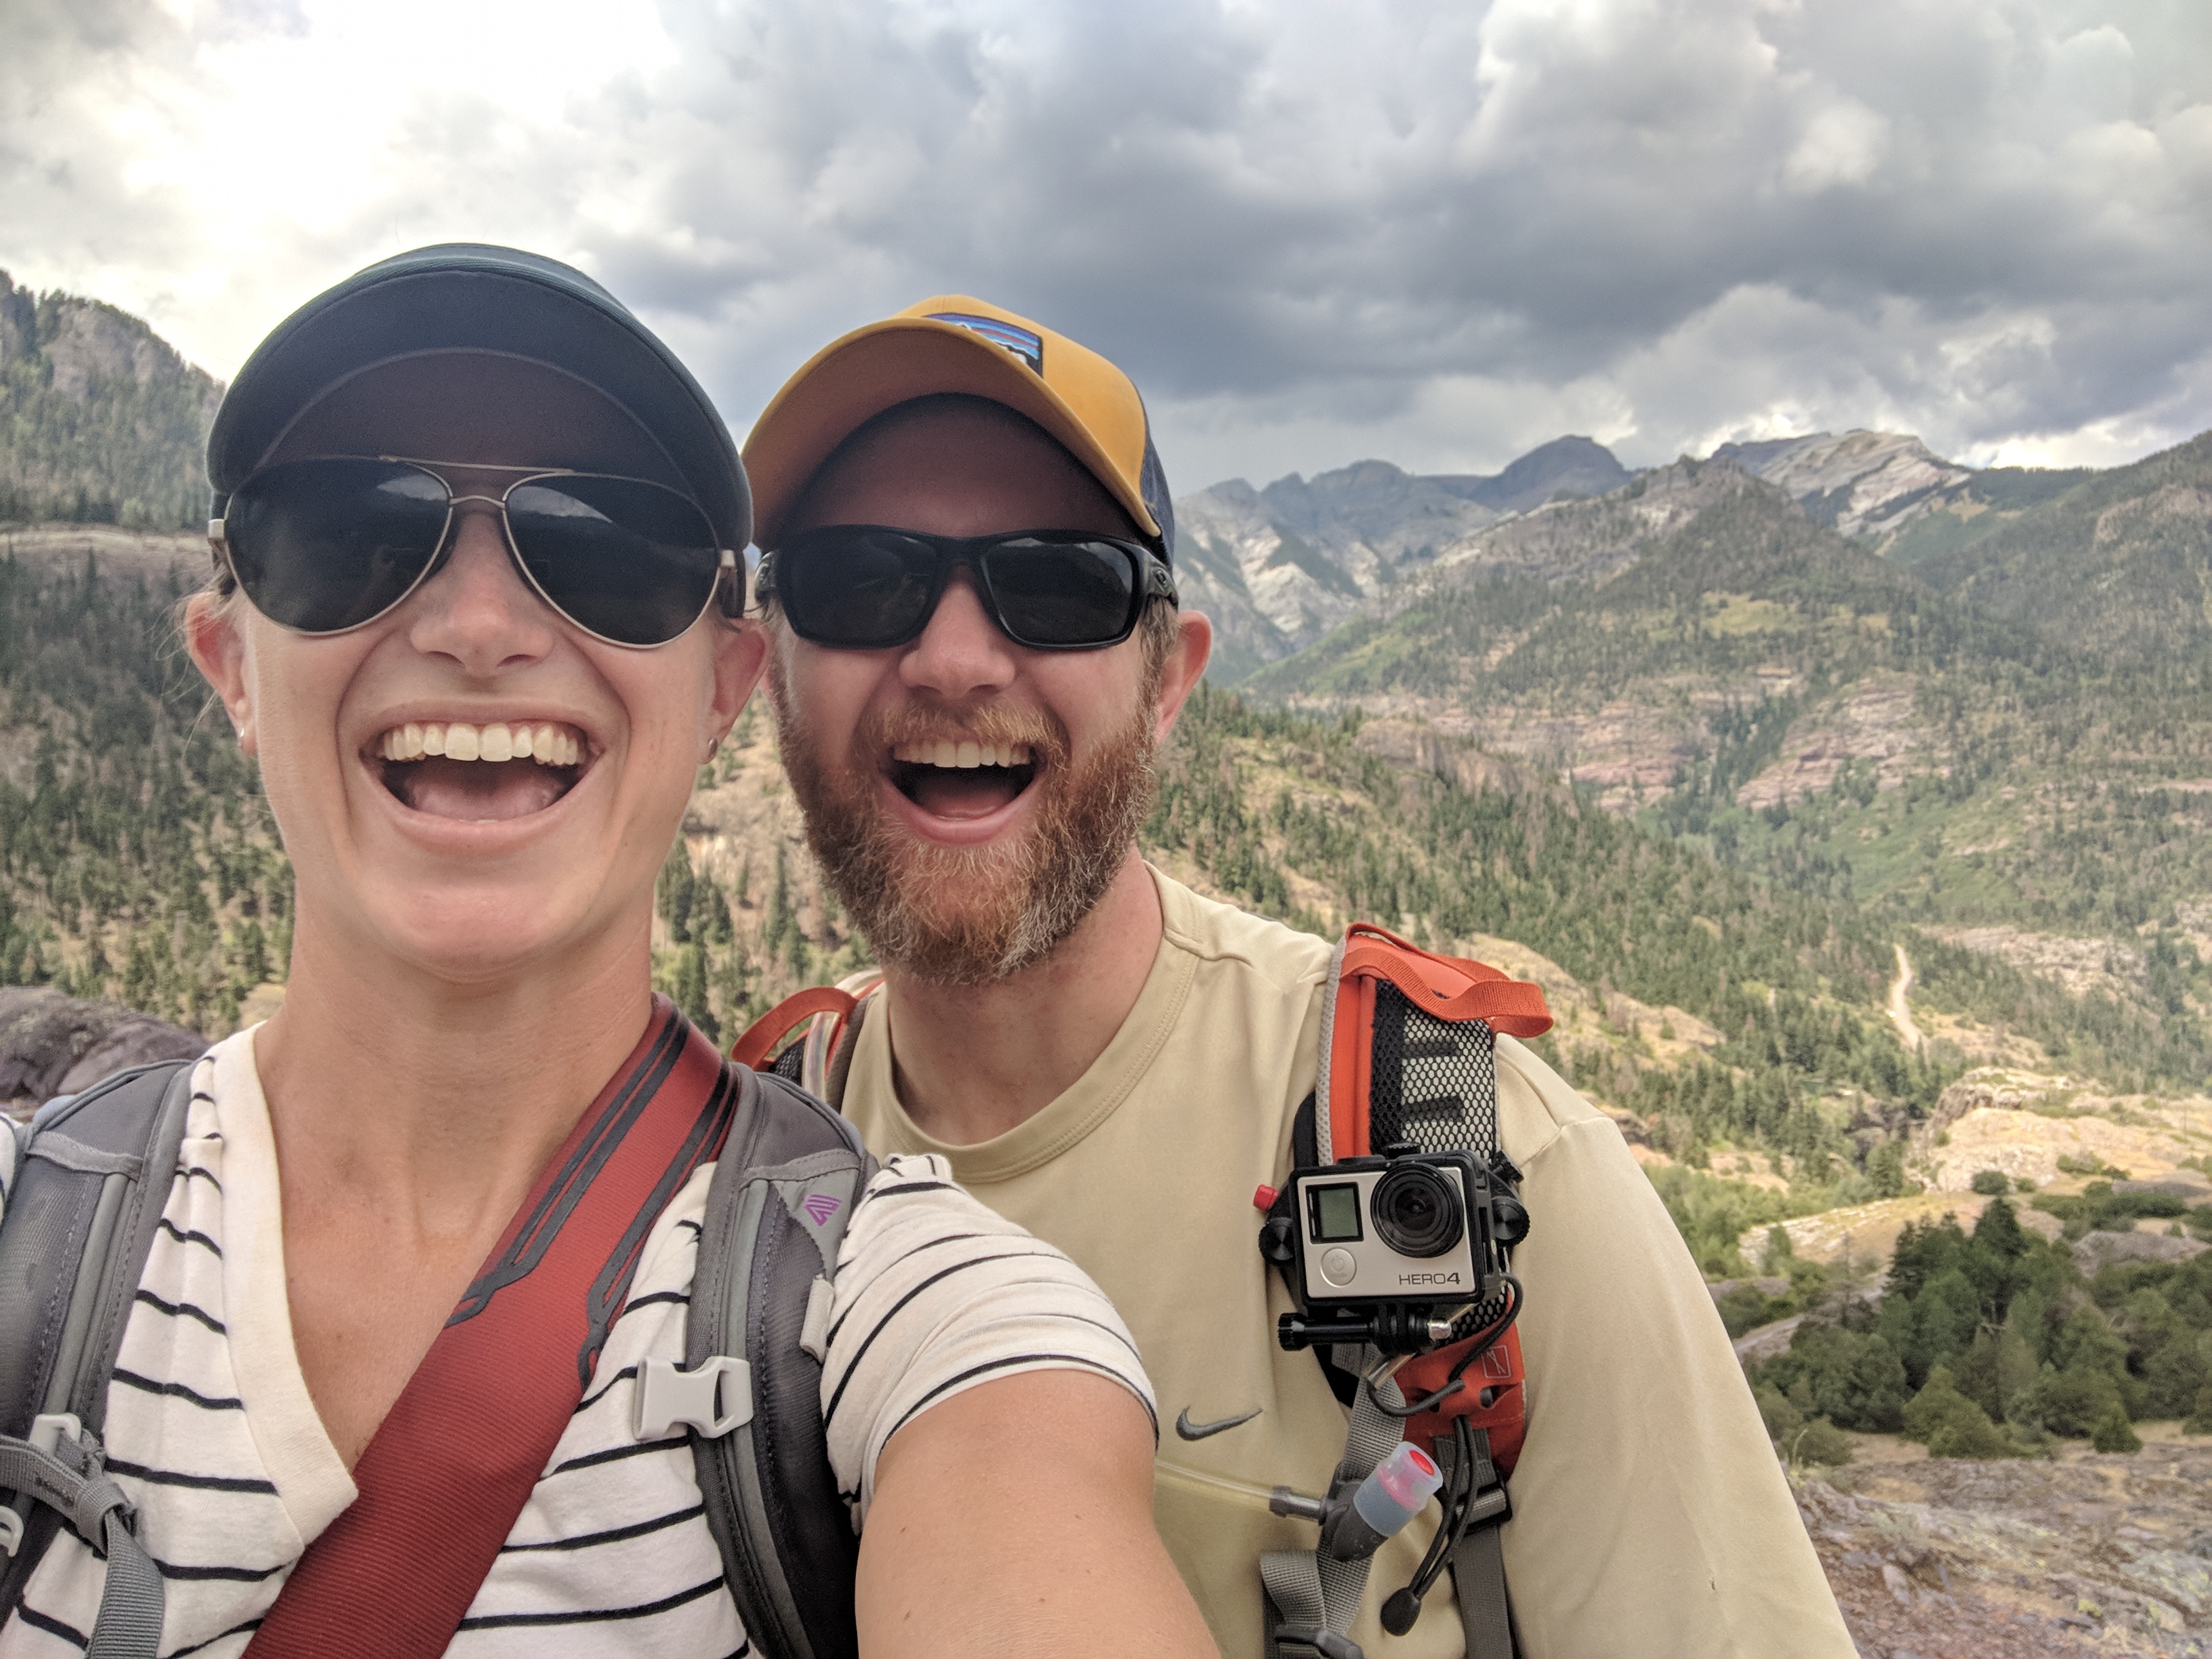
Turn left on the gravel road and hike about 50 yards uphill to a trail marker where the Perimeter Trail branches off to the right. You’ll hike through a beautiful, wide-open meadow to a rock hillock above the 550. This is a great spot to stop and have a snack, take a photo, or just enjoy the scenic beauty of Ouray. From this spot you’ll have panoramic views of Mt. Abram, Hayden Mountain and the Uncompahgre Gorge.

Vancisin_20180714_DSC_2439
Hiking through the meadow.
Vancisin_20180714_DSC_2445
View from the rocky hillock with the 550 down below.

We stopped here for a customary selfie and chatted with a couple that visited the Ouray area annually during the summer months for many years. They were hiking the Perimeter Trail on this particular day, but they were avid off-road aficionados – we gather there are lots of great options for this type of adventure in Ouray.

IMG_20180714_122114
Flattering selfie.

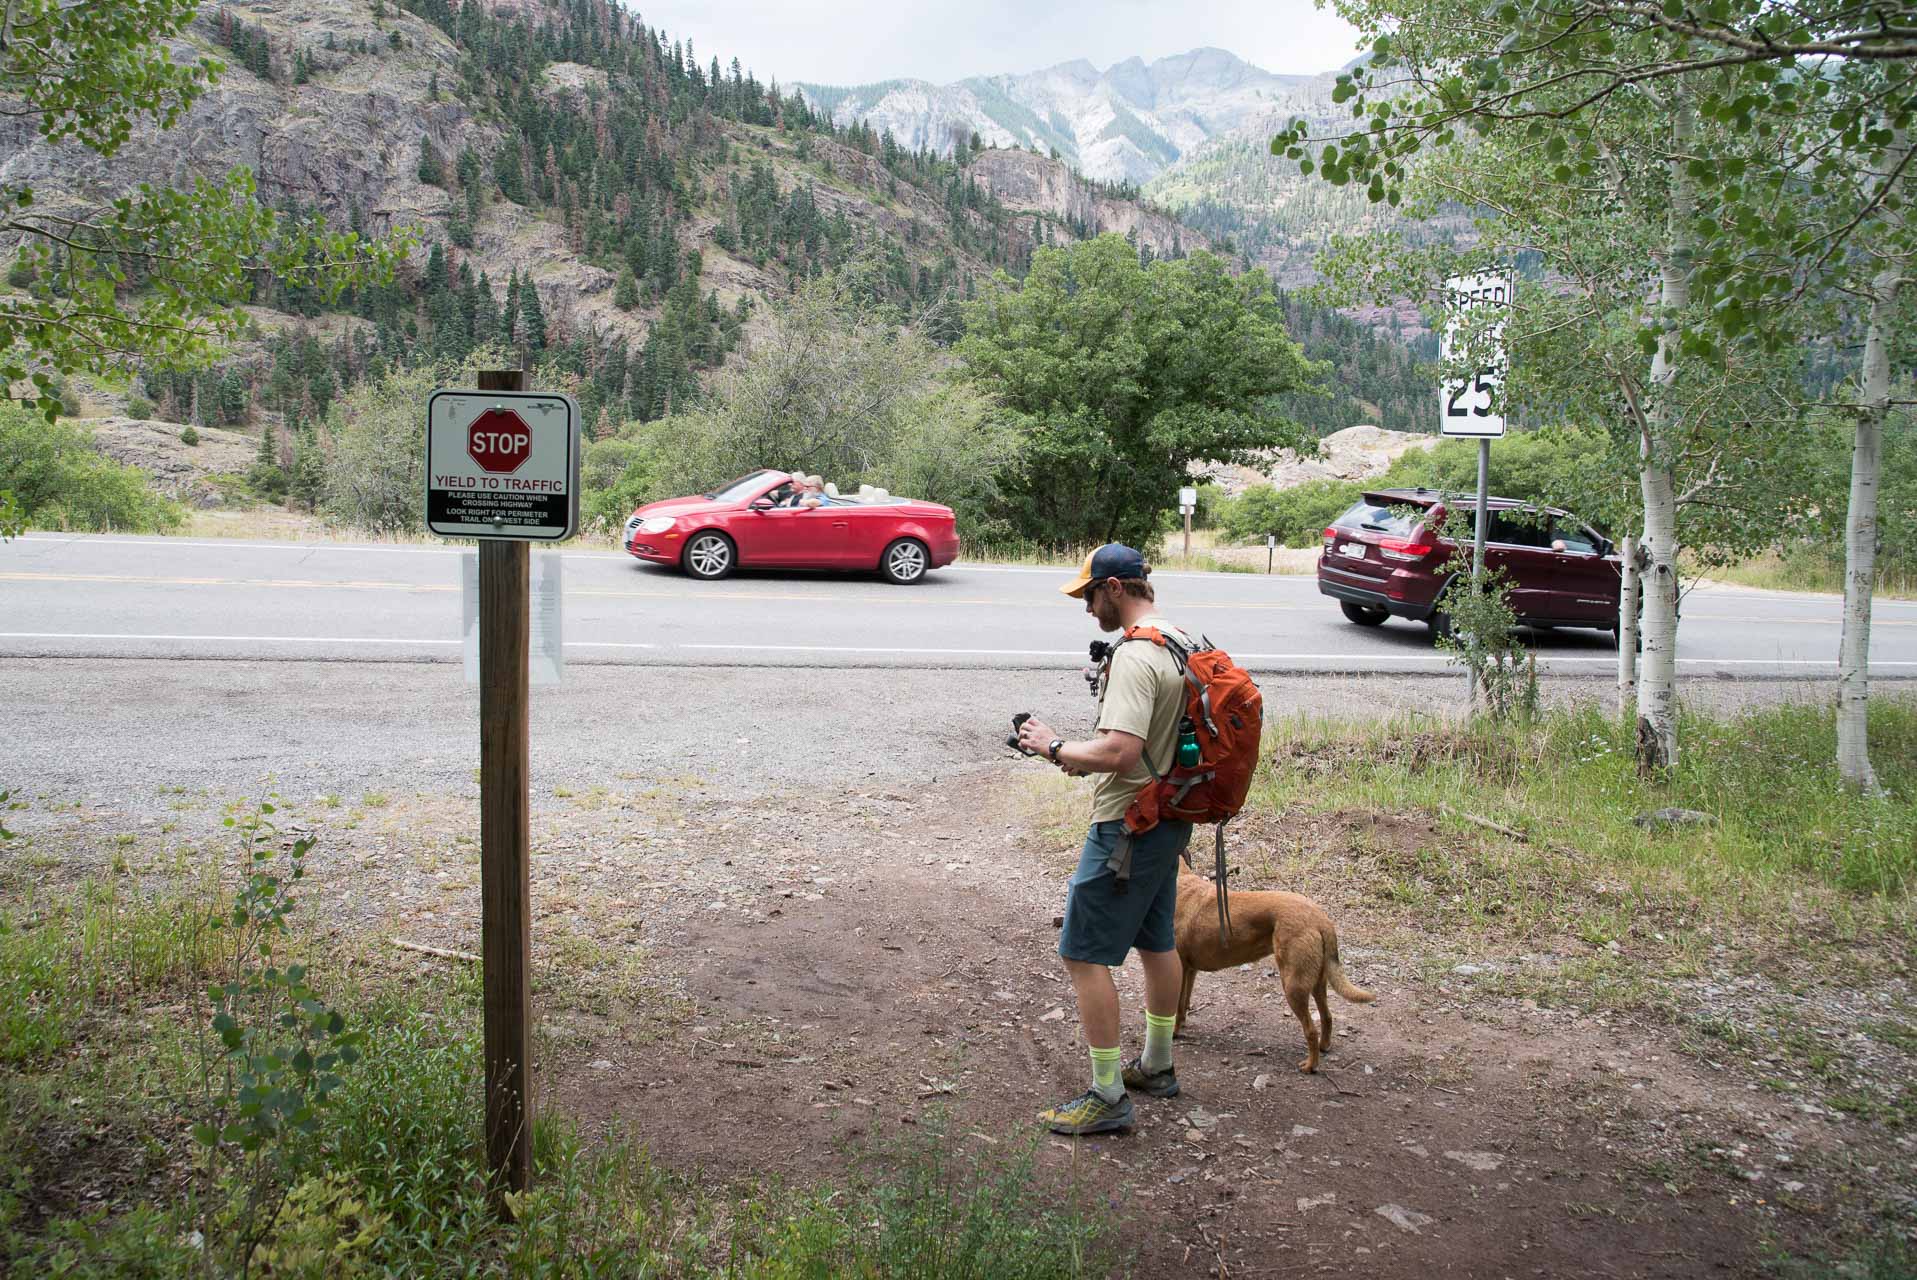
From this hillock, the trail descends steeply down to the 550, famously known as the Million Dollar Highway. This is a windy section of road and though the speed limit is listed at 25 MPH it is right at a speed transition point and many of the cars seemed to be traveling much faster – be very careful when crossing here. Make sure your dog is on-leash or under good voice control; keep a close eye on children as well, if you have them.

Vancisin_20180714_DSC_2453
Crossing the 550 – cars have right-of-way so cross carefully.

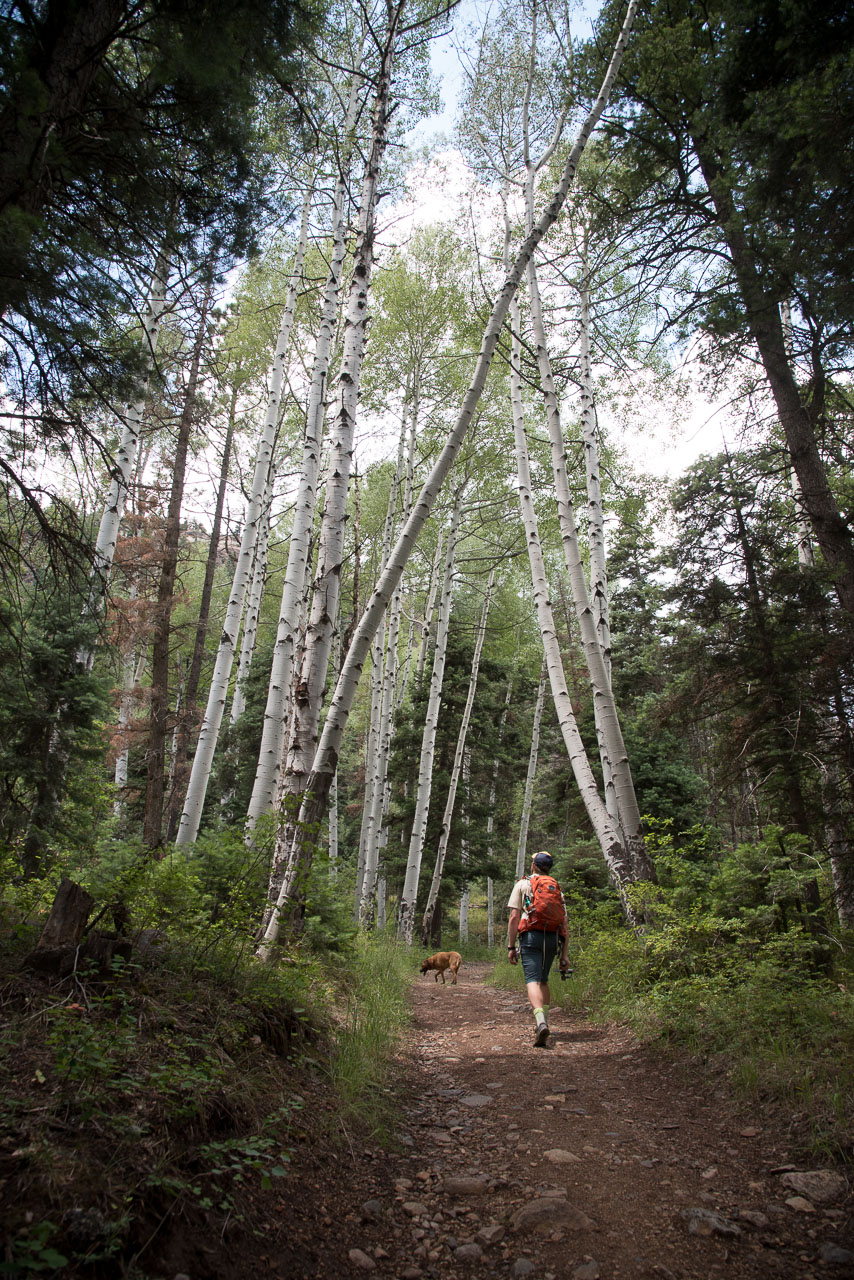
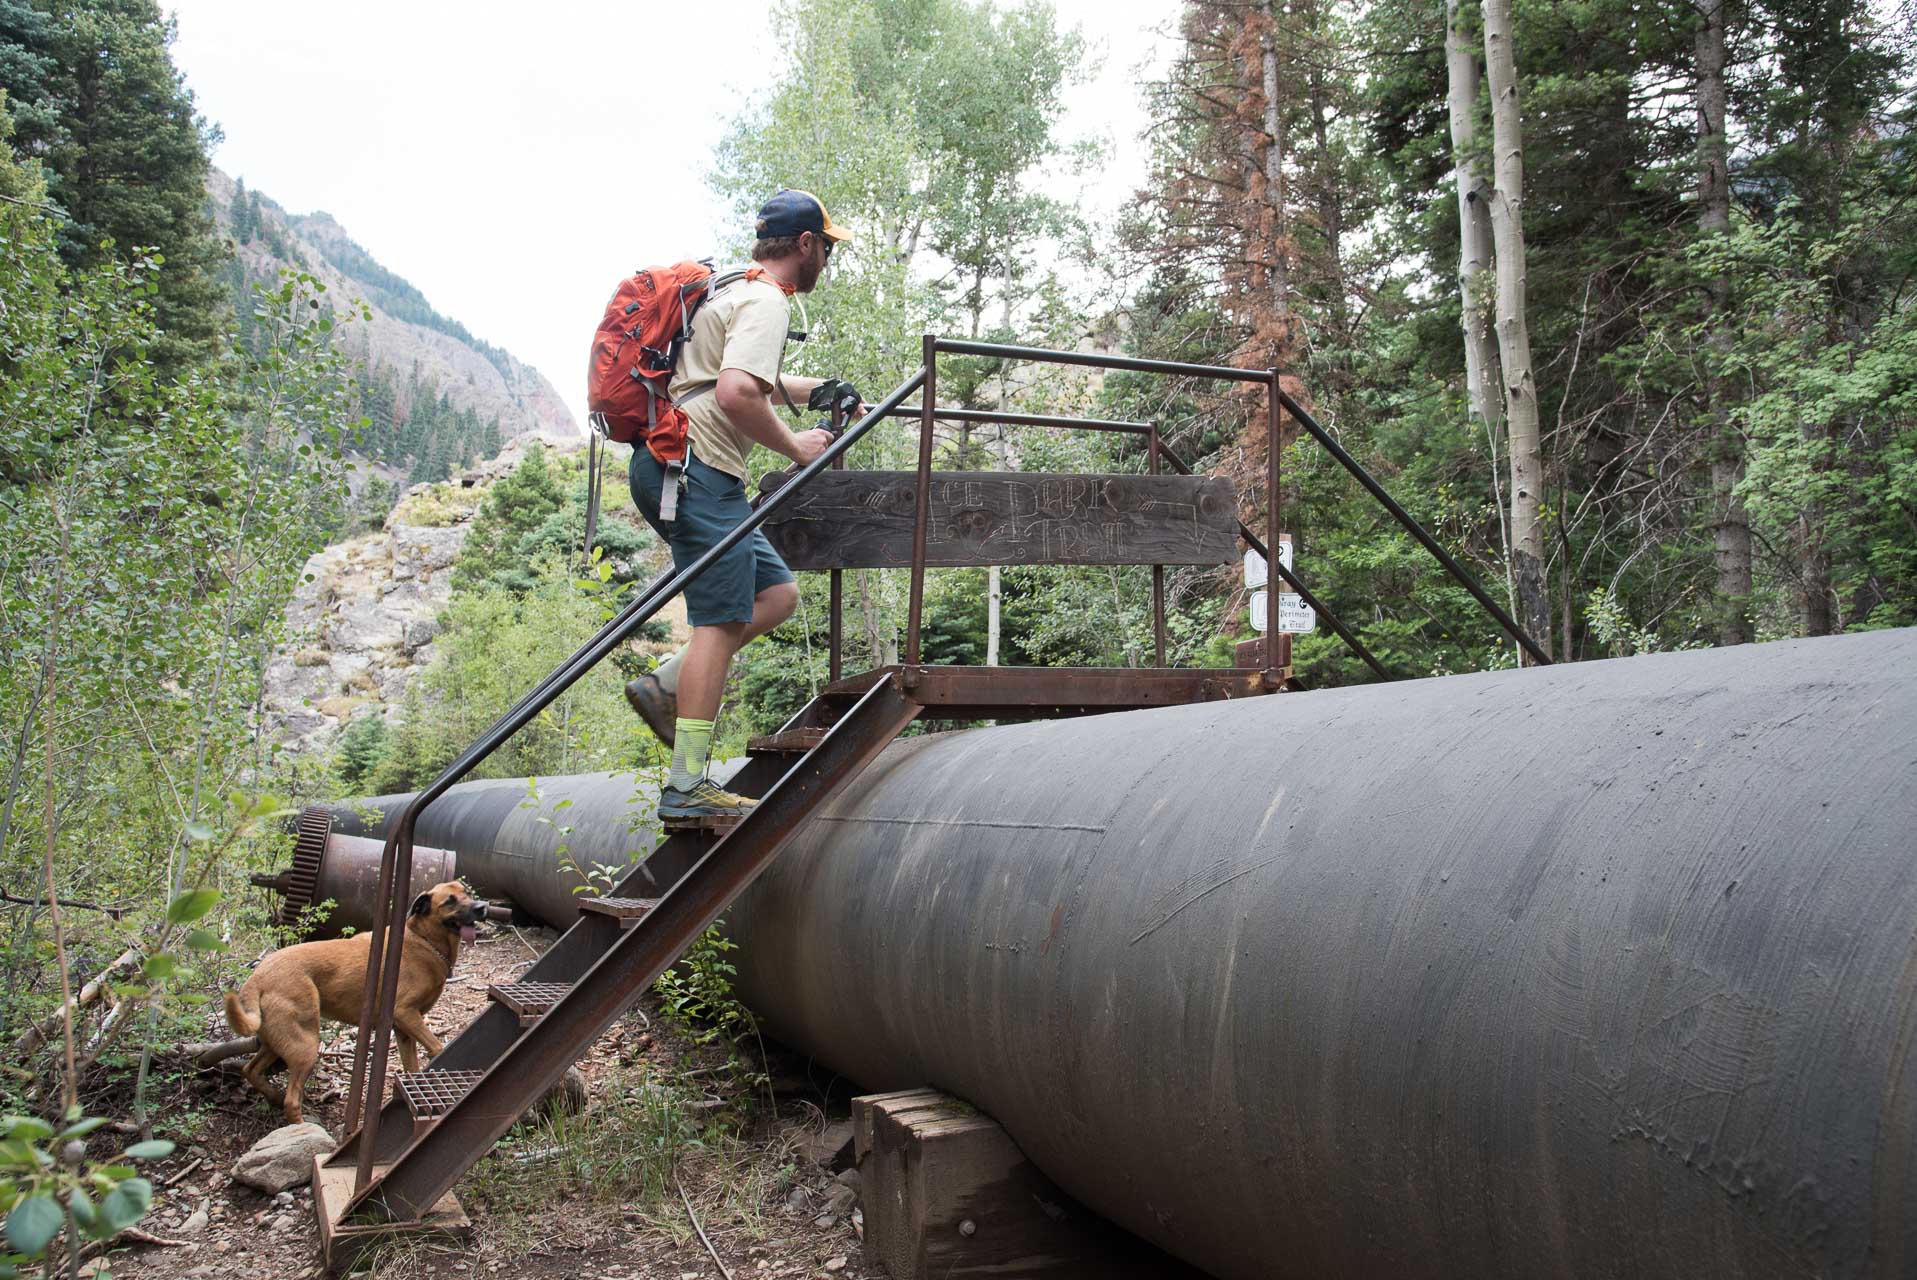
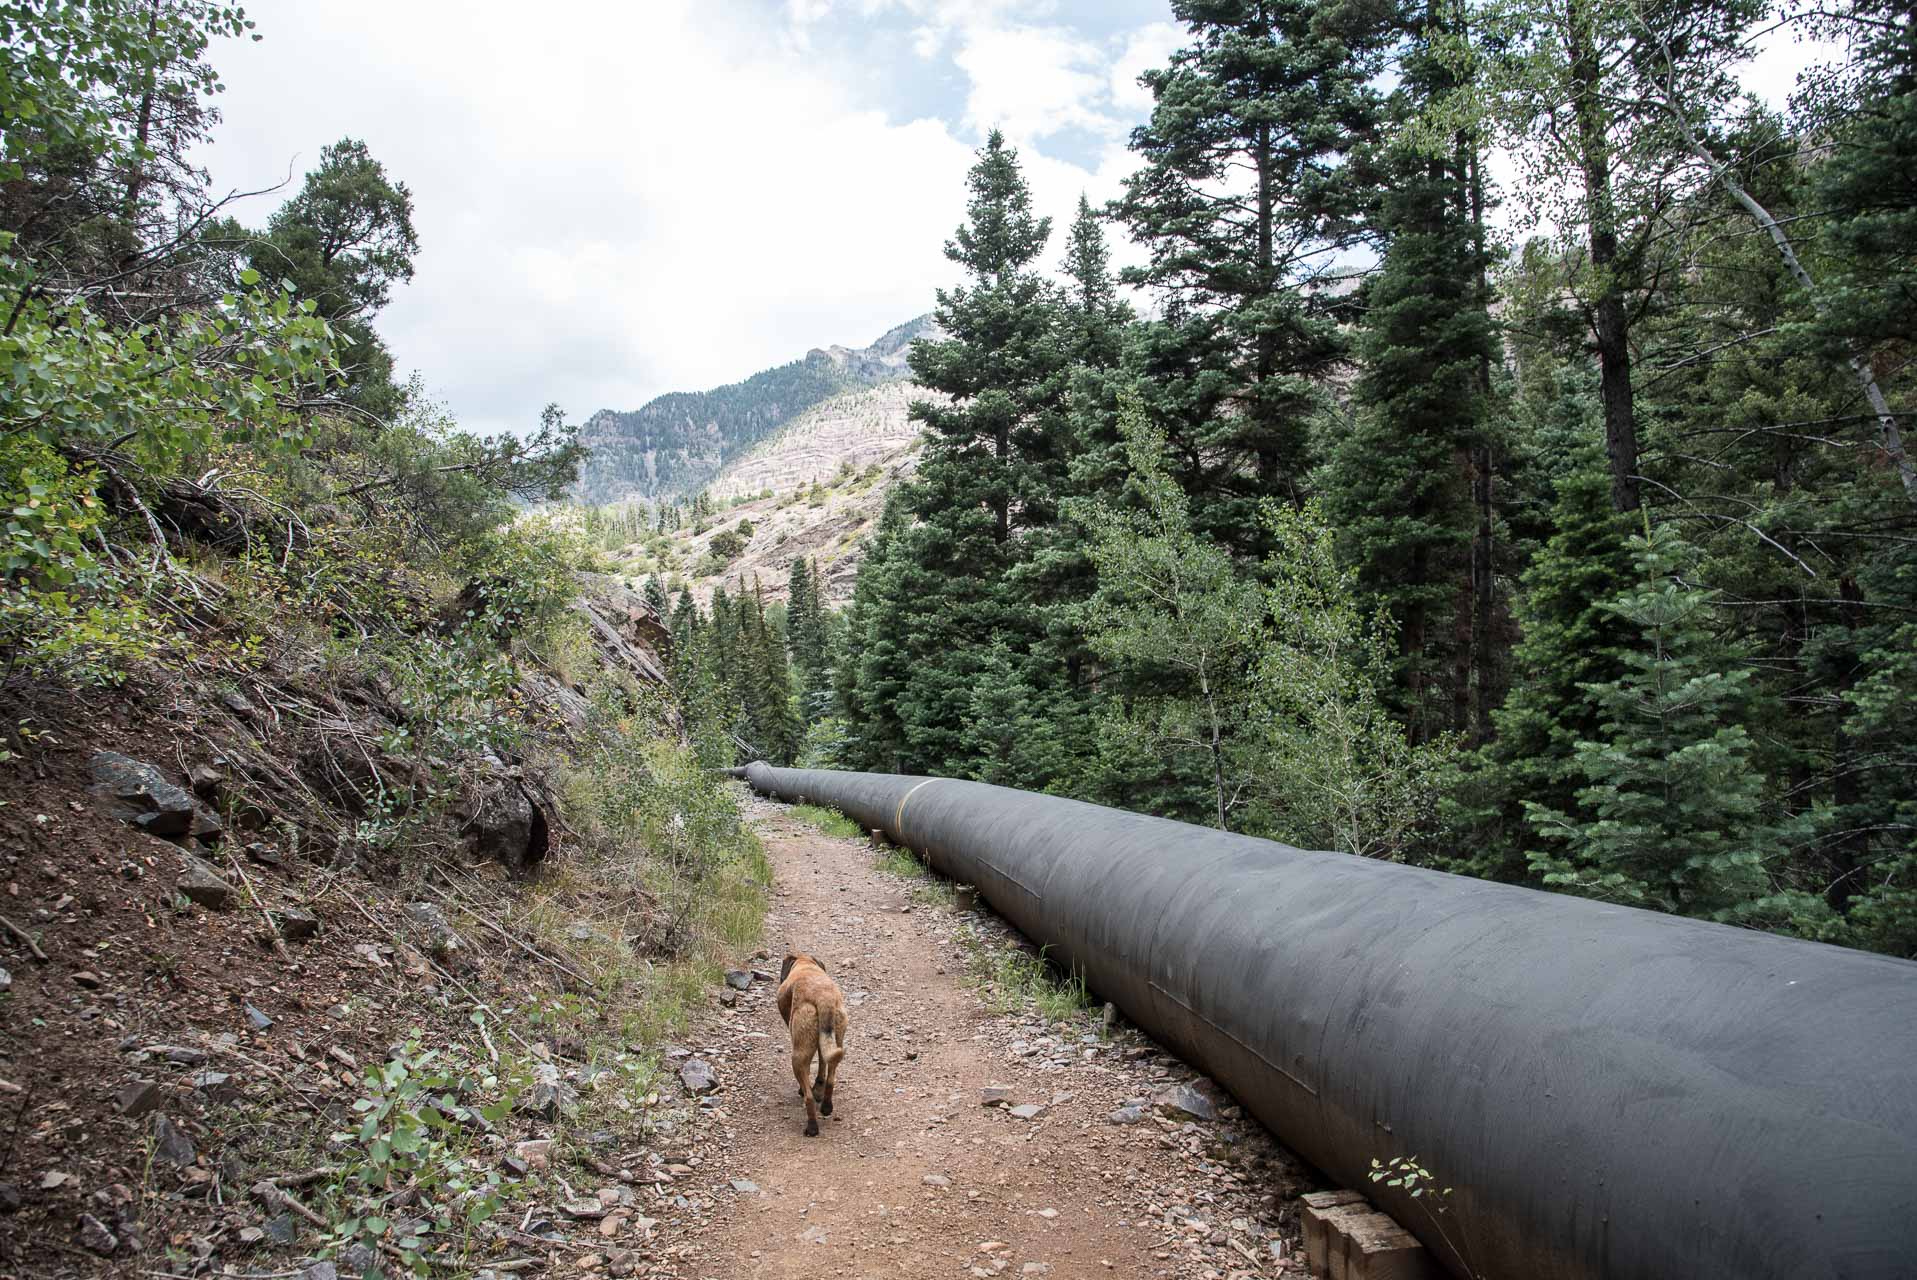
The trail meanders through some birch woods until you enter the Ouray Ice Park, which is marked by crossing over a large, black pipeline. The Ouray Ice Park is one of the premier ice climbing destinations in the world and hosts a famous festival in January each year. The park is manmade and takes advantage of the steep sides of the Uncompahgre Gorge.

Vancisin_20180714_DSC_2463
Beautiful birch trees!
Vancisin_20180714_DSC_2457
Crossing into the Ice Park – Bean was not a fan of the metal grate stairs…
Vancisin_20180714_DSC_2460
This impressive black pipe transports water, but is actually unrelated to the Ice Park.

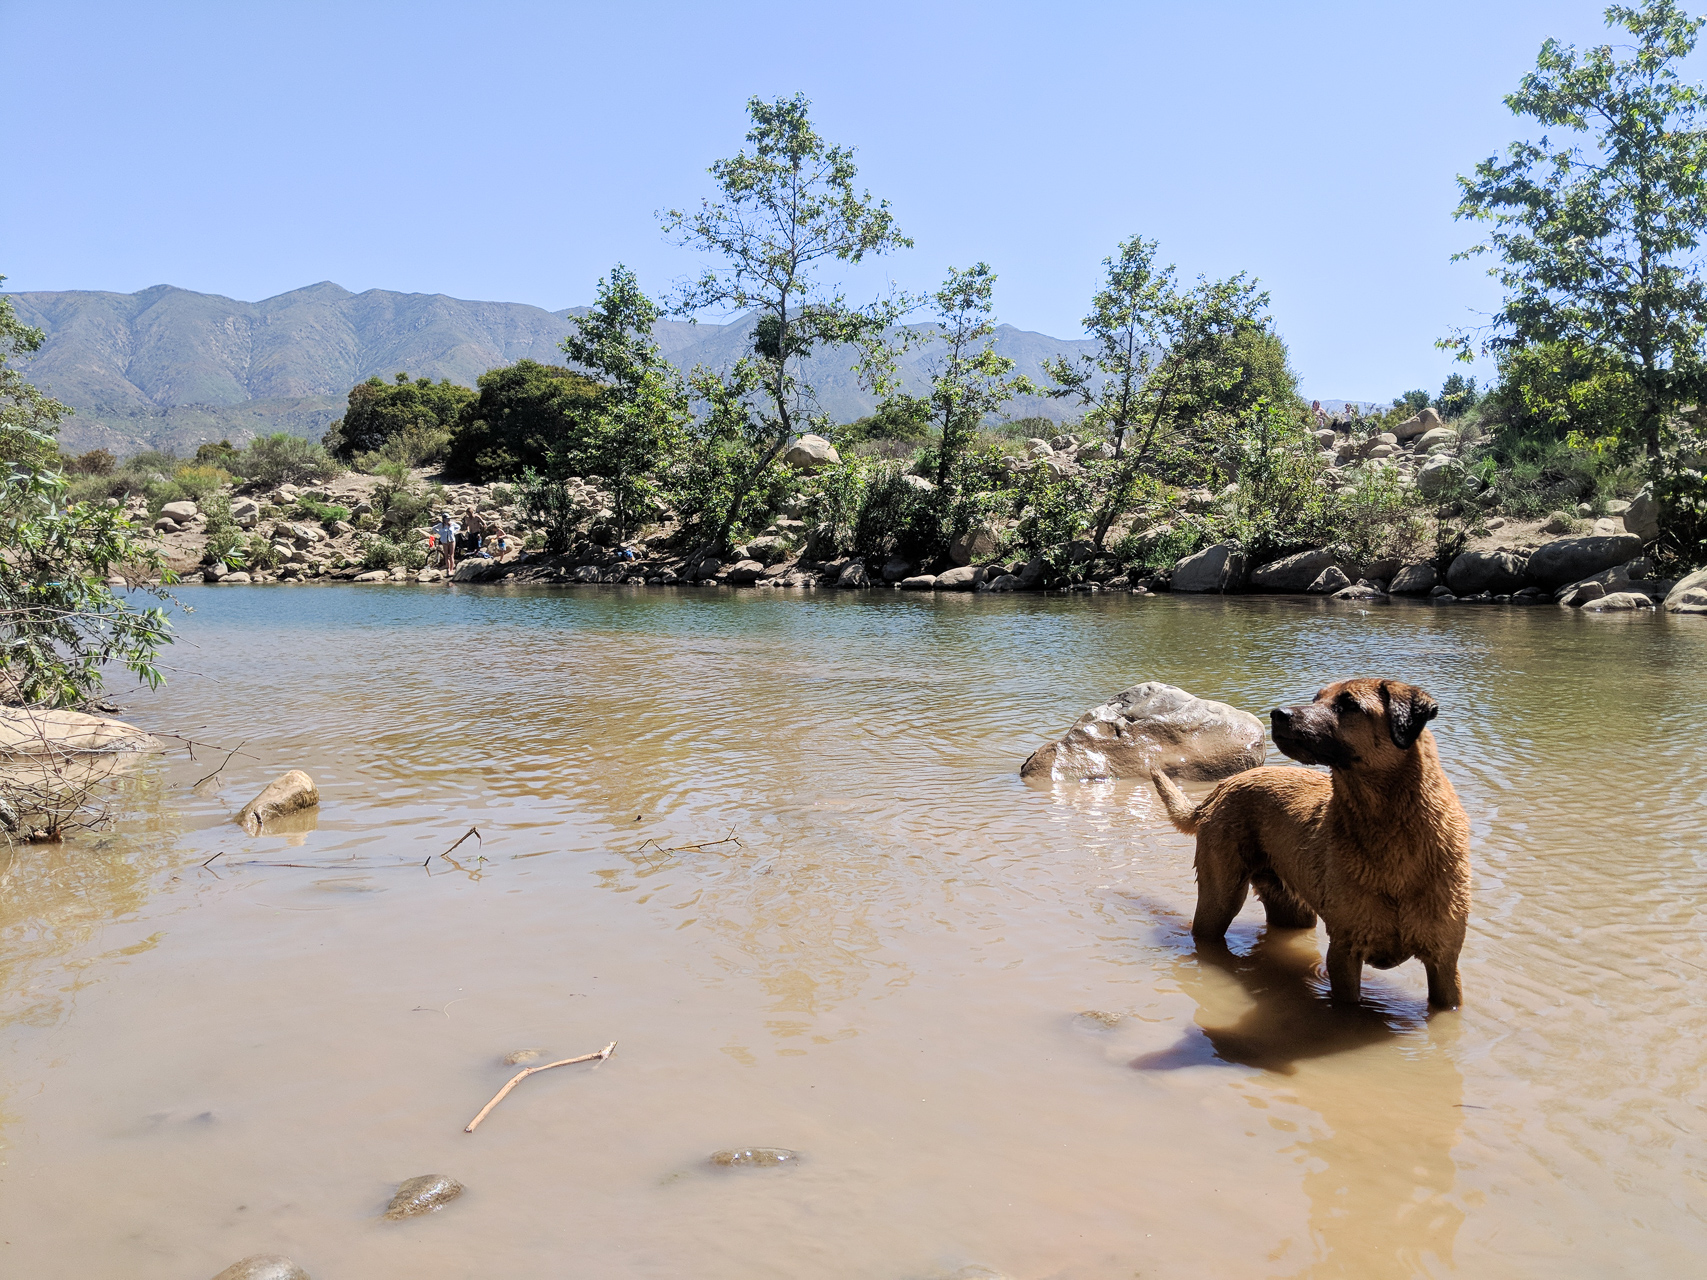
We found a beautiful small pond along this stretch of trail and went down to let Bean swim. The water was practically glacial! Our dog is an obsessive swimmer, so we had to be careful not to allow her to swim too much. We waded in a short distance, but couldn’t withstand the frigid temperature for very long. It did have a nice cooling (numbing!) effect on our tired feet.

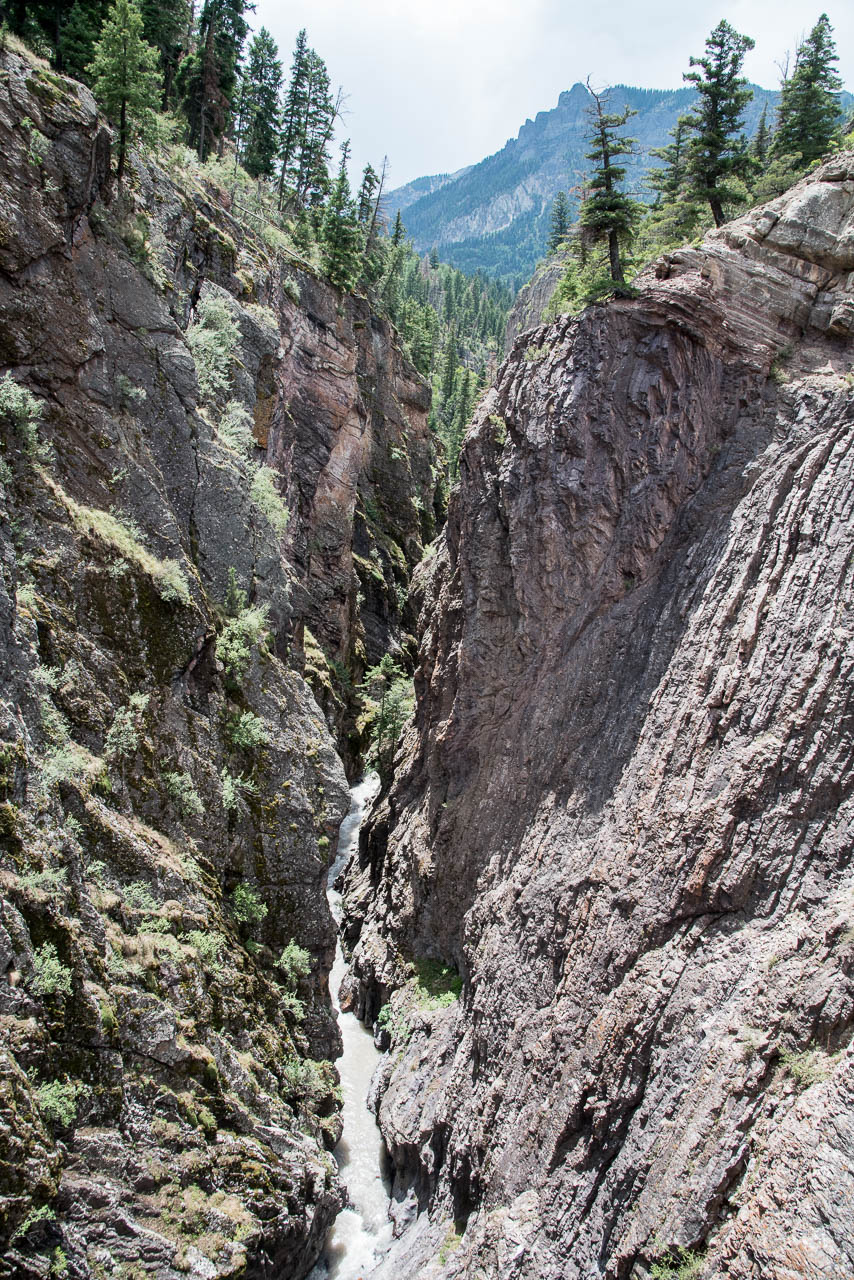
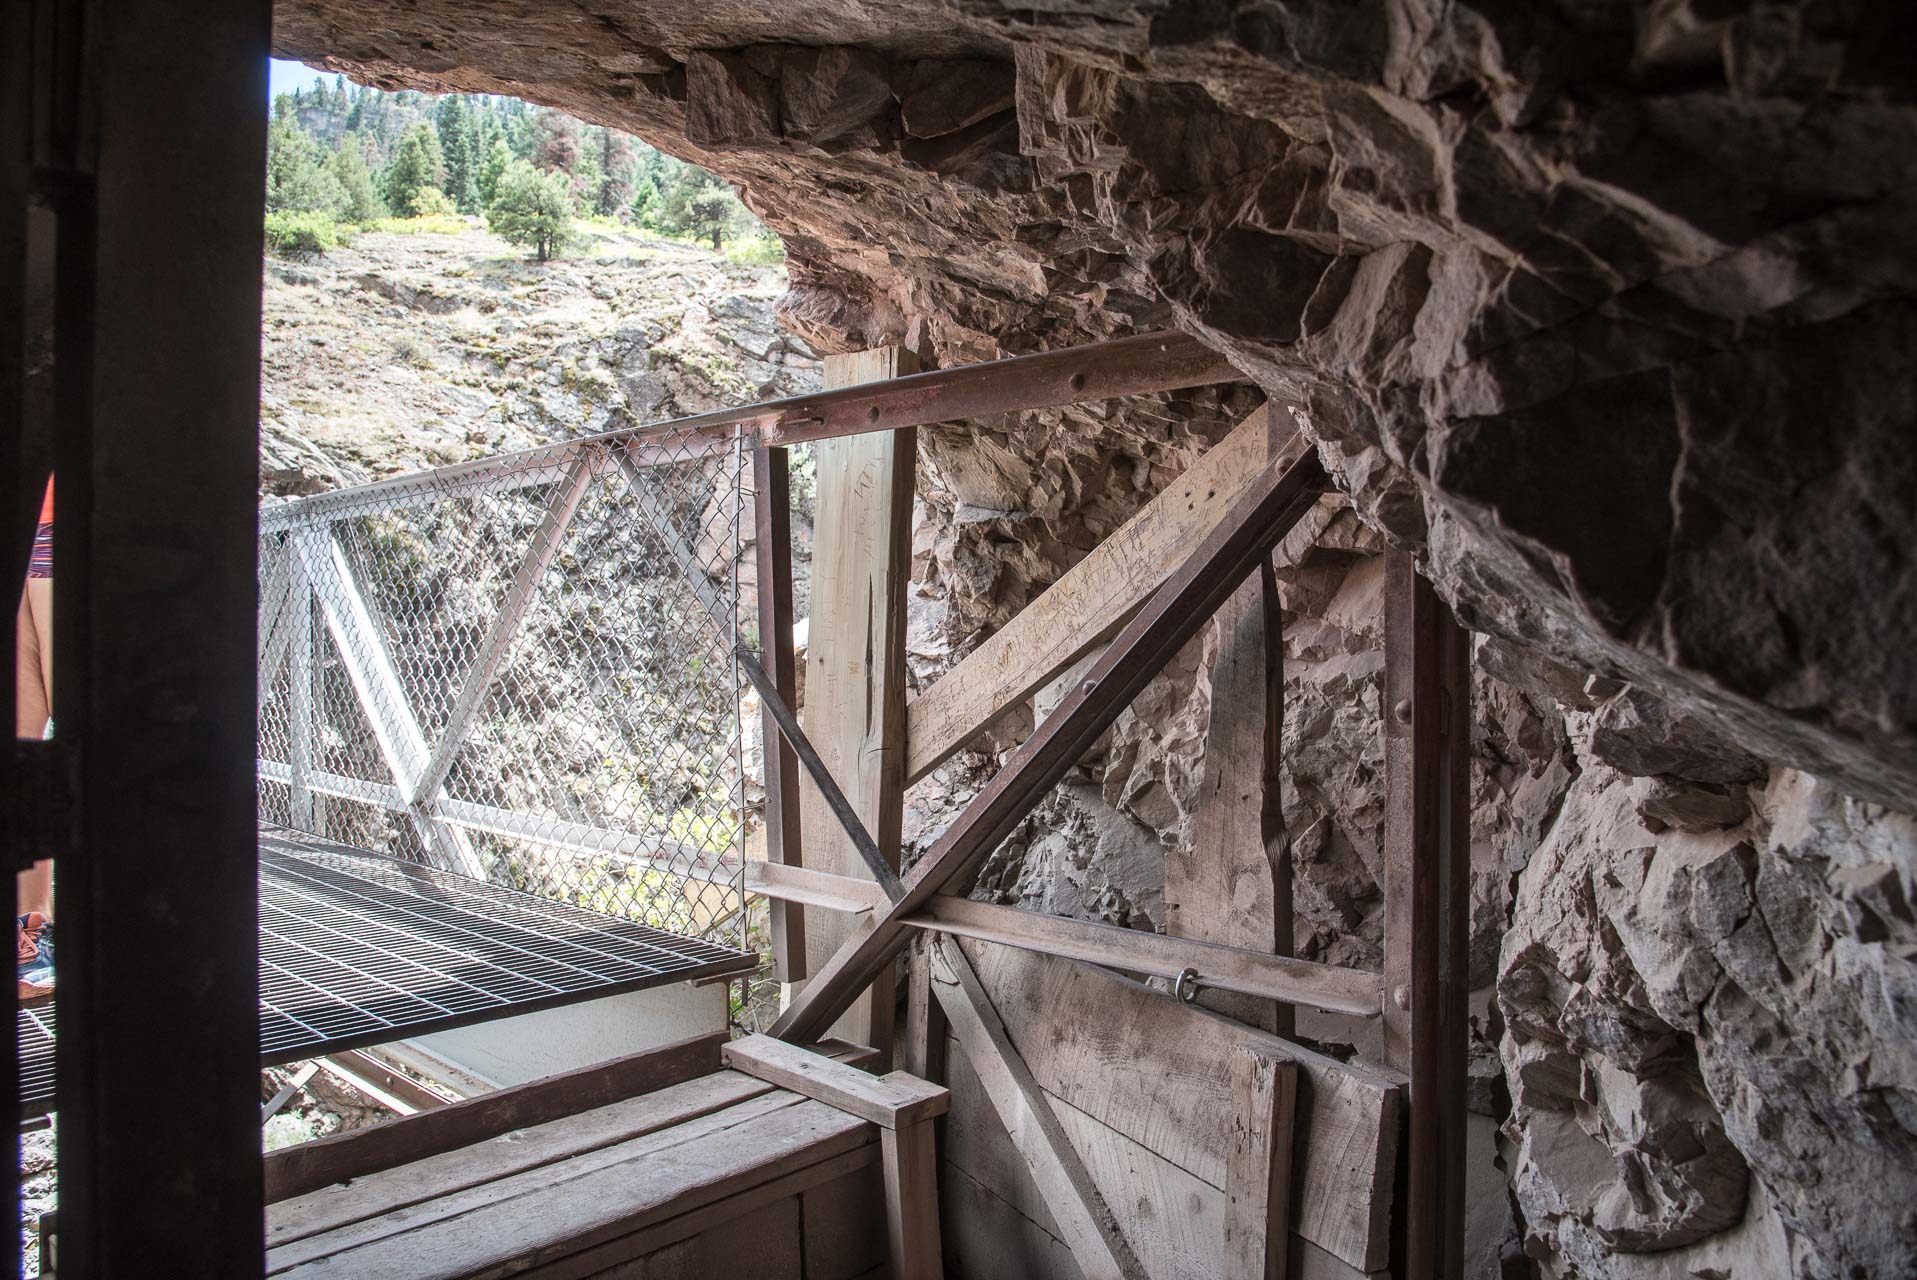
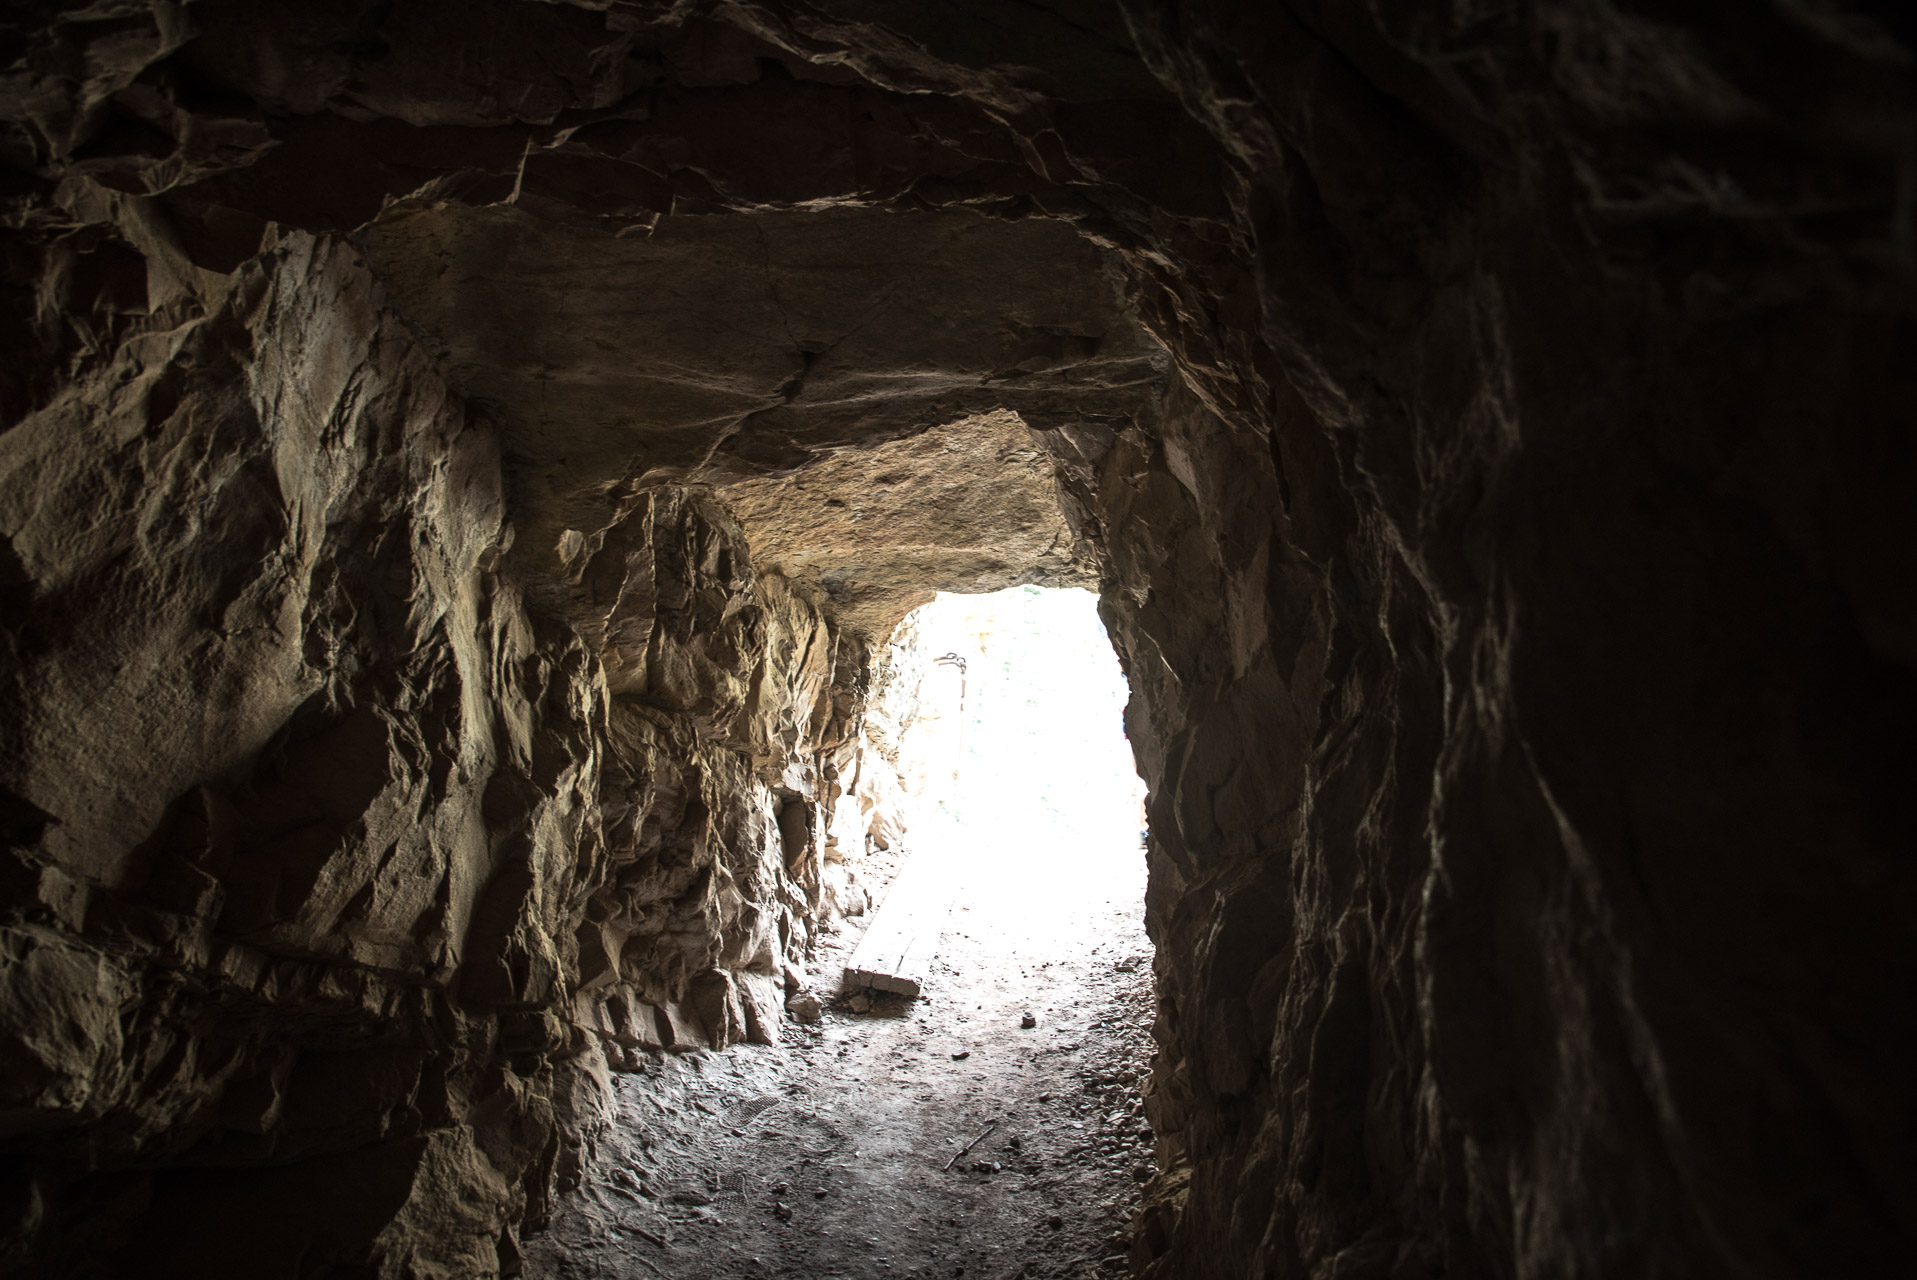
About 4.2 miles into the hike you’ll reach the Box Canyon High Bridge. Box Canyon a popular tourist attraction in the area. The metal grate bridge that crosses the canyon is suspended nearly 100 feet above the rushing water below. It was very impressive! We crossed around 1:00 PM on a Saturday, so we found it to be a little crowded and Bean was very nervous. Once across the bridge the trail goes through a rock tunnel and descends some stairs. The stairs are very steep, so the provided hand rail is reassuring.

Vancisin_20180714_DSC_2478
Box Canyon.
Vancisin_20180714_DSC_2480
The bridge across Box Canyon as seen from the rock tunnel.
Vancisin_20180714_DSC_2482
Rock tunnel.
Vancisin_20180714_DSC_2486
Hubby after successfully descending the steep staircase.

The trail continues for another three tenths of a mile before meeting up with Upper Pinecrest Road. You’ll travel on this gravel road for one switch back and then the trail branches off towards Oak Creek. This section of trail is relatively new, as is the bridge that crosses the creek.

Vancisin_20180714_DSC_2496
Bridge crossing Oak Creek.

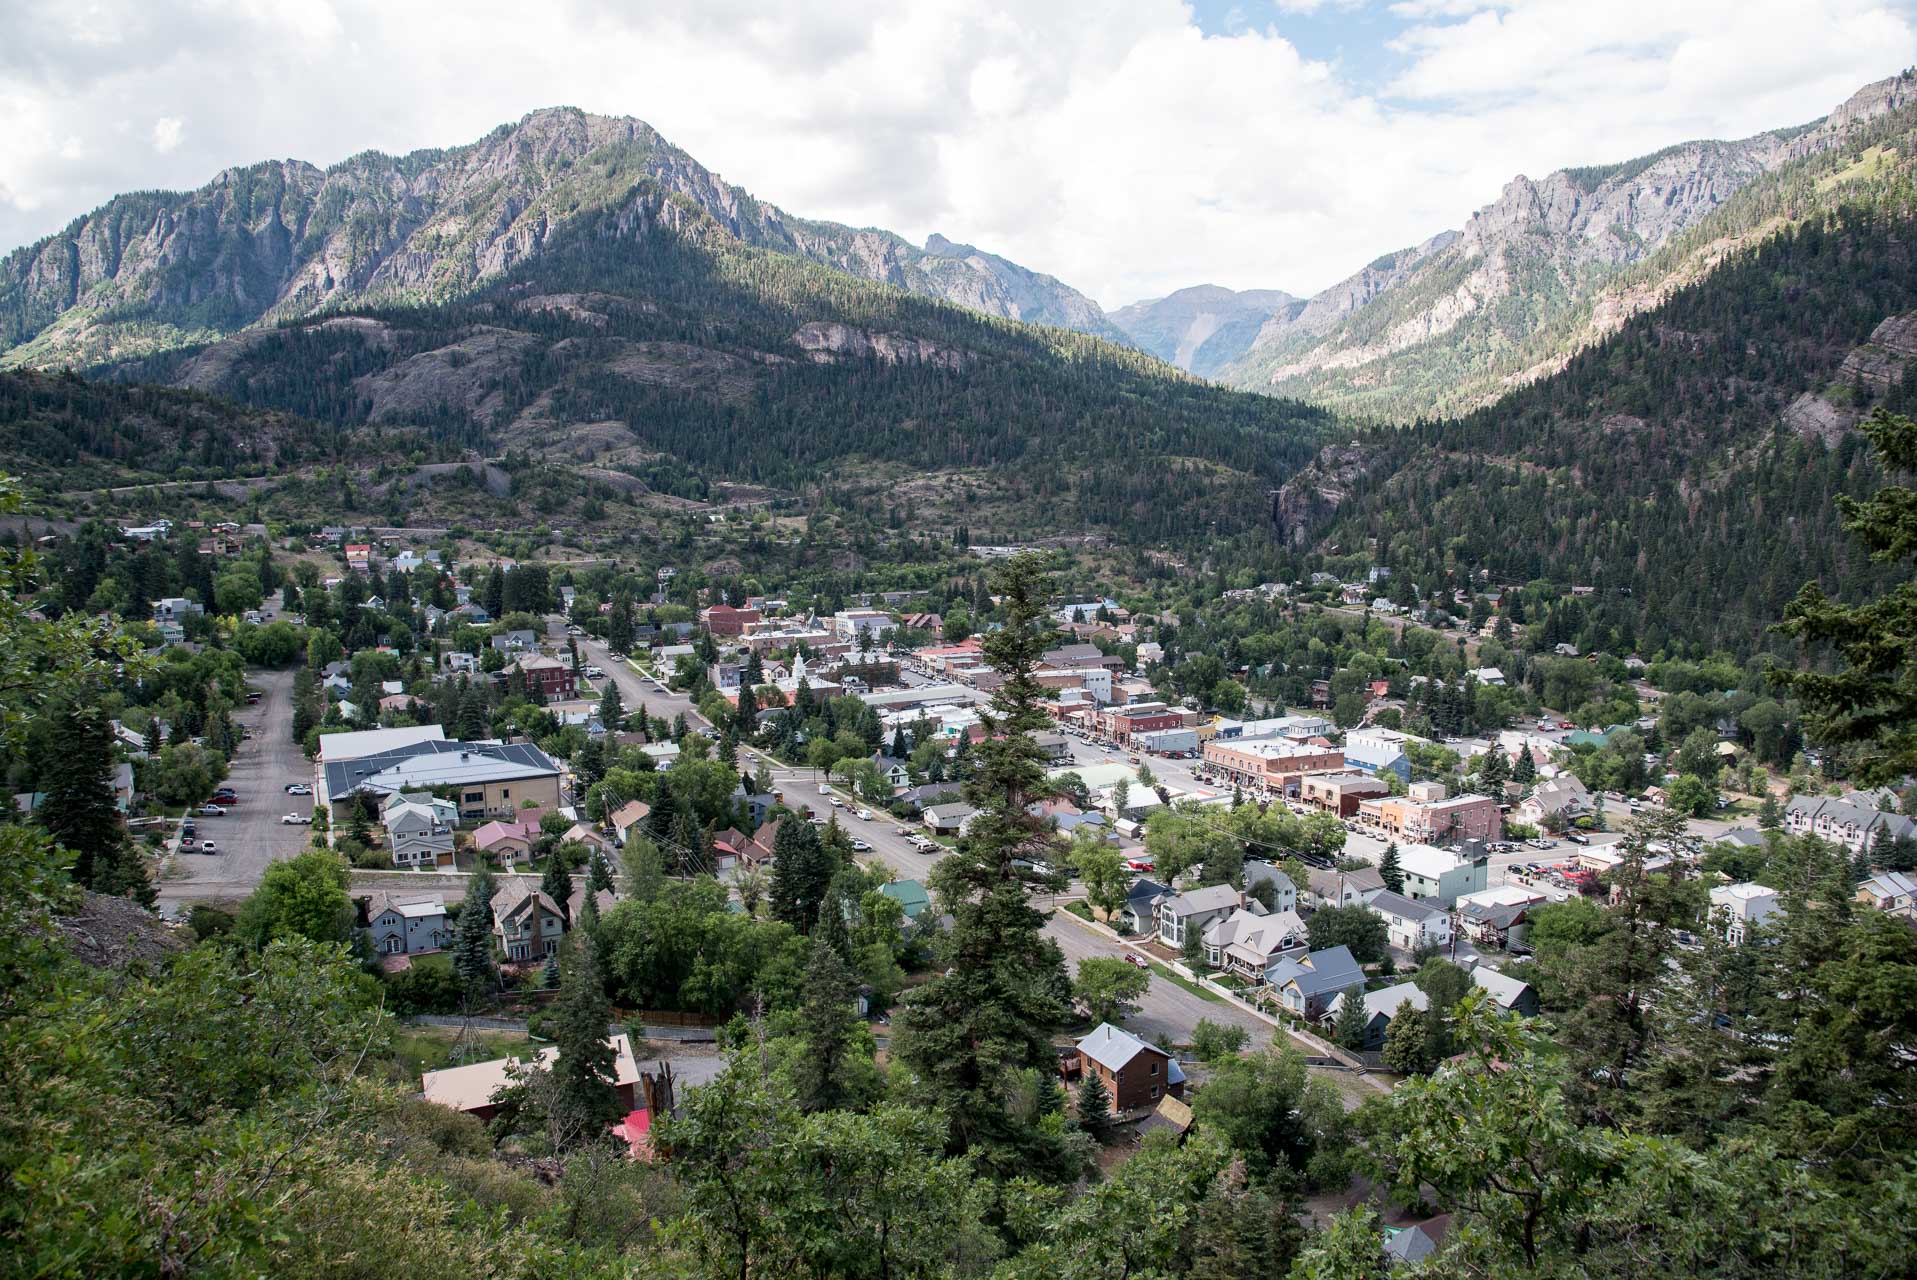
Before reaching the Oak Creek Bridge, there is an viewpoint overlooking the town and the surrounding mountains. This spot offered my favorite view of the whole hike – the Amphitheater is a stunning backdrop to this quaint mountain town.

Vancisin_20180714_DSC_2490
View of Ouray with the Amphitheater in the background.

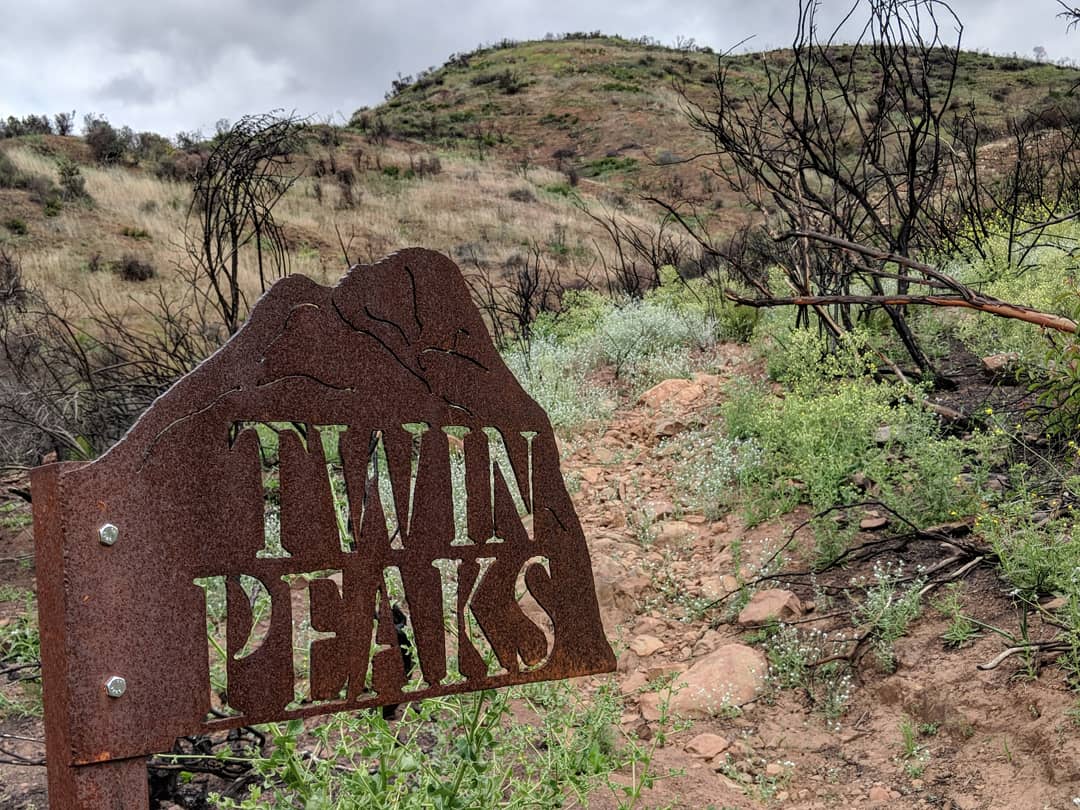
From the bridge it’s just three tenths of a mile to Queen Street and the Twin Peaks Trailhead. To complete the loop you can follow the roads (Queen Street to Oak Street) back to the Visitor’s Center. We elected to head directly into town to grab a burger!

We highly recommend this hike for its scenic beauty – you get a lot of bang for your buck!

Thanks for reading our review of The Ouray Perimeter Trail! Please check out our video trail review of The Perimeter Trail on YouTube.

South Rim Trail

Name of Hike: Grand Canyon South Rim Trail

Trail(s): South Rim Trail

Location: Grand Canyon, Tusayan, AZ

Wilderness Area: Grand Canyon National Park

Type of Hike: Out-and-back or one way (facilitated by shuttle buses)

Difficulty: Easy

Distance: 12.8 miles one way

Estimated Time Commitment: Hiking times can vary for a number of reasons, including but not limited to hiking distance, shuttle times and photo stops. The section we hiked from Bright Angel Trailhead to Mohave Point (out and back) took around 4.5 hours.

Views: There are unbeatable views along the entire length of the South Rim Trail.

Popularity: The South Rim Trail at the Grand Canyon is exceptionally popular (especially during the summer months), and you can expect to encounter many other people. Though dogs are allowed on leash, we did not encounter many.

Facilities/restrooms: There are many restrooms along the route at the various shuttle stops. They will range from nicely maintained pit toilets to full blown restrooms with sinks/mirrors/running water (luxury!).

Directions: Drive to Williams, AZ (from wherever you are!). From Williams, drive north on AZ-64 for approximately 55 miles. Before you reach Grand Canyon Village, you’ll need to pay the fee to enter the park. The official website for the Grand Canyon National Park has all the information you could possibly need on directions, fees, lodging, activities, weather and traffic alerts, etc. If your first stop is the visitor’s center, stay straight on the South Entrance Road. The road will curve around to the left and the visitor’s center will be on the right. That’s as good a place to start as any!

Parking: There is ample parking at the South Rim of the Grand Canyon, though it is limited at each specific spot. The FREE! shuttle buses make it easy to park anywhere within the park and still easily access all points on the South Rim Trail. If you are traveling with a furry friend, be aware that dogs are unfortunately not allowed on the shuttle buses.

Since we had Bean with us, needed to park at the Bright Angel Lodge to access the section of the South Rim Trail that we wanted to hike. Parking here accommodates roughly 50 cars – which sounds like a lot, but it’s not nearly enough. We lucked out in finding a spot even though we arrived relatively early in the morning for our hike.

Vancisin_20180713_DSC_2265
Sign for the Bright Angel Trail at the parking lot for the Bright Angel Lodge.
Vancisin_20180713_DSC_2268
The Bright Angel Trailhead.

We started our section hike of the South Rim Trail at the Bright Angel Trailhead and hiked west towards Hermits Rest.

The incredible views start immediately and they never go away! We stopped often to take pictures and soak in the grandeur of this natural wonder.

Vancisin_20180713_DSC_2303

Not far along the trail, you start gaining elevation. The elevation change is not significant, but most of the elevation change on this section hike (486 feet gain) occurs between the trailhead and the Trailview Overlook. The trail switchbacks for less than a half a mile and then all elevation change is very gradual.

Vancisin_20180713_DSC_2262
View of the Bright Angel Trail as it descends into the Canyon.

This section of the trail is not quite as popular as the sections closer to the two visitor’s centers – The Grand Canyon Visitor’s Center and Verkamp’s Visitor’s Center. No private vehicles are allowed on the road to Hermits Rest from March 1 through November 30, so most people experience this section of the South Rim from the shuttle buses.

The majority of the South Rim trail is on a wide paved path where more than four people can comfortably walk abreast. West of the Bright Angel Trailhead, the section that we hiked, the path narrows to a path only wide enough for two people. While the majority of the path is paved, there are sections west of Powell Point that are well packed dirt/rock. The entire length of the trail is very well maintained – there were crews cleaning and making improvements along the trail the day we hiked.

Vancisin_20180713_DSC_2279
A section of the South Rim Trail by the Trailview Overlook with a trail marker…and a hubby.
Vancisin_20180713_DSC_2364
My favorite section of the South Rim Trail (no longer paved).

There are no guide rails along the trail until you get the various viewpoints. There are places where the trail gets close to the edge of the canyon, so be careful along those stretches!

Vancisin_20180713_DSC_2351
Guard rail at one of the viewpoints.

The trail is well marked with signs and the various shuttle stops make it easy to determine exactly how far you’ve gone. Along a significant length of the South Rim Trail runs the “Trail of Time.” The Trail of Time educates the public on geologic features of this natural wonder. Each meter you travel represents one million years since Earth’s origin.

Vancisin_20180713_DSC_2320
Powell Point shuttle bus stop.
Vancisin_20180713_DSC_2345
One of the free Grand Canyon shuttle buses.
Vancisin_20180713_DSC_2305
The Trail of Time.

Something to keep in mind is that the average elevation of the South Rim of the Grand Canyon is around 7,000 ft. If you are not accustomed to elevation, make sure to take frequent breaks and drink lots of water. There are water stations along the more populated sections of the Rim Trail (near the visitor’s centers), but as you get “further out” towards Hermits Rest there are no refill stations.

We would definitely rate this hike as easy and can confidently recommend it to people of all ages and physical abilities – just be mindful of the possible effects of altitude and the steep drop offs.

We highly encourage you to make the trip to see the Grand Canyon. Pictures (mine especially) do not do it justice! It will be an experience you never forget.

Vancisin_20180713_DSC_2363Vancisin_20180713_DSC_2370Vancisin_20180713_DSC_2317-Pano

Thanks for reading our review of The South Rim Trail! Please check out our video trail review of The South Rim Trail on YouTube.

Castle Rock

Name of Hike: Castle Rock

Trail(s): Castle Rock Trail

Location: Big Bear Lake, CA

Wilderness Area: San Bernardino National Forest

Type of Hike: Out-and-back

Difficulty: Moderate

Distance/elevation: 1.4 miles, 423 ft elevation gain

Estimated Time Commitment: Hiking times can vary for a number of reasons, but we estimate most people would be able to complete this hike in 1-2 hours.

Views: Yes, there are some great views from Castle Rock looking over Big Bear Lake.

Popularity: The Castle Rock Trail is exceptionally popular (especially during the summer months), and you can expect to encounter many other hikers and potentially hikers with furry friends.

Facilities/restrooms: None

Directions: The Castle Rock Trailhead is located 1.1 miles east of Big Bear Lake Dam on the north side of CA-18. It is right next to the city limit sign for Big Bear Lake.

Parking: There is parking scattered along both the left and right shoulders of CA-18 near the trailhead. The largest section to park nearest the trailhead can accommodate about 10 cars.

Maker:S,Date:2017-12-9,Ver:6,Lens:Kan03,Act:Lar02,E-Y
Castle Rock Trailhead and Big Bear Lake city limit sign on the shoulder of the CA-18.
Maker:S,Date:2017-12-9,Ver:6,Lens:Kan03,Act:Lar02,E-Y
Castle Rock Trailhead sign.
Maker:S,Date:2017-12-9,Ver:6,Lens:Kan03,Act:Lar02,E-Y
The climb begins immediately!

The Castle Rock Trail is located in the San Bernardino National Forest and is open to hikers and dogs. More detailed and up-to-date information on the San Bernardino National Forest available here.

The trail begins directly off the CA-18 at the city limit of Big Bear Lake. Be careful when walking along the road (or crossing) to get to the trailhead. The road is winding and generally busy with traffic cruising at 40+ mph.

The Castle Rock Trail is well traveled and well marked (with trail signs and light-blue spray paint). It is a single track for the majority of the hike, but occasionally widens out so that two people can comfortably walk side-by-side.

Maker:S,Date:2017-12-9,Ver:6,Lens:Kan03,Act:Lar02,E-Y
Trail indicators like this one are frequent along the trail.

This hike climbs steeply for the first half mile and then transitions to a more gradual climb for the remaining distance to Castle Rock. There are lots of roots and rocks on the trail, so mind your step!

Maker:S,Date:2017-12-9,Ver:6,Lens:Kan03,Act:Lar02,E-Y
Nothing like climbing a staircase of rocks early in the morning!

Maker:S,Date:2017-12-9,Ver:6,Lens:Kan03,Act:Lar02,E-Y

The climb to Castle Rock is a short distance, but it definitely gets your heart pumping! There are a few places to stop along the way, but none quite as comfortable and well placed as these benches.

Maker:S,Date:2017-12-9,Ver:6,Lens:Kan03,Act:Lar02,E-Y
Some benches along the way offer a great spot for a rest and catch your breath.

We arrived at a spot in the trail where the blue trail markers seemed to deviate from the more popularly traveled route. Because of this hike’s tremendous popularity, though, we were able to ask a group of hikers on their decent about which route to take. They let us know that, essentially, all routes lead to the Rock. We elected to follow the markers and successfully arrived at the sign for Castle Rock.

Maker:S,Date:2017-12-9,Ver:6,Lens:Kan03,Act:Lar02,E-Y
Castle Rock sign – we made it!

You are not immediately rewarded with views since you’re hiking through a forest of pine trees and boulders, but the view from the top does not disappoint. There is also a great view of the Castle Rock formation from the trail before the final climb.

Maker:S,Date:2017-12-9,Ver:6,Lens:Kan03,Act:Lar02,E-Y
Castle Rock as seen from the trail below.

People braver than I am scale the rocks to see the view from the top. Conner is one of those people and he reported having a relatively unobstructed view of the lake and surrounding area from the top. It is also a very popular rock climbing location. If you’re lucky there will be some scaling the various routes while you’re there – be prepared to be impressed!

Maker:S,Date:2017-12-9,Ver:6,Lens:Kan03,Act:Lar02,E-Y
Conner scaling the boulders to get to the top.

Maker:S,Date:2017-12-9,Ver:6,Lens:Kan03,Act:Lar02,E-Y

After exploring the rock formation for a time, we began our descent back to the car. We followed some of the frequented side-trails around the rocks to get back to the main trail.

This trail is very popular. We hiked it on a Sunday morning and encountered many groups, families, individuals, couples, dogs, you name it! It was a little quieter on the way up, but our descent was at around 9:00 AM when activity was ramping up. Everyone was very friendly, and we enjoyed seeing so many people enjoying the great outdoors!

If you’re looking to avoid the crowds, your best bet is to go early in the morning or late in the evening. You can also try a weekday when school is in session.

This is a short out-and-back trail – our total distance was 1.4 miles. If you’re feeling up for a longer hike, this trail continues beyond Castle Rock to Forest Service road 2N86 and connects to other trails from there. Lots of possibilities!

Screenshot (Sep 18, 2018 1_11_53 PM)

Thanks for reading our review of The Castle Rock Trail! Please check out our video trail review of Castle Rock on YouTube.Maker:S,Date:2017-12-9,Ver:6,Lens:Kan03,Act:Lar02,E-Y


Cozy Dell

Name of Hike: Cozy Dell Trail

Trail(s): Cozy Dell Trail

Location: Meiner’s Oaks, CA

Wilderness Area: Los Padres National Forest

Type of Hike: Out-and-back

Difficulty: Moderate

Distance/elevation: 3.75 miles, 886 ft elevation gain

Estimated Time Commitment: Hiking times can vary for a number of reasons, but we estimate most people would be able to complete this hike in 2-3 hours.

Views: Yes, there are some nice views looking towards Meiner’s Oaks and Ojai.

Popularity: The Cozy Dell Trail is pretty popular, and you can expect to encounter other hikers and potentially bikers and equestrians as well.

Facilities/restrooms: None

Directions: The Cozy Dell Trail starts on the Northbound side of the 33 just before Friend’s Ranch packing house (green/aqua building on the right). If you’re approaching Ojai from the west, take the 33 North towards Ojai. Take a left at the intersection with the Vons to stay on the 33 North. Stay on the 33 North for about 3.5 miles and the Cozy Dell Trailhead will be on the right. There was a sign on the lefthand side of the road indicating the trailhead, but it got scorched in the Thomas Fire and is unreadable (pictured below with Friend’s Ranch packing house in the background). If approaching Ojai from the east, take the 150 West through town and take a right on the 33 North at the intersection with the Vons. Continue according to the above directions to the trailhead. If you cross the bridge over Sheldon Canyon you’ve gone too far.

Parking: There is plenty of parking available in a dirt turnout along the Southbound side of the 33 directly across from the trailhead.

00000IMG_00000_BURST20180617100226741_COVER
Scorched sign for the Cozy Dell Trail on the 33.

The Cozy Dell Trail is located in the Los Padres National Forest and is open to hikers, bikers, equestrians and dogs. More detailed and up-to-date information on the Los Padres National Forest available here.

Be careful crossing traffic across the 33 to get to the trail – cars go pretty fast along this small highway. The trailhead is pretty discrete and begins behind the guardrail on the northbound side of the highway. You won’t have to walk too far, though, for the sounds of the highway to start to die down in the background.

00000IMG_00000_BURST20180617100758414_COVER.jpg
The beginning of the Cozy Dell Trail with Sheldon Canyon and Friend’s Ranch packing house in the background.

Not far along the trail, there is a sign posted indicating that this area was affected by the recent Thomas Fire (December, 2017). As a result, the landscape is more fragile and susceptible to the hazards mentioned: loose rock, falling trees and limbs, flash flooding, and debris flows. For some stats on the Thomas Fire visit the Cal Fire website here.

Maker:S,Date:2017-12-9,Ver:6,Lens:Kan03,Act:Lar02,E-Y
Sign posted curtesy of the Los Padres National Forest warning against the dangers of hiking through recently burned landscape.

The trail begins its climb almost immediately from the trailhead. You’ll ascend up a series of switchbacks that are not too strenuous, but will definitely get your heart pumping right away. This first climb will last for approximately 0.9 miles and culminate at the top of one of the foothills affording you a nice view towards the Matilija Canyon and Meiner’s Oaks. This is a nice, spacious area with lots of rocks to sit and rest on. We saw several other groups during our hike and a few turned around at this spot.

Vancisin_20180617_IMG_20180617_122639.jpg
View from near the top of the first foothill towards Matilija Canyon.

From here the trail begins a gradual descent and then climbs again for a short stretch to the top of a second foothill. This stretch of trail is easily visible in its entirety from the first foothill and is only 0.25 miles in length.

Maker:S,Date:2017-12-9,Ver:6,Lens:Kan03,Act:Lar02,E-Y
Looking towards the second foothill from the low point of the trail connecting the two foothills.

The trail does not take you directly to a view point at the second foothill, but rather continues past on its way through the foothills behind Ojai. It’s worth a short jaunt up to the top, though, as it affords a slightly different view of the surrounding area.

Vancisin_20180617_IMG_20180617_111110.jpg
Looking back along the trail towards the first foothill from the top of the second.

From here the trail descends gradually deeper into the foothills until it crosses a creek bed and meets up with a Forest Service Road. The sign at this point is also burned and difficult to read. The creek bed, though dry, is a bit wide making it a little bit difficult to see where the road is on the other side. Follow the cairns (small stacks of rocks) across. While there was no water flowing in the larger creek at the time we hiked the Cozy Dell Trail, we did encounter a small creek crossing the trail a short ways before.

00100dPORTRAIT_00100_BURST20180617113520412_COVER
Burned trail sign at the intersection of the Cozy Dell Trail and the Forest Service Road.
Vancisin_20180731_Frame Exports for Cozy Dell_0000_Layer 2
The Forest Service Road continuing further into the Los Padres National Forest.
Vancisin_20180731_Frame Exports for Cozy Dell_0001_Layer 1
The dry creek bed just before the Cozy Dell trail meets the Forest Service Road.

This trail is single track for the entire way. The condition of the trail during the time of our hike was remarkably good considering the recent fire. The trail felt solid underfoot and there was little to no erosion from the rain. There was, however, a tremendous amount of regrowth invading the trail. This will likely change with dryer weather since it was mostly grasses and mustard plants (pictured below).

Maker:S,Date:2017-12-9,Ver:6,Lens:Kan03,Act:Lar02,E-Y
Conner wading through the mustard plants.

The Cozy Dell is an out-and-back trail, so we turned around at the intersection with the Forest Service Road (about 1.8 miles). Because the Cozy Dell trail connects to a Forest Service road, you do have the option of continuing your hike further.

Screenshot_20180812-180238

Thanks for reading our review of The Cozy Dell Trail! Please check out our video trail review of The Cozy Dell Trail on YouTube.

Ventura River Preserve

Name of Hike: Orange Grove Trail to the Upper River Loop Trails

Trail(s): Orange Grove Trail, Wills Crossover, Upper River Loop Trails

Location: Meiner’s Oaks, CA

Wilderness Area: Ventura River Preserve

Type of Hike: Loop

Difficulty: Easy

Distance/elevation: 2.5 miles, 113 ft elevation gain

Estimated Time Commitment: Hiking times can vary for a number of reasons, but we estimate most people would be able to complete this hike in 1-2 hours.

Views: Yes, there are some nice views looking towards the Topatopa Mountains. Since the elevation gain on this particular hike is negligible, the views are from down low and not panoramic.

Popularity: The Ventura River Preserve is very popular, and you can expect to encounter many other hikers, bikers and equestrians.

Facilities/restrooms: None

Directions: The Ventura River Preserve can be accessed by a few different trailheads. For the hike we did, the Orange Grove Trail to the Upper River Loop Trails, we used the Oso Trailhead. If you are approaching from the east, head west on the 150 through the town of Ojai. Take a right on the 33 North. In 1.6 miles, turn left on Fairview Road. At the T-stop, turn right on Rice Avenue, then left on Meyer Road. If you are approaching from the west, take the 33 North towards Ojai. Take a left at the intersection just before downtown Ojai to stay on the 33 North, then proceed according to the directions listed above. The trailhead can be found at the end of Meyer Road through a white metal gate (pictured below). The gate hours are 8:00AM – 7:30PM between April 1 and October 31.

Parking: There is a good-sized dirt parking lot at the Oso Trailhead. However, given the popularity of this location, spaces can fill up quickly.

Maker:S,Date:2017-12-9,Ver:6,Lens:Kan03,Act:Lar02,E-Y
Gated entrance to the Oso Trailhead parking lot.

There are so many great hiking options in the Ventura River Preserve. We went intending to hike the Rice Canyon – Wills Canyon Loop, but saw for ourselves that the route was impassable. Unfortunately, this area was significantly impacted by the Thomas Fire in December 2016 and the bridge across the canal used to access the Rice Canyon Trail burned. We had read on another forum that the trail was still accessible if you weren’t afraid to bushwhack a bit and crawl under some barbed wire. Once we arrived at that spot, however, we quickly realized that it was not a hike we should be recommending to our constituents at this time. We do look forward to returning and exploring more of trails in the preserve soon. For up-to-date information on the Ventura River Preserve, trail conditions and map check out their website here.

The Ventura River Preserve is open to hikers, bikers, equestrians and dogs.

Maker:S,Date:2017-12-9,Ver:6,Lens:Kan03,Act:Lar02,E-Y
Oso Trailhead.

We started our hike at the Oso Trailhead. There are two different trails that originate at this point – the Orange Grove Trail and the Upper River Loop Trail. We headed west on the Orange Grove Trail and went to investigate the situation with the burnt out bridge on the Rice Canyon Trail. Not long after setting out from the parking lot (probably around 0.1 a mile) you’ll cross the Ventura River. We were pleasantly surprised to find so much water! There are rocks strewn through the river making it reasonably easy to cross, but do be careful to make sure the stepping stones are secure before putting all of your weight on them.

Maker:S,Date:2017-12-9,Ver:6,Lens:Kan03,Act:Lar02,E-Y
Bean in the Ventura River at the first crossing with the trail continuing on behind her.

We continued along the Orange Grove Trail a short way further and came to an intersection with the Rice Canyon Trail. We branched right on the Rice Canyon Trail and after confirming that trail’s (hopefully only temporary) closure, we changed our plan and went to explore the lower trails close to the river.

Maker:S,Date:2017-12-9,Ver:6,Lens:Kan03,Act:Lar02,E-Y
Orange Grove Trail and Rice Canyon Trail intersection.

The sign pictured above is a little confusing, because the left direction actually continues along the Orange Grove Trail towards the Wills Canyon Trail. Despite having a map and trails being reasonably well-marked, we did manage to get a little lost later on because of slight deviations like that…

The Orange Grove Trail is very wide and flat. It travels on an elevated bank parallel to the river. We went on a weekend, so we crossed paths with other people every few minutes on this trail.

Maker:S,Date:2017-12-9,Ver:6,Lens:Kan03,Act:Lar02,E-Y
View from the Orange Grove Trail towards the Topatopa Mountains.

About a half mile along this trail we saw a large swimming hole in the river. There were a number of small trails on the lefthand side of our trail that led down to the swimming hole – you can take your pick! The only difference between them all is where along the swimming hole you end up. There was already a group of people set up on the beachy side, so we opted for a spot a little further down. Bean loves to swim, so we took a short break here to indulge her.

Maker:S,Date:2017-12-9,Ver:6,Lens:Kan03,Act:Lar02,E-Y
Bean enjoying the swimming hole.

We followed the Orange Grove Trail to what we thought was the end, however we did not look closely enough at our map (see below). We should have connected with the Wills Canyon Crossover Trail for a brief stretch, but instead continued straight to a dead end at a chain link fence. Fortunately, because we had the map of the preserve with us, we had a good sense of where we would meet up with our next trail. We bushwhacked along and across the river for a short way until we met up with one of the branches of the Upper River Loop Trails.

4-13-2018 VRP Map.pdf
The area in red is where we got a little confused and lost the trail.

As can be seen from the above map, there is a network of short trails that comprise the “Upper River Loop Trails.” There are even more little side trails than are indicated on the map. We picked a more direct route back to the parking lot since the day was beginning to get hot, but we could have easily spent a little more time meandering and exploring along the river bank.

Maker:S,Date:2017-12-9,Ver:6,Lens:Kan03,Act:Lar02,E-Y
On one of the Upper River Loop Trails heading north.

Much like the Orange Grove Trail, the Upper River Loop Trails are easy going. They are nice and wide (you could fit four or more people abreast easily in spots!) and there is virtually no elevation change. This particular loop would be a great excursion for people of all ages and experiences.

We look forward to going back to the Ventura River Preserve soon and exploring more of its lovely trails.

Thanks for reading our review of The Orange Grove Trail and the Upper River Loop Trails in the Ventura River Preserve! Please check out our video trail review of The Ventura River Preserve on YouTube.

The Pines

Name of Hike: The Pines

Trail(s): Horn Canyon

Location: Ojai, CA

Wilderness Area: Los Padres National Forest

Type of Hike: Out-and-back

Difficulty: Moderate

Distance/elevation: 5 miles, 1,655 ft elevation gain

Estimated Time Commitment: Hiking times can vary for a number of reasons, but we estimate most people would be able to complete this hike in 2-3 hours.

Views: Yes, there are some nice views looking down Horn Canyon back towards the Ojai Valley once you start gaining more significant elevation. You will not reach a summit on this hike, though, so there will not be any panoramic views.

Popularity: The Horn Canyon Trail is reasonably popular. It is not so popular that you are encountering other humans constantly, but it is entirely possible to share the trail with other hikers, equestrians and mountain bikers.

Facilities/restrooms: None

Directions: This hike starts at the Horn Canyon Trailhead in Ojai, CA. If you’re approaching Ojai from the west – head east through town on the 150, take a left on Reeves Rd (immediately before Boccali’s restaurant – great food if you’re looking for a post-hike meal, we especially recommend their seasonal strawberry shortcake!), take another left on McAndrew Rd (follow all the way to the top of the hill), then take a right into The Thacher School campus (if the gate is closed there is some space to park along the street and then you’ll walk the rest of the way to the trailhead), take another right around the perimeter road of the campus, then take one last right on the dirt road and the Horn Canyon Trailhead will be on your left. Keep in mind that you are driving through private property to get to the trailhead, so please remember to drive slowly and be courteous. If you’re approaching this hike from the east you won’t actually reach the town of Ojai before the turnoff for Reeves Rd. Follow the 150 west, take a right on Reeves Rd (immediately after Boccali’s restaurant), then proceed according to the directions above.

Parking: There is space for several vehicles to park at the trailhead. There are no delineated spots, but seven cars can easily fit.

Vancisin_20180513_00000IMG_00000_BURST20180513113204683_COVER
Horn Canyon Trail marker located on the right just beyond the composting station.

The Horn Canyon Trail is located in the Los Padres National Forest and is open to hikers, bikers, equestrians and dogs. More detailed and up-to-date information on the Los Padres National Forest available here.

The hike to The Pines is a straight shot up the Horn Canyon Trail. The Pines are located at about the halfway point of the Horn Canyon Trail as it winds its way up to the Nordhoff Ridge Road.

There is a large composting station on the left as you begin your hike. Don’t be alarmed; you are in the right place! The lower section of the Horn Canyon Trail –maybe about a mile long – is easy going and great for all hikers, young and old. This early stretch of trail is quite wide and can be walked two or three abreast in parts.

There are four water crossings on the trail, all located within a mile of the trailhead. You’ll encounter the first creek crossing after just under a half a mile. Depending on the time of the year and the severity of the drought conditions, there may not be water. The lowest crossing is the first to dry up, so if there is no water there you may still find some further up.

Vancisin_20180513_00000IMG_00000_BURST20180513114531718_COVER
Bean at the first creek crossing on the Horn Canyon Trail.

We hiked this trail in May 2018, about six months after the Thomas Fire, so there was a significant amount of burnt brush contrasted with vibrant new growth. It had been 25-30 years since this area had suffered a significant burn, so the brush had been devastatingly thick. With the brush cleared out, we were able to see more interesting glimpses of the canyon’s history (like the remnants of a fireplace). We were pleased to see that some of the large California Oak Trees withstood the flames, though whether or not they can recover is yet to be seen. Some facts about the Thomas Fire can be found at Cal Fire’s website.

Vancisin_20180513_00000IMG_00000_BURST20180513120903270_COVER
Remnants of an old fireplace revealed after the Thomas Fire.
Vancisin_20180513_00000IMG_00000_BURST20180513115712388_COVER
A section of trail between the second and third water crossing with some large California Oaks.

As mentioned earlier, there are four creek crossings on the Horn Canyon Trail within the first mile of the trailhead. There is a good amount of poison oak along the lower section of this trail, though the trail is generally wide enough to not bring you in close contact. Once you reach the fourth crossing the trail starts to narrow and rise through the canyon more steeply. Immediately after the crossing you will go up a series of awkwardly spaced wooden steps. The trail is a single track from this point onward and rises in some long, sweeping switchbacks.

Vancisin_20180513_00100dPORTRAIT_00100_BURST20180513141226604_COVER
Poison oak growing from beneath one of the wooden steps.

As you gain elevation, you’ll begin to get some nice views back down the canyon towards the Ojai Valley. Your best views are going to be in this middle stretch of trail where you’re walking along the mountainside.

Vancisin_20180513_IMG_20180513_132550.jpg
View looking down Horn Canyon towards the Ojai Valley.

You’ll know your getting close to The Pines when you come across a few more wooden steps on the trail. Some of these have burned away with the fire or washed away with the rain, but a few remain. When you see these you are around a quarter mile from your end destination. The Pines was formerly a campground – the trees were planted by the CCC (California Conservation Corps) after World War II. It no longer retains the campground designation because the trees fell victim to the pine beetle and more recently the Thomas Fire. There are still some trees standing, but not nearly as many as there once were. We hiked up on a rainy day, so The Pines had an erie look. Knowing what this place suffered recently, left us with a feeling of reverence. There was formerly a spring box that directed spring water to the campground, but that has not been in working order for the last few years.

Maker:S,Date:2017-12-9,Ver:6,Lens:Kan03,Act:Lar02,E-Y
Approaching The Pines in the clouds.

Maker:S,Date:2017-12-9,Ver:6,Lens:Kan03,Act:Lar02,E-Y

It is a 2.5 mile hike to reach The Pines and the elevation change is 1,655 feet (high elevation point of 3,142 ft). The former campground is a nice large flat area that offers some shade on sunny days, though not as much anymore. There are a few stumps to sit on and it ends up being a good spot to stop and have lunch. The hike is an out-and-back venture, so once you’ve had your rest and a snack you’ll pick up and head back down the way you came.

If you’re feeling ambitious, the Horn Canyon Trail continues deeper into the Los Padres National Forest for another 2.5 miles and connects with the Sisar Canyon Road and the Nordhoff Ridge Road.

Screenshot_20180626-131605

Thanks for reading our review of The Pines! Please check out our video trail review of The Pines on YouTube.

Twin Peaks

Vancisin_20180526_PANO_20180526_133724
View from the summit of Twin Peaks

Name of Hike: Twin Peaks

Trail(s): Horn Canyon, L.Moore, Twin Peaks

Location: Ojai, CA

Wilderness Area: Los Padres National Forest

Type of Hike: Out-and-back

Difficulty: Strenuous

Distance/elevation: 4.68 miles, 1,868 ft elevation gain

Estimated Time Commitment: Hiking times can vary for a number of reasons, but we estimate most people would be able to complete this hike in 2-3 hours.

Views: Yes! There are countless photo ops on this hike – the best, of course, being from the summit. On a clear day you can see the Pacific Ocean and Channel Islands.

Popularity: The Twin Peaks Trail is not frequently traveled, so don’t expect to encounter many other humans (you may see wildlife, though!). The Horn Canyon Trail, however, is reasonably popular. It is entirely possible to encounter other hikers, equestrians and mountain bikers along that early stretch of trail.

Facilities/restrooms: None

Directions: This hike starts at the Horn Canyon Trailhead in Ojai, CA. If you’re approaching Ojai from the west – head east through town on the 150, take a left on Reeves Rd (immediately before Boccali’s restaurant – great food if you’re looking for a post-hike meal, we especially recommend their seasonal strawberry shortcake!), take another left on McAndrew Rd (follow all the way to the top of the hill), then take a right into The Thacher School campus (if the gate is closed there is some space to park along the street and then you’ll walk the rest of the way to the trailhead), take another right around the perimeter road of the campus, then take one last right on the dirt road and the Horn Canyon Trailhead will be on your left. Keep in mind that you are driving through private property to get to the trailhead, so please remember to drive slowly and be courteous. If you’re approaching this hike from the east you won’t actually reach the town of Ojai before the turnoff for Reeves Rd. Follow the 150 west, take a right on Reeves Rd (immediately after Boccali’s restaurant), then proceed according to the directions above.

Parking: There is space for several vehicles to park at the trailhead. There are no delineated spots, but seven cars can easily fit.

Vancisin_20180517_IMG_20180516_214102_656
Horn Canyon Trailhead

The hike to Twin Peaks is located in the Los Padres National Forest and is open to hikers, bikers, equestrians and dogs. More detailed and up-to-date information on the Los Padres National Forest available here.

This hike starts on the Horn Canyon Trail. This is a really nice trail – it starts out quite wide and has a very gradual incline. There are four water crossings on this trail (depending on the time of year and the severity of the drought there may not be water flowing), but you’ll only cross once on your way to Twin Peaks. You’ll hike along the Horn Canyon Trail for less than three quarters of a mile and just a little ways past the first creek crossing is the intersection for the L.Moore Trail. Take a left on the L.Moore Trail and follow it for about a quarter mile until you reach the Twin Peaks Trail marker on the right. The trail is reduced to a single track once you get on the L.Moore and the terrain becomes slightly more challenging.

Maker:S,Date:2017-12-9,Ver:6,Lens:Kan03,Act:Lar02,E-Y
Easy going along the Horn Canyon Trail for the first three quarters of a mile.
Maker:S,Date:2017-12-9,Ver:6,Lens:Kan03,Act:Lar02,E-Y
Trail marker for the L.Moore Trail, located on the left as you hike up Horn Canyon.
Maker:S,Date:2017-12-9,Ver:6,Lens:Kan03,Act:Lar02,E-Y
Conner hiking along the L.Moore Trail.
Vancisin_20180528_IMG_20180527_221436_286
Trail marker for Twin Peaks, located on the right as you hike along the L.Moore.

The Twin Peaks Trail is a challenging single track that rises steeply over the next mile and a half to the summit (elevation: 3,231 ft). The majority of the 1,868 ft of elevation change is gained in this short stretch. As mentioned before, there is no access to water on this trail. Additionally, there are no trees – just native chaparral. Make sure to plan accordingly by bringing lots of water and wearing/applying appropriate sun protection. The condition of the trail is not great, but passable. The Thomas Fire and subsequent rains had a significant impact on the trail condition through erosion and regrowth . The lower half of the trail is deeply rutted in spots and strewn with rocks, while the upper half is shaley and loose in sections. The rains this winter rejuvenated the native flora causing plant life to dominate and overwhelm the trail at the time of our hike. The juxtaposition of the remnants of burned brush and the blooming new growth is beautiful. While the magnitude of the Thomas Fire was truly devastating, fire is a natural part of this type of landscape. The recovery has been fascinating to watch. For some stats on the Thomas Fire visit the Cal Fire website here.

Vancisin_20180526_00100dPORTRAIT_00100_BURST20180526122116906_COVER
Some Large-Flowered Phacelia amongst charred brush.
Maker:S,Date:2017-12-9,Ver:6,Lens:Kan03,Act:Lar02,E-Y
Taking a short break before the final push to the top.

There are two short stretches where the trail levels out, the second coming right before the final push to the peak. The last three tenths of a mile are a series of switchbacks that climb just under 400 feet to the summit. There is not much room at the top and no shade, but the view is a stunning 360° panorama of the Ojai Valley and the Topatopa Mountains. On a clear day you can see as far as the Pacific Ocean and the Channel Islands.

Maker:S,Date:2017-12-9,Ver:6,Lens:Kan03,Act:Lar02,E-Y
View from the summit looking West out over the Ojai Valley towards the Pacific Ocean.
Maker:S,Date:2017-12-9,Ver:6,Lens:Kan03,Act:Lar02,E-Y
View from the summit looking north/east at the Topatopa Mountains.

This is an out-and-back trail, so you will proceed back to the Horn Canyon Trailhead the same way you came up.

Screenshot_20180625-081741

Fun fact: this is the first hike that Conner and I did together. We started dating soon-there-after and the rest is history! In November 2015, Conner proposed to me at the top of Twin Peaks. We hiked it again with some of our family and friends the day before we tied the knot in 2016. Basically, this is a really special hike!

12314689_849504284595_4029744203882101613_o16251997_848175148719_8293738341928835137_o

Thanks for reading our review of Twin Peaks! Please check out our video trail review of Twin Peaks on YouTube.

Maker:S,Date:2017-12-9,Ver:6,Lens:Kan03,Act:Lar02,E-Y